Indie Game Devlog 03 - Experimental Character Design and Animation
In the last post, I had finished the blockout for our main level in 3D and did a very basic lighting pass. I also tested the limitations of material transfer between Blender and Godot.
My player character being a big floating capsule wasn’t making it easy to ensure the proportions of the level are passible. Plus, I still didn’t know much about the very complex art of character modeling, rigging, and animation.
My background in character design
I have very limited history of designing characters as an adult.
My first foray into reinterpreting an existing character in 3D was modeling Dory from my previous team Tabedori.
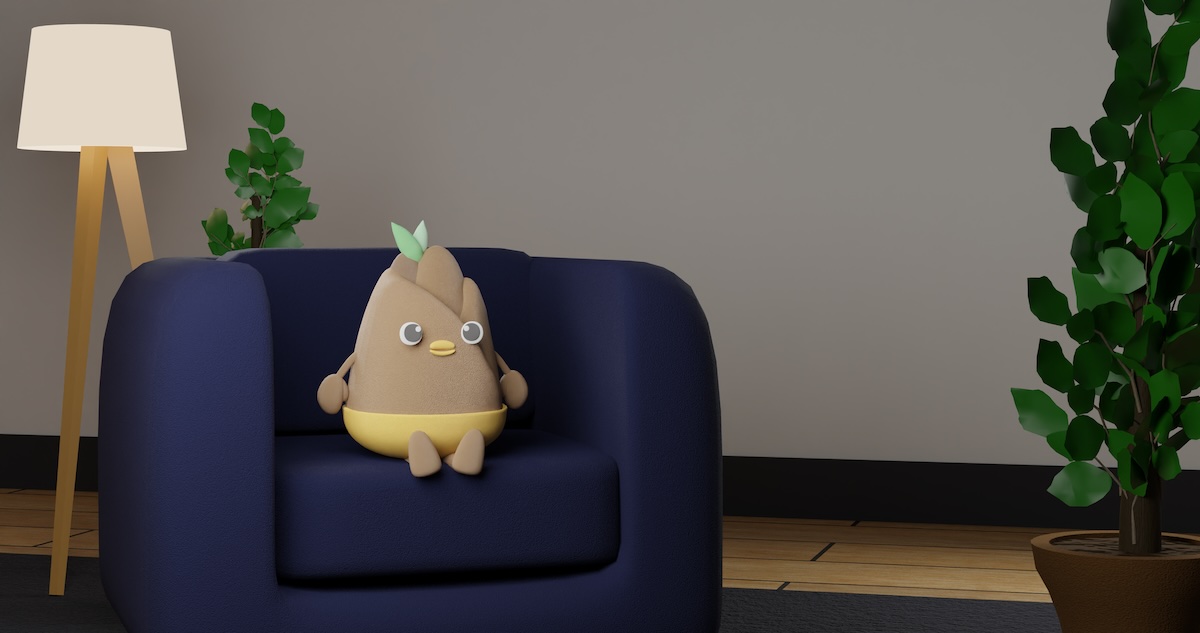
The unusual bamboo shoot body shape was an ambitious task for a beginner 3D modeler.
I tried rigging Dory so that I could do some basic poses or even try an animation. But my first attempt failed and I shelved that stretch goal.
Rigging is tough, and not particularly rewarding in my opinion. There are many ways to accomplish the same thing depending on how you’d like to use the rig, so it took me some time to find the right YouTube tutorial to match my goals and skill level.
Last year, I did a few other character projects. One was a full modeling, rigging, and animation project from a tutorial.
The next was a self portrait, again based on the original 2D design by a friend.
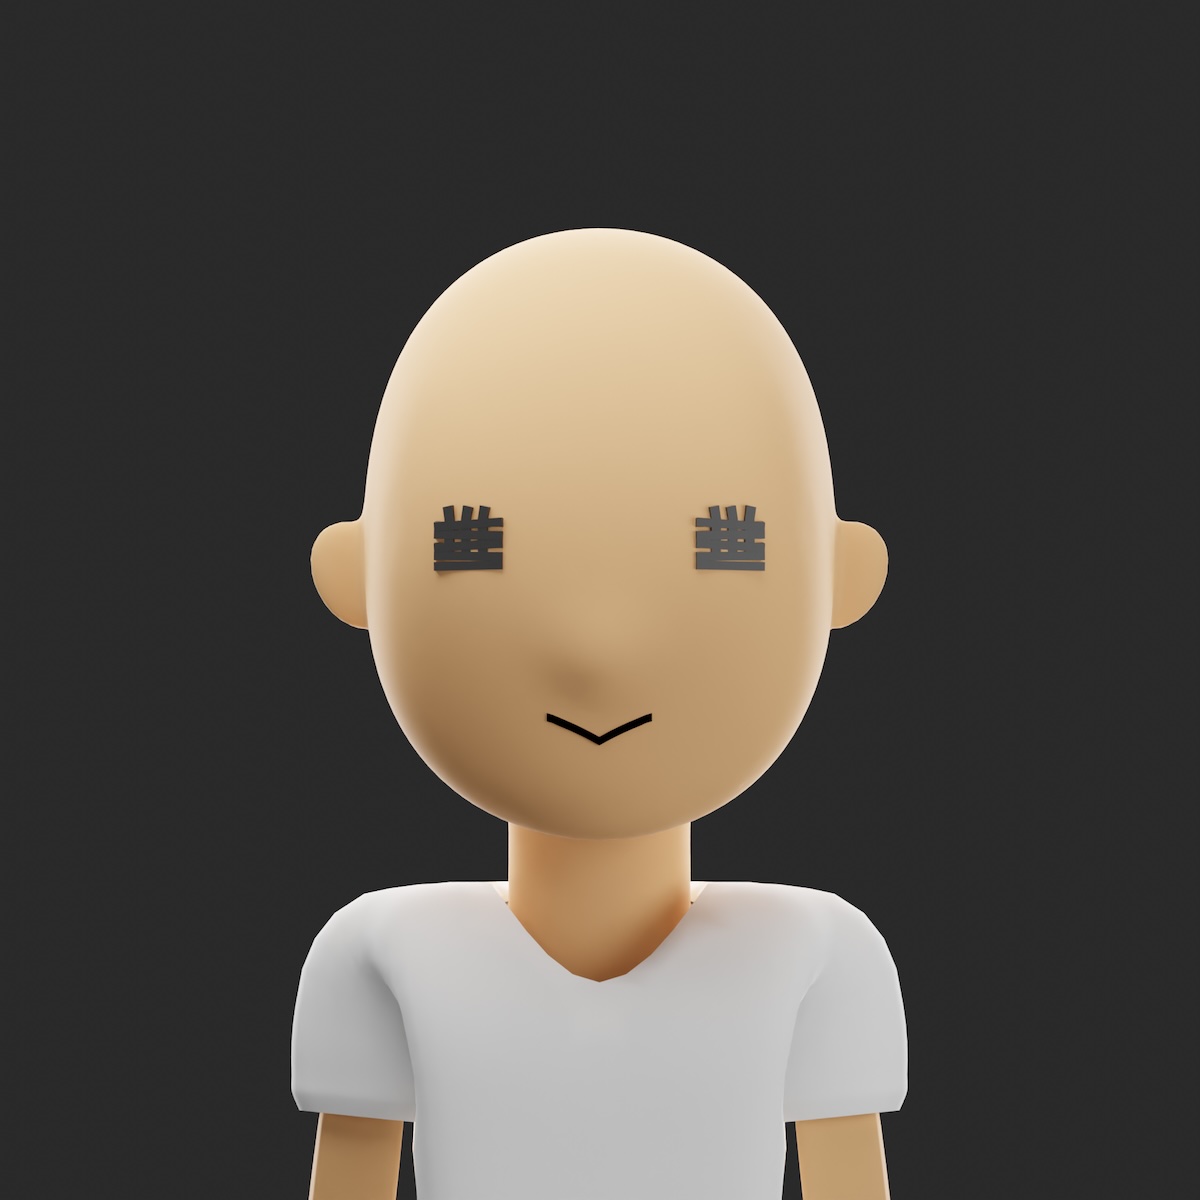
This all led up to my first original character design was a vampire rabbit named Biki for my iOS app Count Biki.
Biki was an ambitious project in that it not only was my first original character design, but it also required exporting the rigged and animated model from Blender into SceneKit on iOS.
It took at least one major revision on the design to get something that looked like a rabbit instead of a hamster. I also cut scope by keeping Biki in a sitting position and only rigging his body, arms, head, and ears. Creating the animations was actually my favorite part. Overall, I’m pretty happy with the result. For more on this process, see Count Biki - App and Character Design.
All this is to say that I’m intentionally starting the character design, modeling, rigging, animation, and import/export process slowly, not aiming for full fidelity or even going beyond answering “what am I and what is Godot capable of?”.
The next iteration of the player character
I found a solid and succinct YouTube tutorial addressing Blender and Godot specifically: Godot 4 / Blender - Third Person Character From Scratch.
I especially liked this tutorial because the rigging section was barebones enough for my to wrap my head around the fundamentals and plumbing of rigging within Blender for the first time. This is the first tutorial I’d seen that showed how to manually assign mesh vertices to bones instead of using automatic weights or weight painting. I finally understood the relationship between the armature and vertex groups, which makes it a lot easier to debug inevitable problems in the future.
Modeling
I wasn’t ready to commit to a character design until I’d finished a test run with this potential character pipeline. Therefore, I just wanted to find an existing design that was in the ballpark, and could throw away down the line.
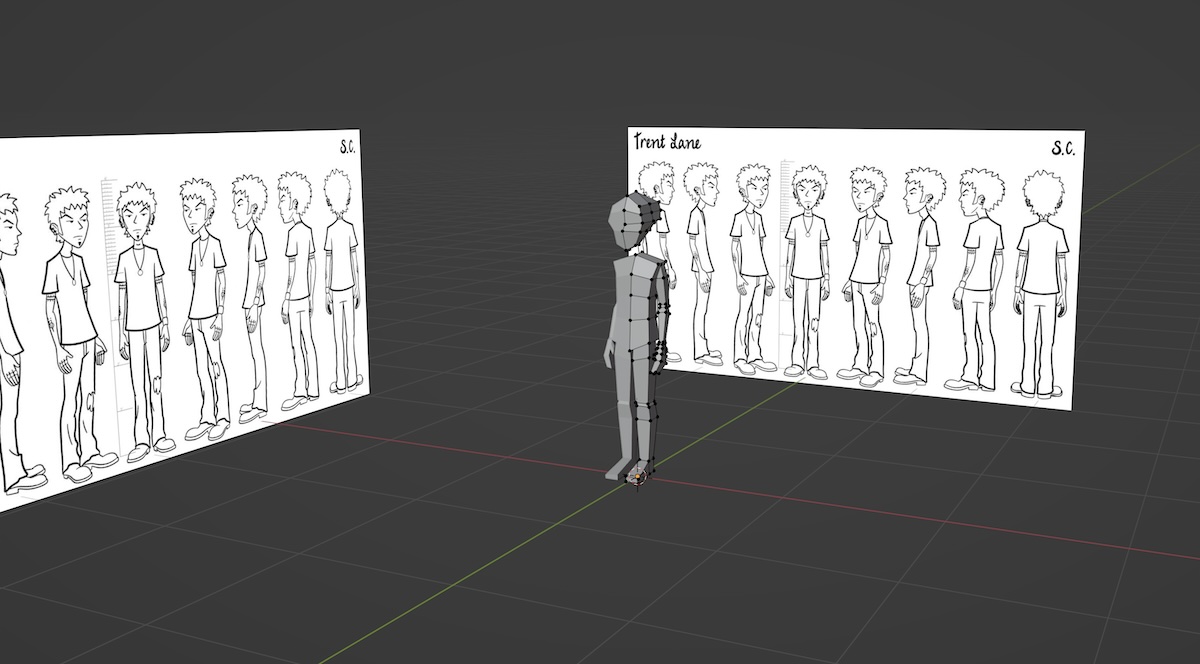
I randomly found a character turnaround of Trent from the late 90’s MTV show Daria and used that as my base for the low-poly model. This modeling part went pretty well. My thoughts at this point were:
- Should I keep limb components (e.g. upper arm, forearm) as separate meshes in my final design?
- I need to find a lot of head references. My intuition for head shapes (even though I possess one) is way off.
- How many bones should I use? Especially for hands, neck, and face.
Rigging
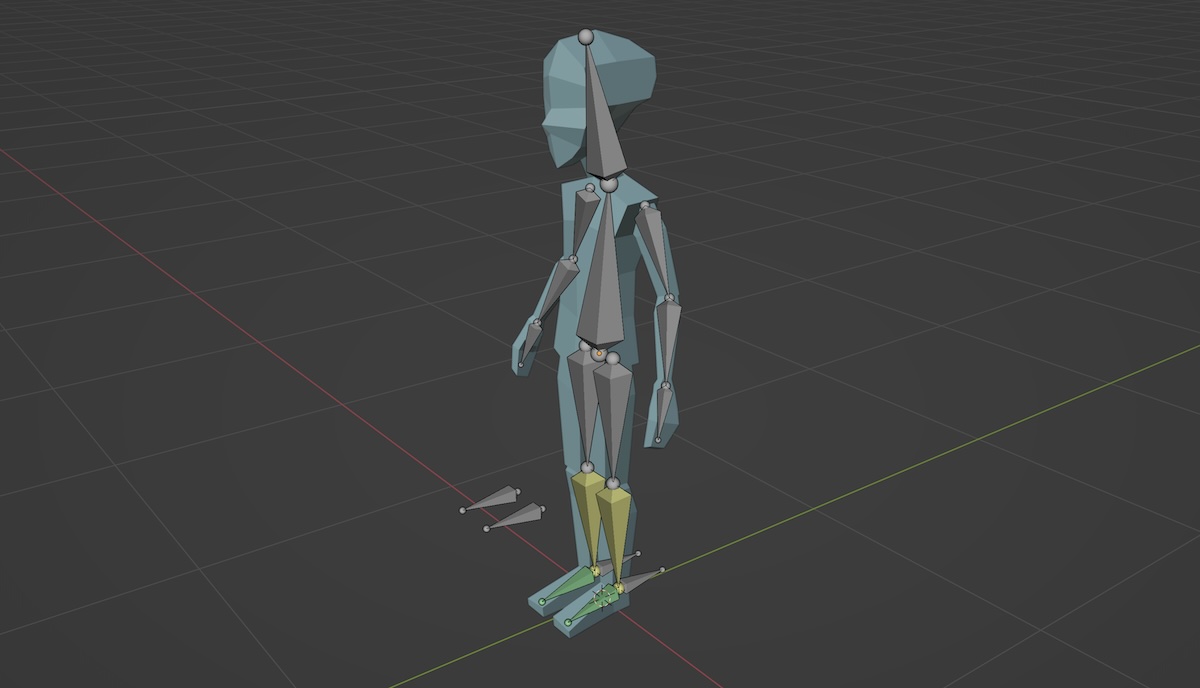
Next part was the dreaded rigging, although as mentioned above, it clicked more this time than it had in the past. I still don’t think I’ve internalized the process well enough to do it on my own without reference (especially doing IK), but I’m not planning on becoming a professional rigging artist so no problems there.
Animation
Animation was next. I still find Blender’s Action, NLA Editor, Dope Sheet, F-Curve Editor, and other animation widgets intimidating, but following the tutorial helped avoid some complexity from the jump.
I started on the walk cycle animation by following a classic walk cycle breakdown chart, but this walk was way too fast and intense for my character.
Regardless, I wanted to press on to see the animation in context before polishing.
Importing into Godot the first time was relatively pain free. I created an AnimationTree node and wired up a BlendSpace1D between the idle and walk animation.
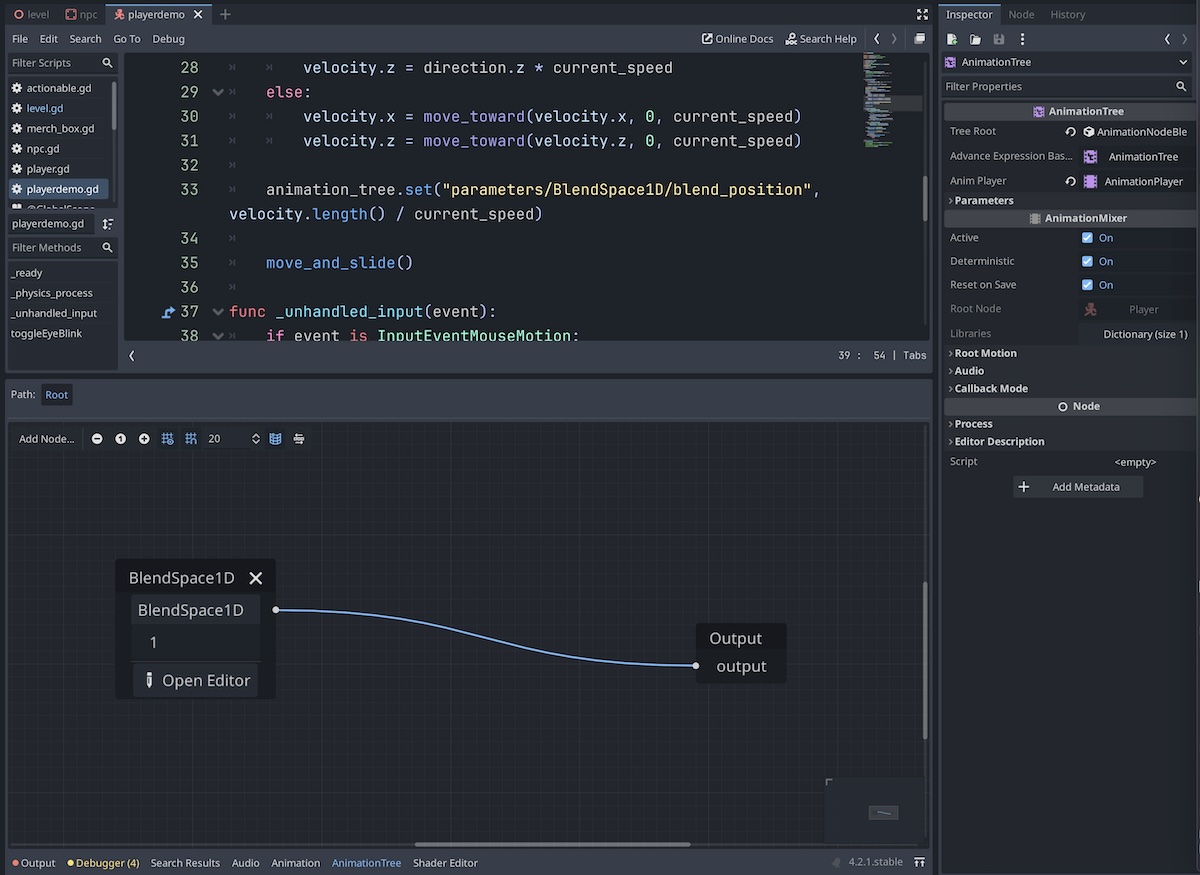
It technically worked, but the synchronization between the walk speed and animation speed left a lot to be desired.
I obviously wasn’t satisfied with this walk, so I started over once, twice, three times, four times. Sometimes the joints would lock in weird ways. In general, all the steps felt heavy in a way I couldn’t debug. I spent some time pacing around my apartment looking at my legs and trying to walk normal.
I hit the point of diminishing returns and threw in the towel. Making all the movements less pronounced produced a slower and more casual walk, but it still wasn’t perfect. I learned that before I start the real animation, I need to find some more animation reference books and budget time to practice.
I saved my latest walk and moved back into Godot. This was where I hit a big roadblock. I had needed to make a new scene for my character in order to use AnimationTree because:
- AnimationTree requires an AnimationPlayer in the same scene.
- AnimationPlayer is created as read-only from the Blender scene.
- The scene root must be a CharacterBody3D.
Trying to untangle the web of dependencies in my head while Googling, I finally came up with a solution. If you’re interested in the details, it’s in a separate blog post.
The new node configuration for my player scene allowed quick iteration on the walk cycle animation while tweaking the character.
Still quite robotic, especially considering the low-poly look.
Reconsidering the player controls
In context, having this animation in place also made me start reconsidering my player control scheme. With only a forward walk-cycle created, my side-strafing controls look weird: the legs are moving forward and backward while the character slides sideways.
- Do I keep side-strafing as a control option (and therefore require more unique animations)?
- Do I remove side-strafing controls completely, forcing the player to move their mouse to rotate the character in place before moving forward?
- Do revise the control scheme so that pressing left both turns and moves the character that direction without affecting the camera?
I’m not ready to commit to a decision yet, so for now I’m going to keep the weird side-strafing animation.
Stop-motion style animation
I started thinking about aesthetics again too. While watching YouTube tutorials for research into my next big task (face rigs), I rediscovered YouTuber SouthernShotty who does really great stylized characters and animation.
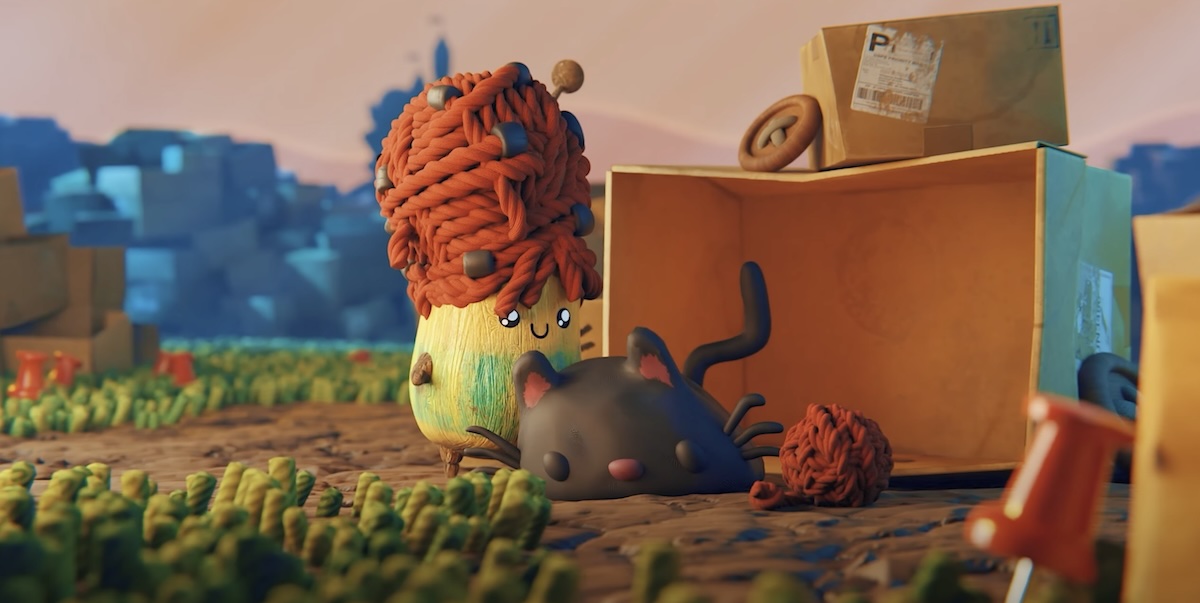
He wrote a Blender add-on that automates some steps in converting regular animation timing to stop-motion style animation. I wanted to give it a shot to see how it looked in context of my (very underbaked) game world.
What is stop-motion style animation?
By default, when you make an animation in Blender, you create keyframes along a timeline at critical poses. Each row represents a different value of each of the character’s bones (e.g. x position, y rotation). In professional rigs there can be hundreds if not thousands of possible control points! In the dope sheet, it looks something like this:
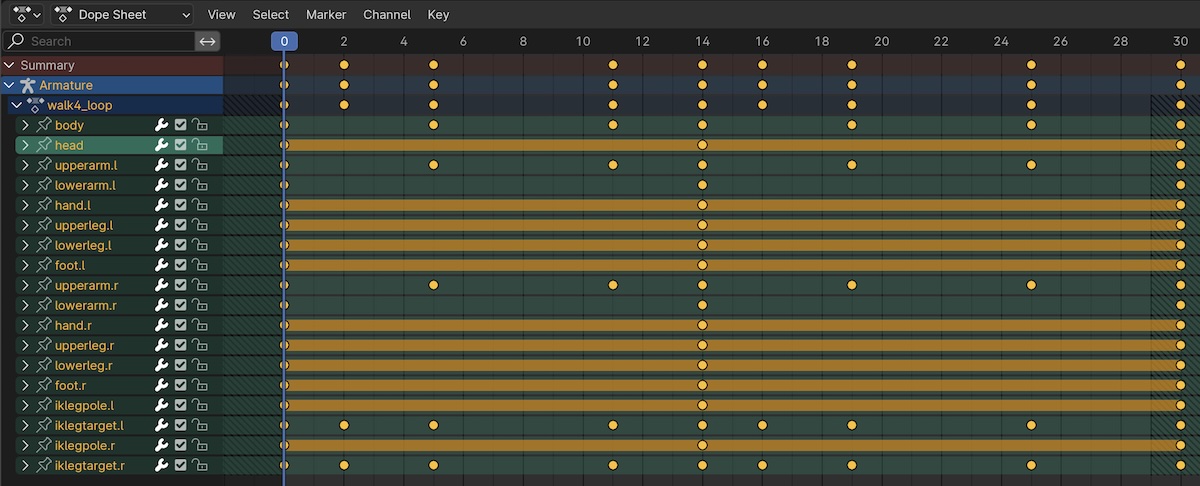
Blender then uses the default smooth F-curves to interpolate the unspecified keyframe values in between the values the animator explicitly set. This both saves the animator a lot of work while also allowing a smooth result by default. F-curves are nearly infinitely tweakable, and real animators will spend a significant amount of time going through control-point by control-point to get the timings just right.
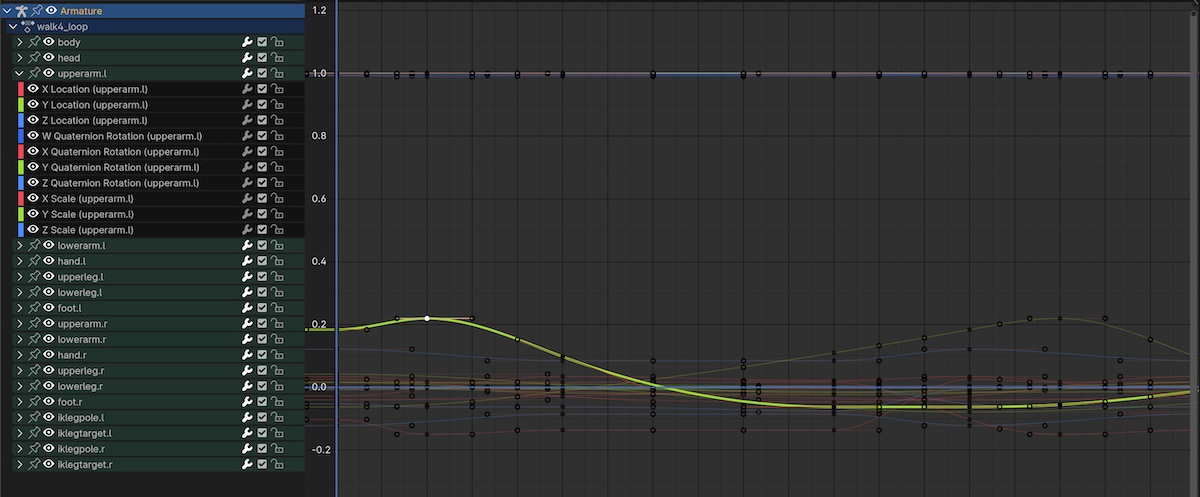
The F-curves are usually Bezier curves, but there’s no reason they can’t be linear or constant. Linear animation curves tend to look very unnatural because very few things in the real world move with a constant velocity and then stop abruptly. Constant curves look choppy because the poses jump at intervals slower than our eyes are capable of detecting.
In classic stop-motion animation (or relatedly, hand-drawn animation), there’s no such thing as automatic easing. The animator must take a picture for each pose and inbetween position between the poses. However, it’s generally considered prohibitively expensive to take a picture at rates that are “smooth” to the human vision system like 60 frames per second. Usually this type of animation alternates between 24 frames per second (reasonably smooth) and 12 frames per second (noticeably choppy).
Although animating stop-motion at a nominal 12 frames per second can be a budgetary constraint, it’s often just as much an artistic choice. It produces an aesthetically pleasing and unique style of animation that, especially when the frame rate is varied with a professional eye, results in even more emotional impact for the viewer.
It’s not only frame rate that produces the stop-motion style (as mentioned above, hand-drawn animation has the same fundamental limitation). Handing physical objects changes them in subtle ways between frames. With clay, it might be a thumbprint added between frames. With puppets, it might be a strands of hair moving unpredictably. All the randomness adds to the stop-motion vibe.
SouthernShotty’s plugin tries to automate both the frame rate and random material adjustments. Since I haven’t decided on materials yet, I’m more focused on the frame rate adjustments.
Implementing reduced framerate in Blender
The plugin works by simply adding a Stepped Interpolation modifier to the F-curve in Blender. This modifier locks in whatever position the original smoothly interpolated curve was at a specified frame interval.

I could just as well manually create poses and keyframes every 2 frames of animation like a stop-motion animator would. But using the Stepped Interpolation modifier gets most of the effect without most of the work. For a solo animator, if this can meet my self-imposed quality standards, it’s a big win. It also allows me to experiment with different frame rates just by changing a number from 2 to 3 instead of having to spend hours recreating the animation from scratch.
With all that motivation outlined, I began applying the F-curve modifier to all channels and checking the result in the viewport. It looked interesting for sure.
Implementing reduced framerate for Godot
However, when exported to Blender, it was clear the modifier wasn’t being applied. It wasn’t that surprising that modifiers in this corner of the Blender interface wouldn’t automatically be applied on export/import as opposed to object modifiers which are critical to most workflows.
I needed to find a way to apply the modifier to the raw data so that Godot would read the results of the operation. And ideally there’d be a way to do so non-destructively, so I could continue to iterate on the less dense keyframe data.
At the time was first investigating this, I was using Blender 4.0.2. At that time, the best I could do to bake the keyframes was:
- Apply the Stepped Interpolation modifier to all channels.
- Use the Keys to Samples operator. This effectively removes the keyframes and replaces them with samples (honestly not really sure what this means under the hood).
- Remove the modifier from all channels.
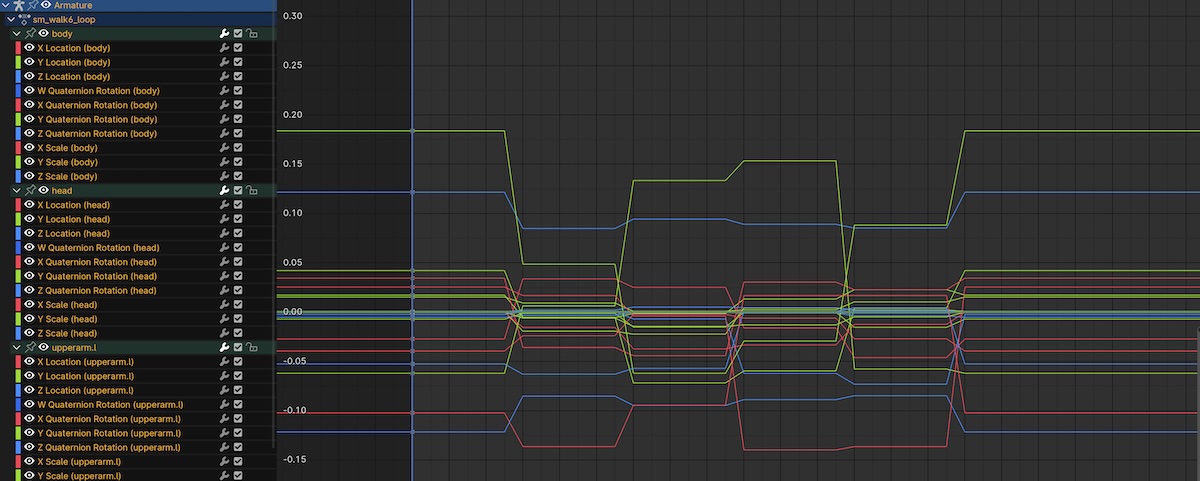
Saving the animation will make the original keyframes unrecoverable, so it’s best to do this on a duplicate of the Action.
Switching back over Godot and selecting the new animation, it’s working!
By some stroke of luck, Blender 4.1 (just released the day I’m writing this) includes a new Bake Channels operator. This streamlines my use case slightly:
- The Stepped Interpolation modifier is no longer necessary.
- Select all channels then select the Bake Channels operator.
- From the options, choose the range of the animation, the desired step, and an interpolation type of constant.
Unfortunately, this is still a destructive operation, so duplicating the Action is still required.
If I decide to use this workflow for most/all animations in my game, I’ll spend the time making a custom Blender plugin to automate this process. For now I’m happy enough with the manual process.
I like this effect. It’s opinionated, and I think it will put a stake in the ground and help guide the aesthetics of the rest of the game. I’m already thinking about paper or wood textures to lean into the “real life” stop-motion vibe.
In this example, I have the step set to 6 which is quite extreme! I’m not sure how far I’m going to push this yet. Starting on the extreme side and dialing back isn’t such a bad way to get things rolling.
Next steps
We’re definitely getting into more unfamiliar territory. It’s fun seeing these small steps of progress, but each step just reminds me how much more there is to discover before I even get the point where I need to go heads down churning out assets and content.
Even though it could be considered a flourish, the next thing I’d like to explore is configurable/animatable face shapes for the characters. It turns out there are a lot of problems to solve in this workflow too!
Until next time.