Importing and Auto-updating a CharacterBody3D from Blender into Godot
This is a quick guide related to Godot, Blender, and an auto-update import workflow between the two for rigged 3D characters with animation.
I’m using Blender 4.0.2 and Godot 4.2.1. Your milage may vary with past and future versions of each.
Follow this tutorial: Godot 4 / Blender - Third Person Character From Scratch.
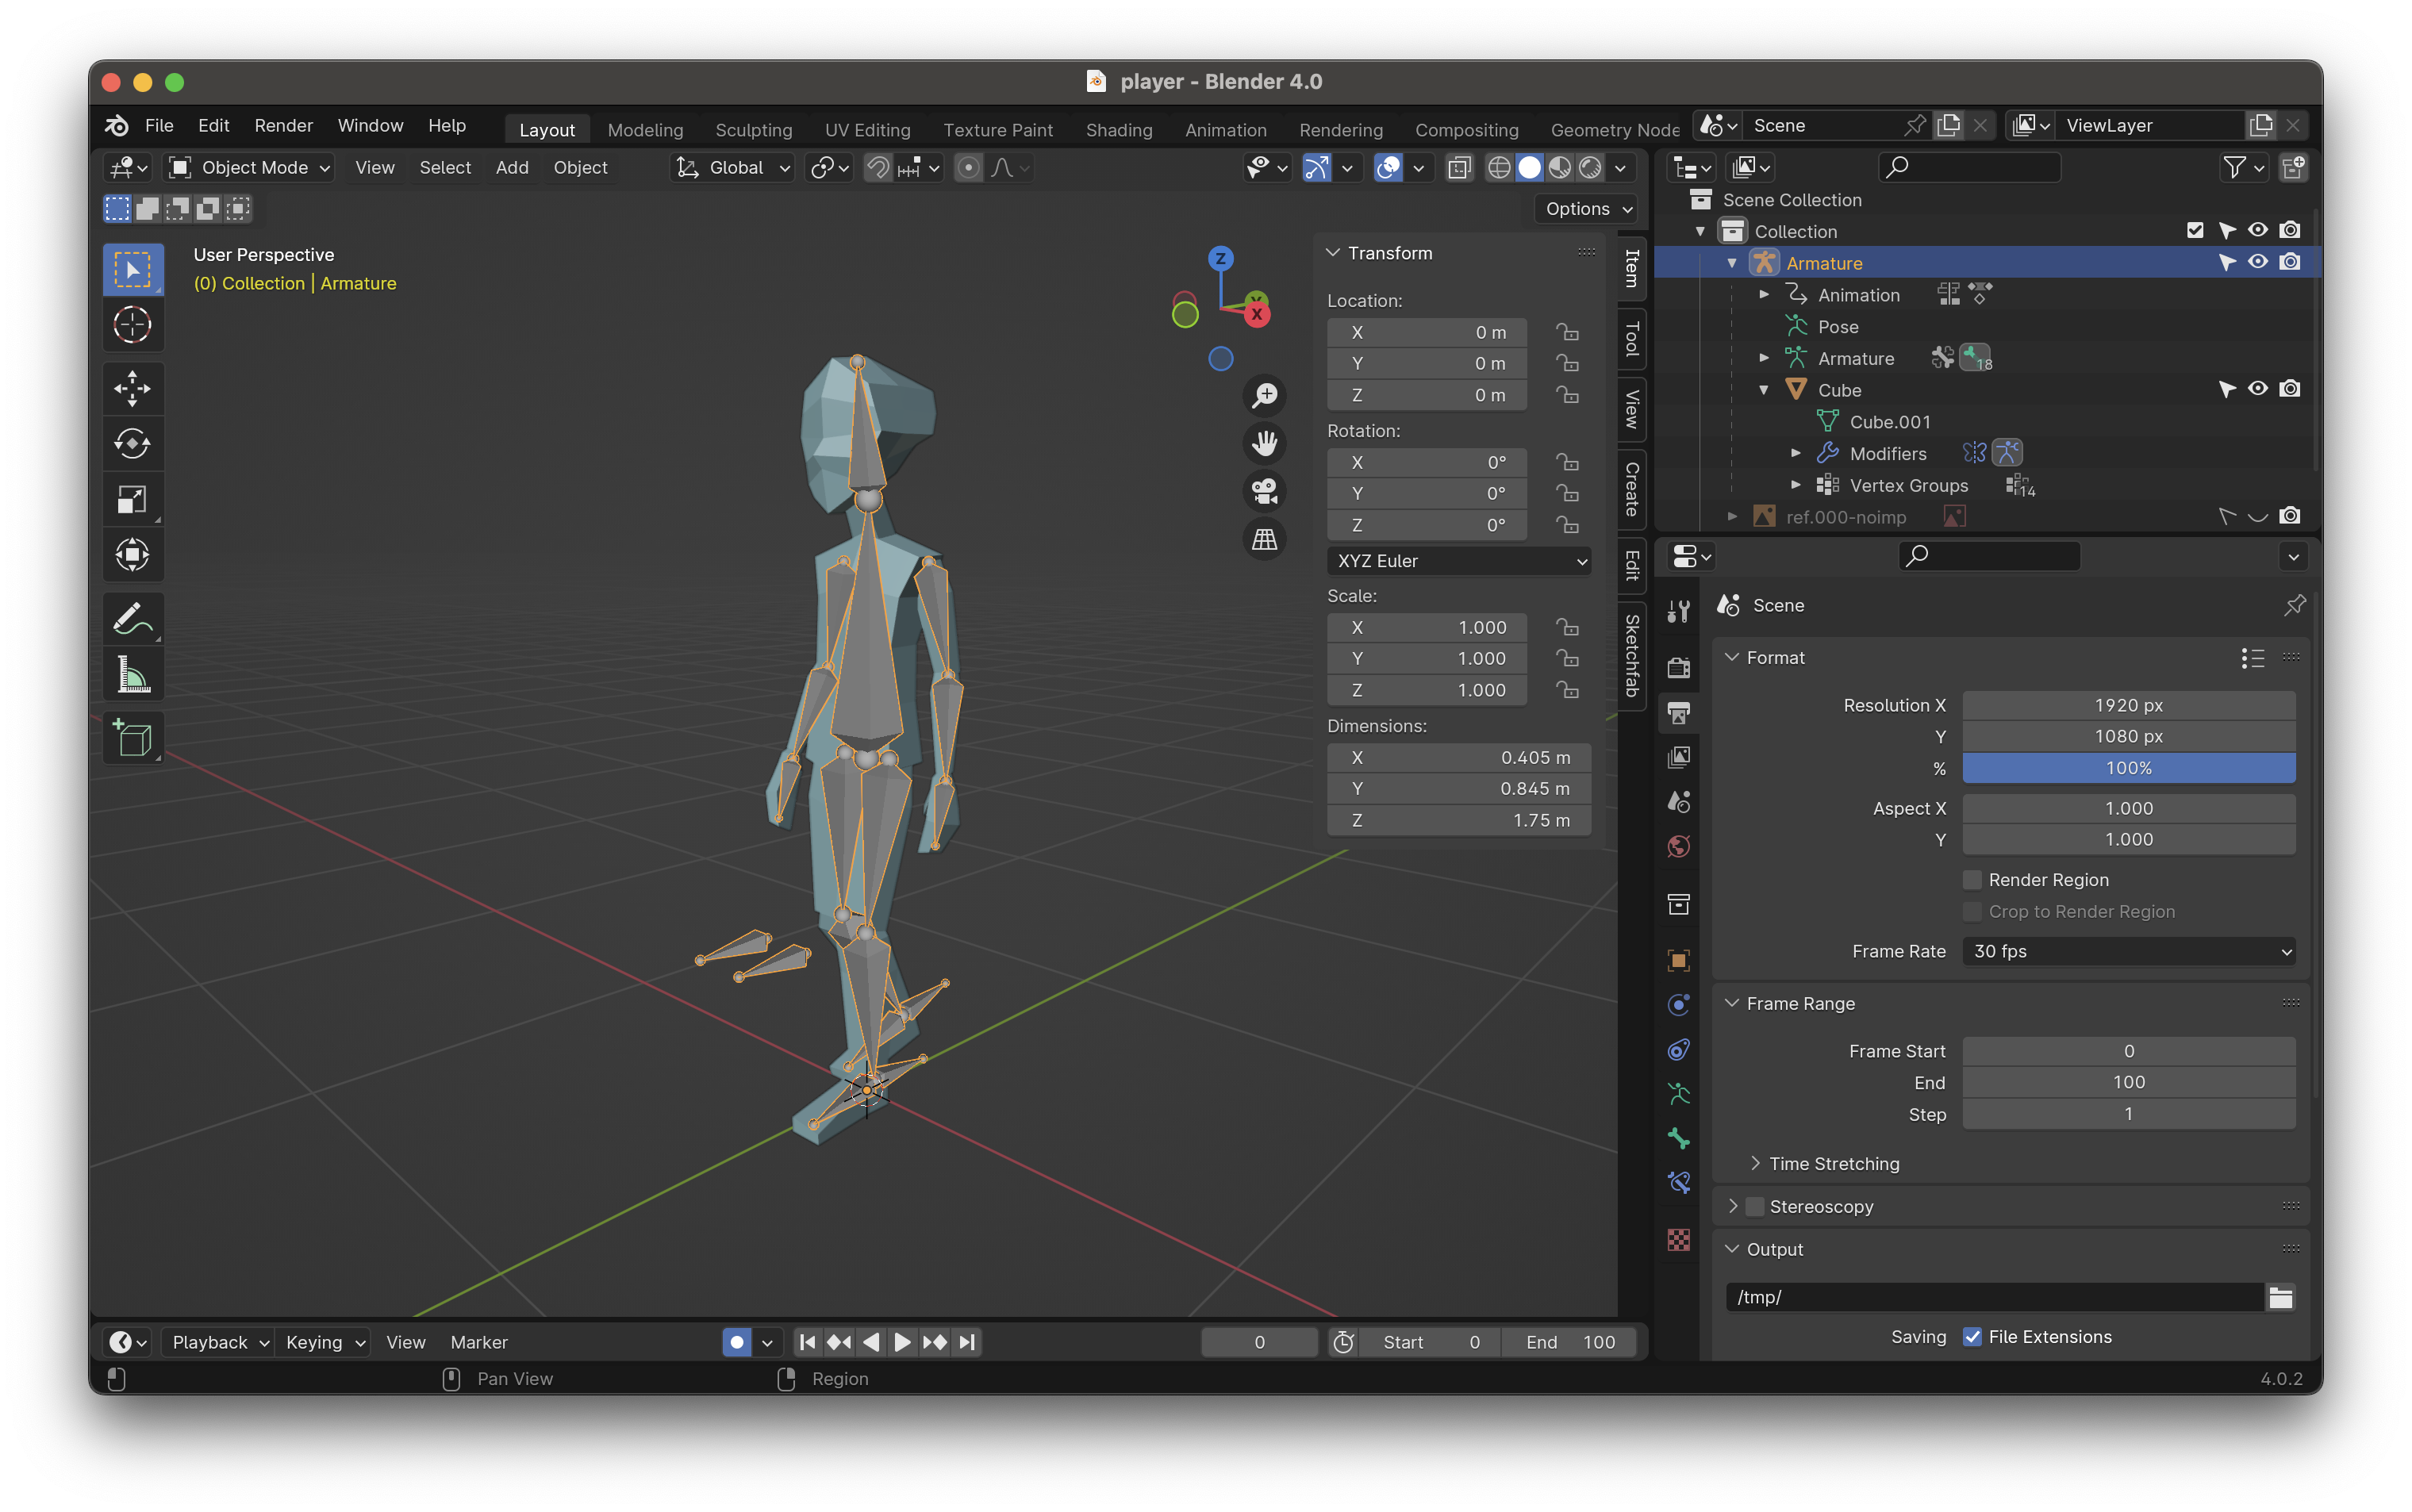
After the tutorial I assume you have the following in Blender:
- A 3D modeled character with one mesh in one object
- …parented to and rigged with an armature
- …with one or more animation Actions
And the following in Godot:
- An empty Godot project
- The Blender file from above in the same directory as your Godot project
The goal is to have a CharacterBody3D-backed Scene containing the armature, mesh, and animations from the Blender file, along with other child nodes like CollisionShape3D, AnimationTree, etc. and most importantly, be able to reasonably add/modify parts of the Blender file and have the Godot Scene live autoupdate.
Blender setup
The Blender file setup is nearly identical to that of the YouTube tutorial with a few small details:
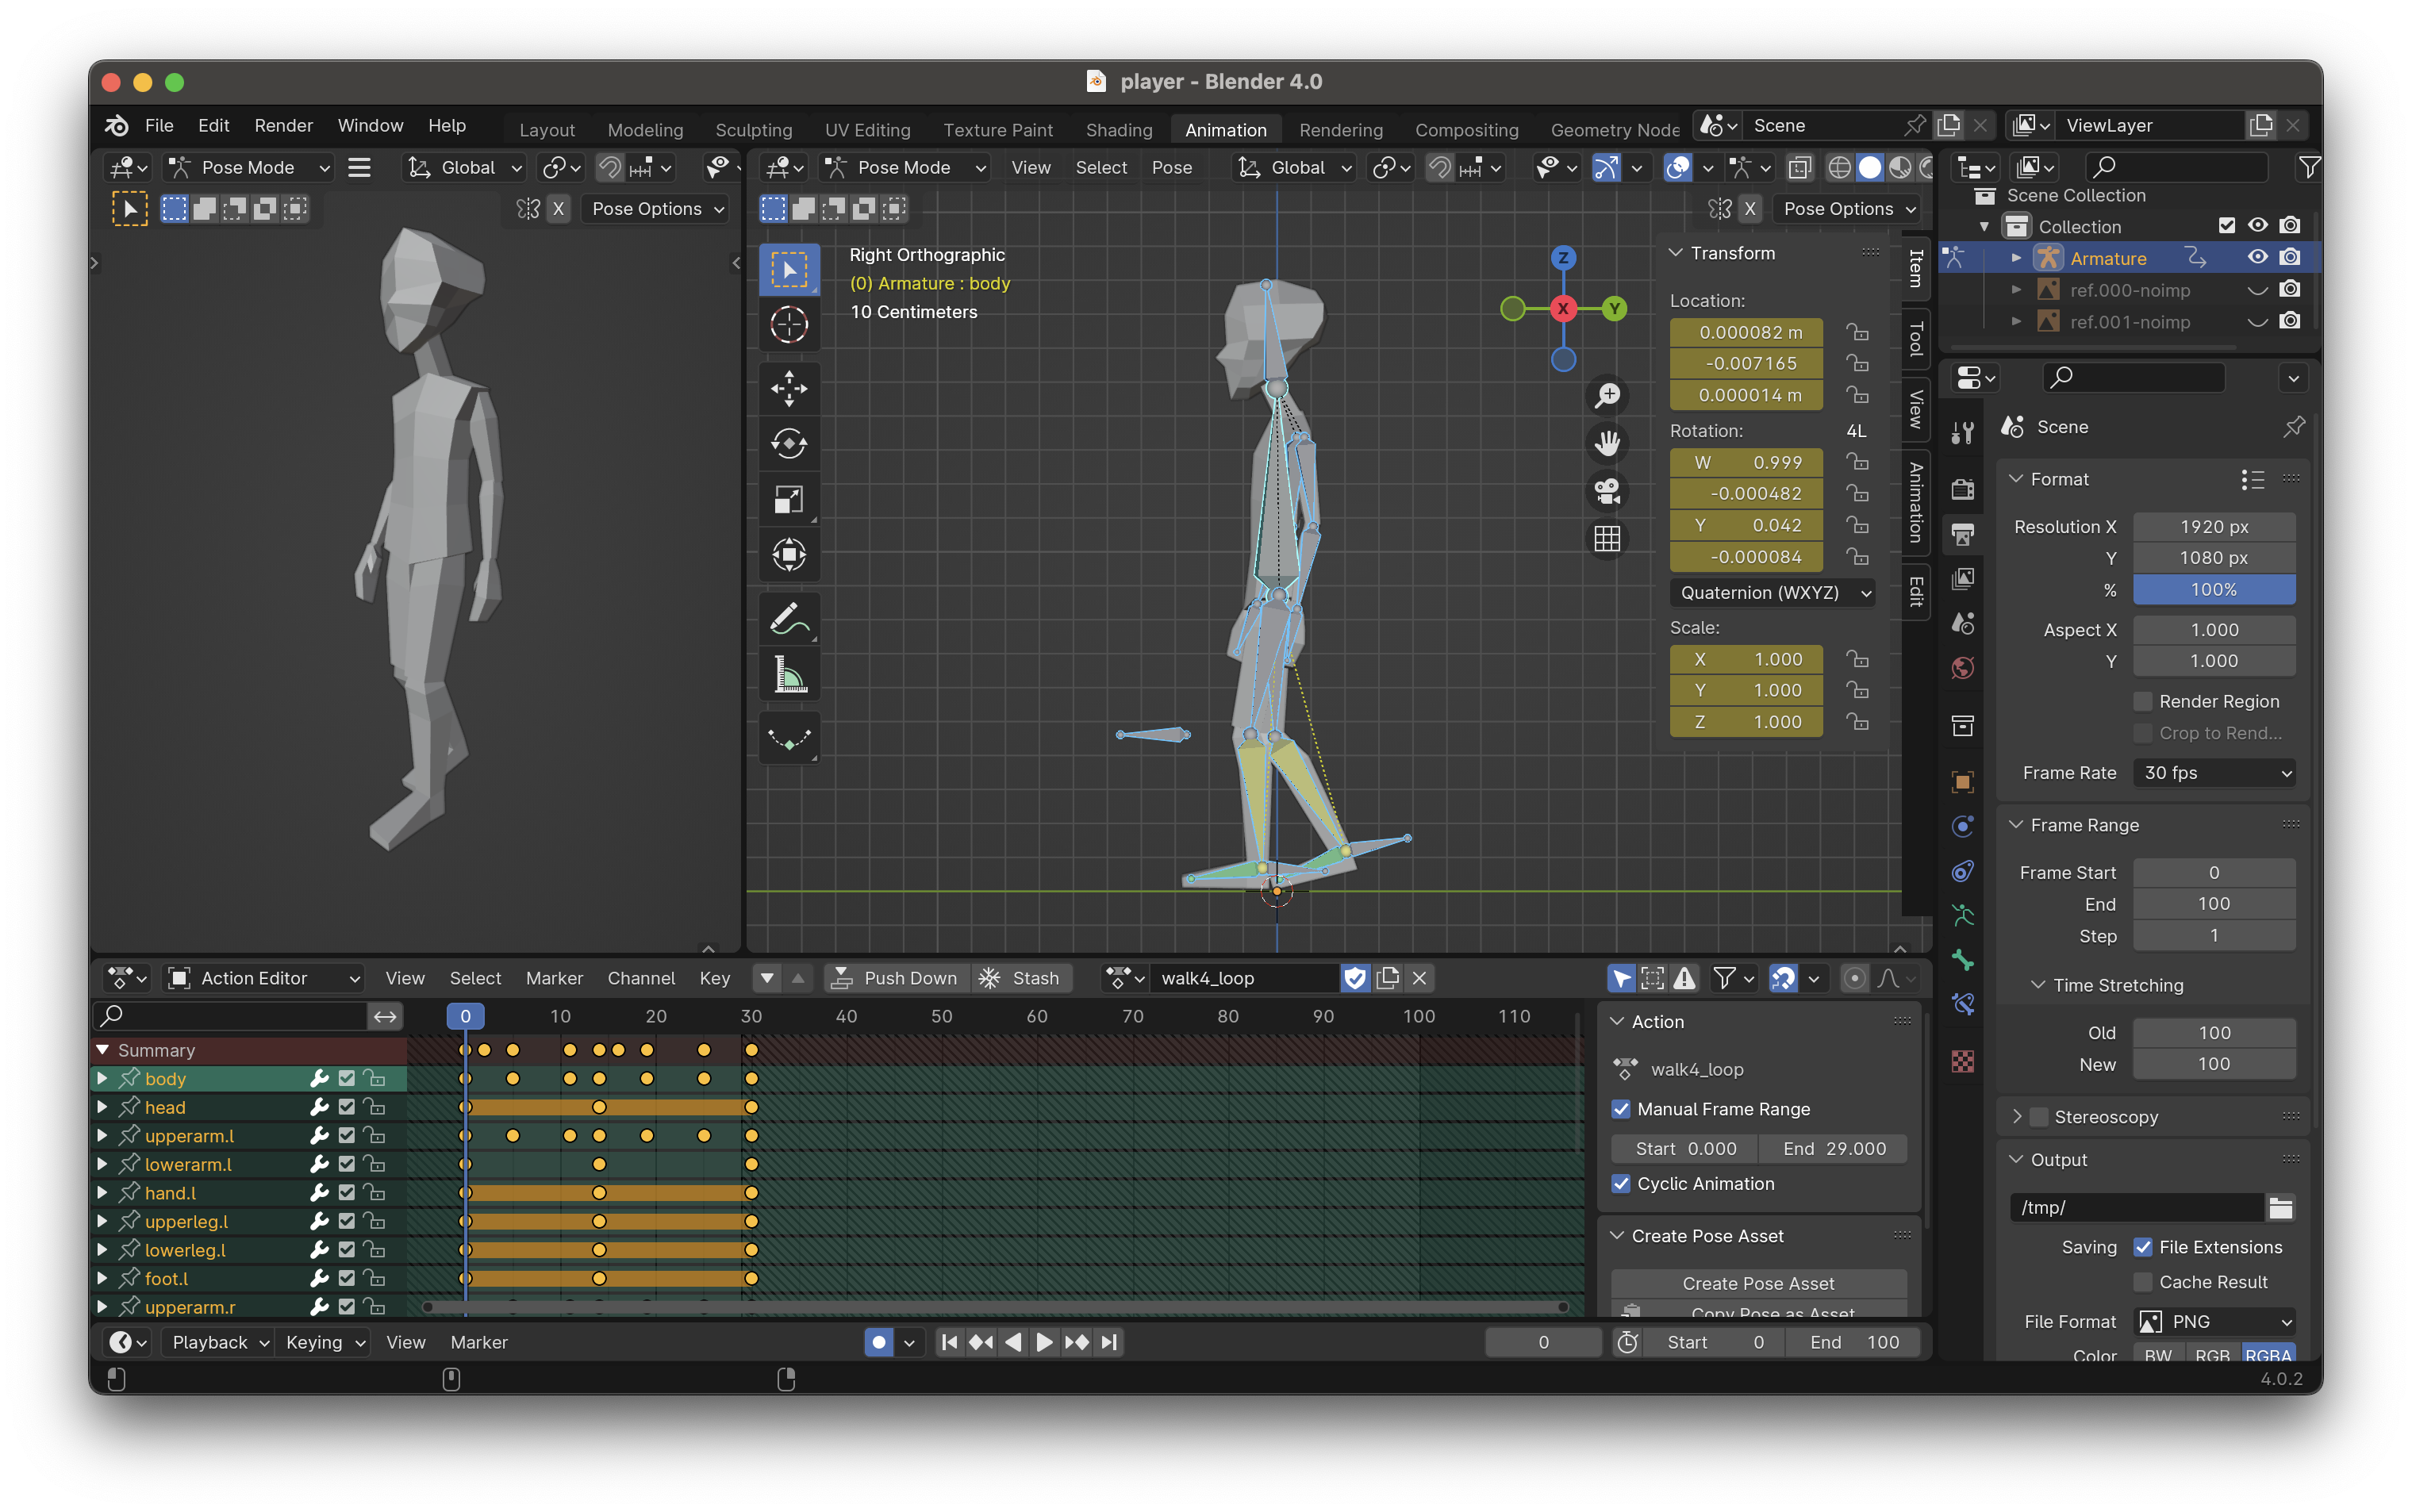
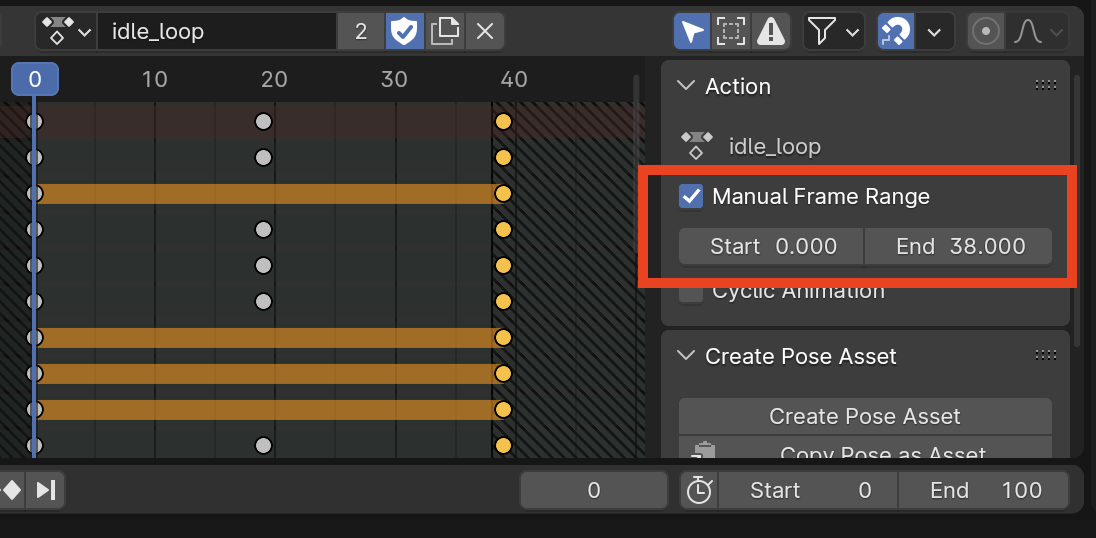
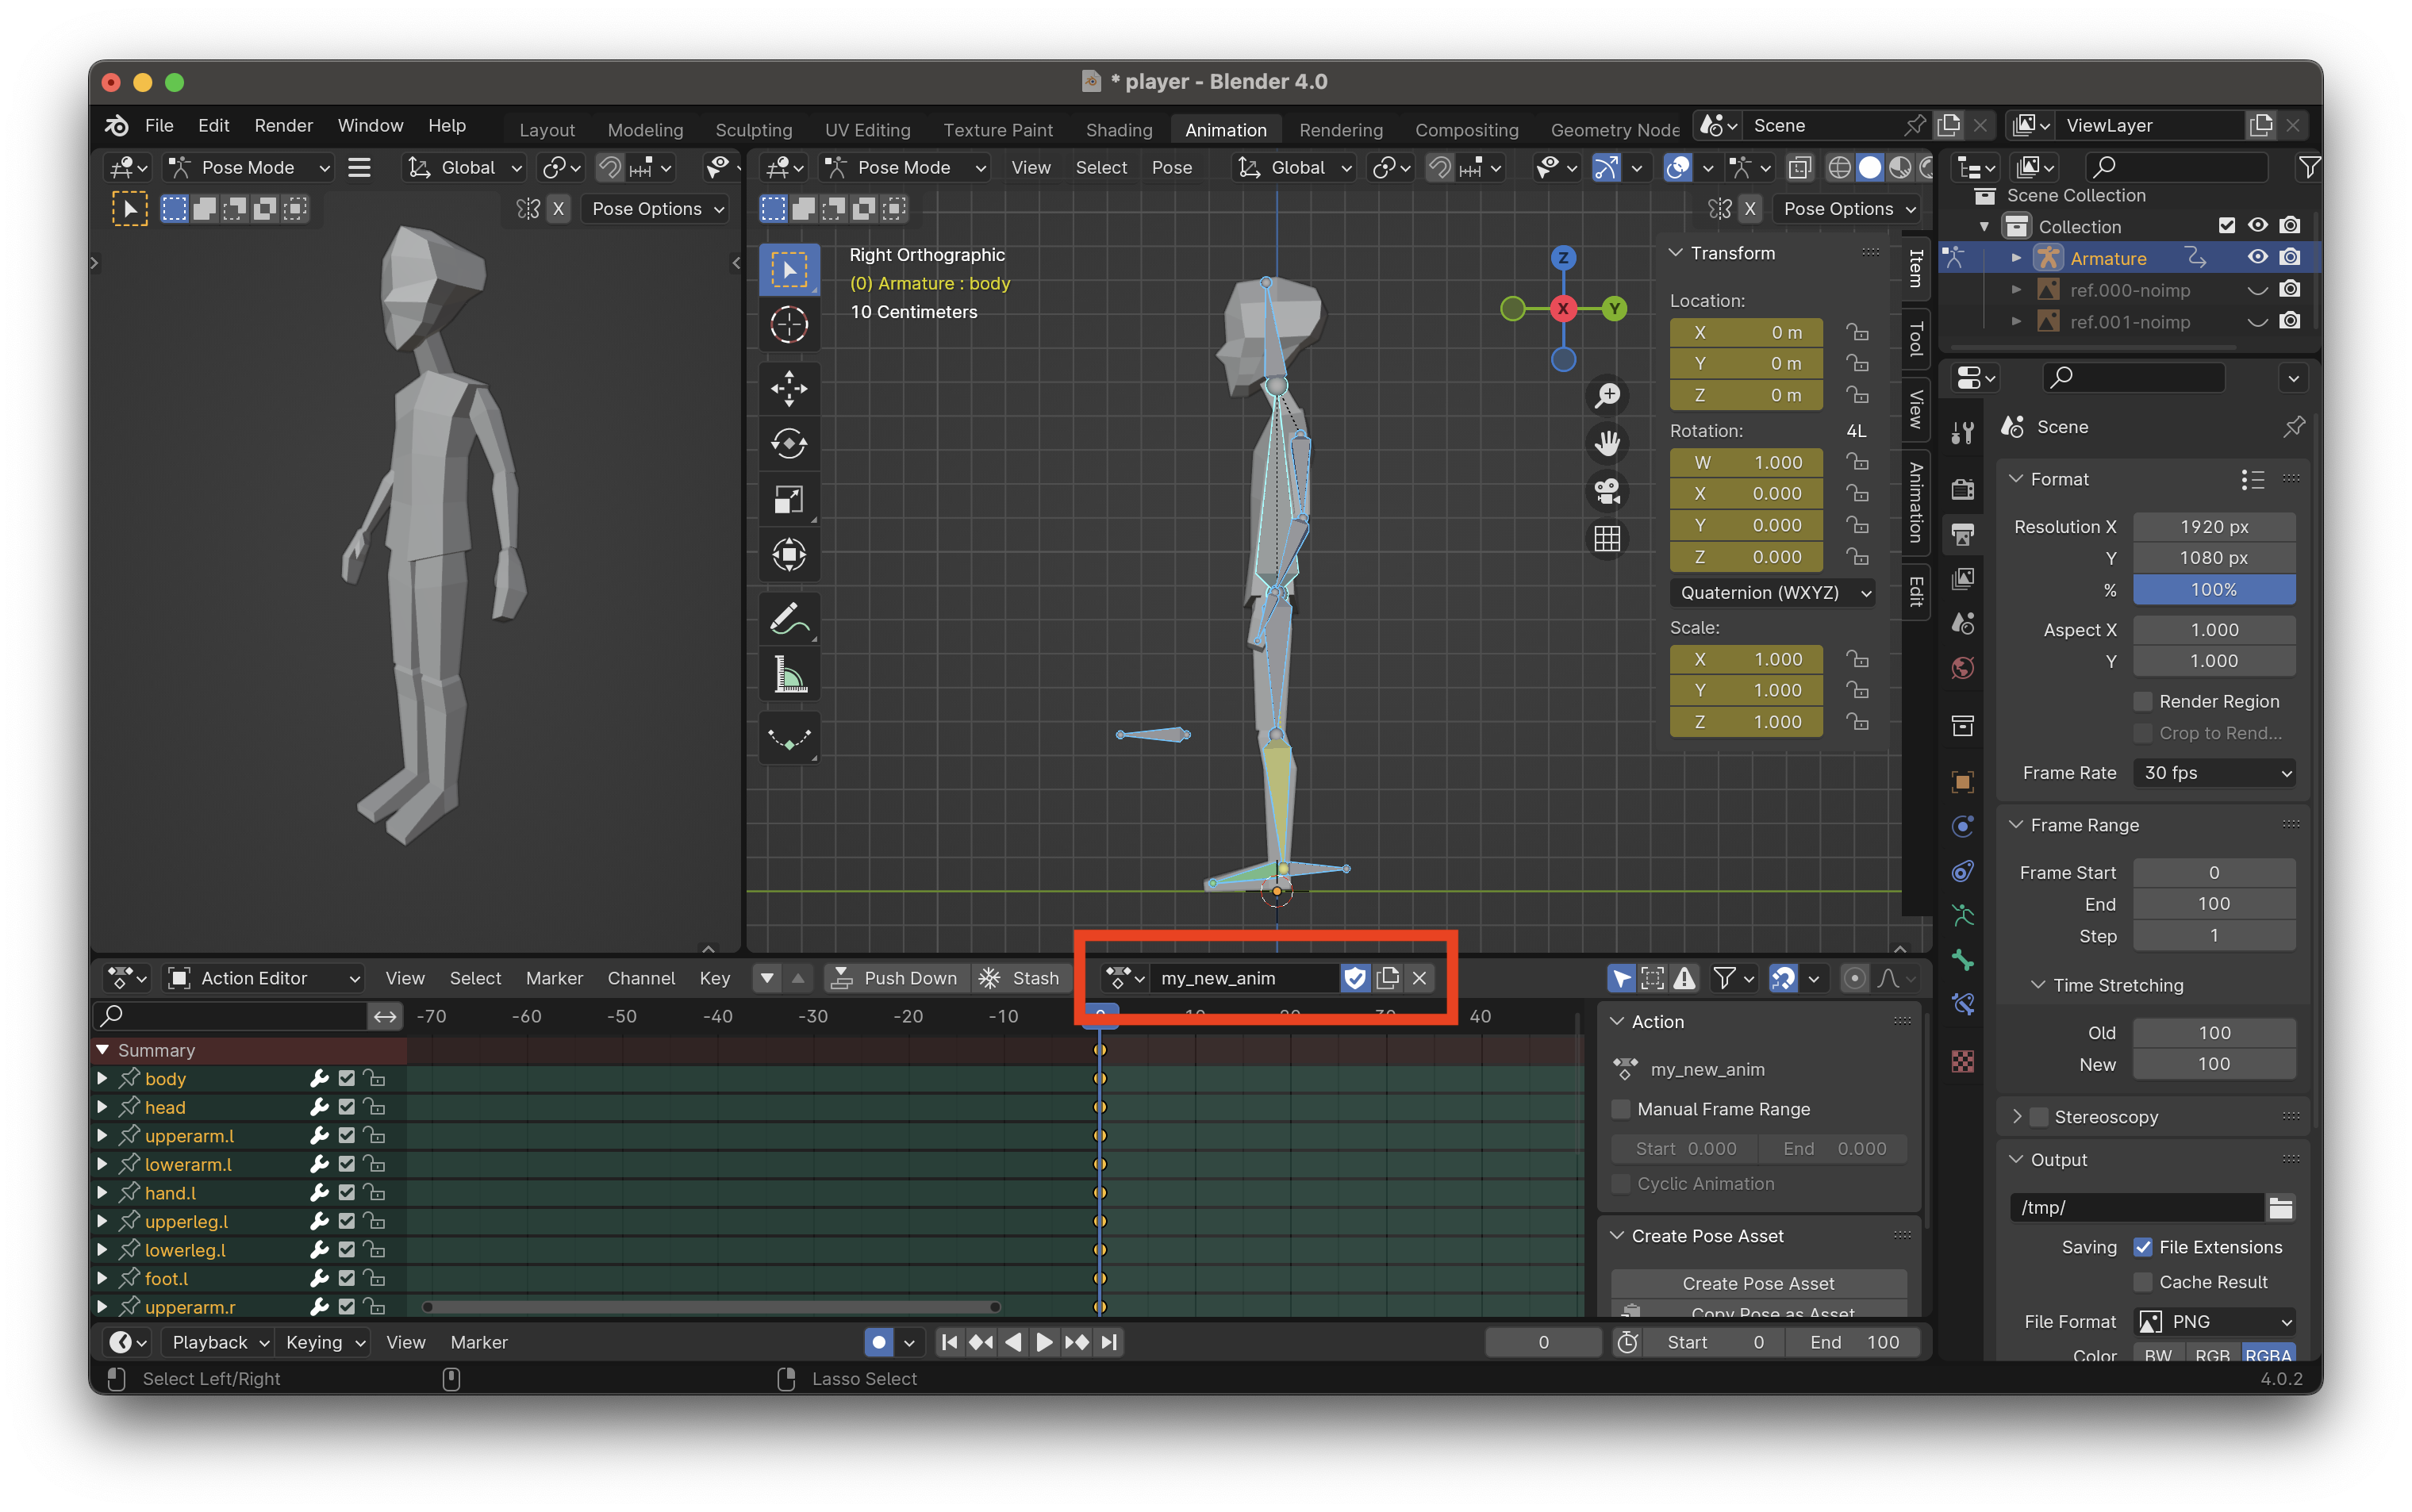
- If you have multiple animations (Actions), and they have different lengths, set “Manual Frame Range” in the Action properties bar to the proper start/end times. The file-wide start/end times should be longer than the longest animation time.
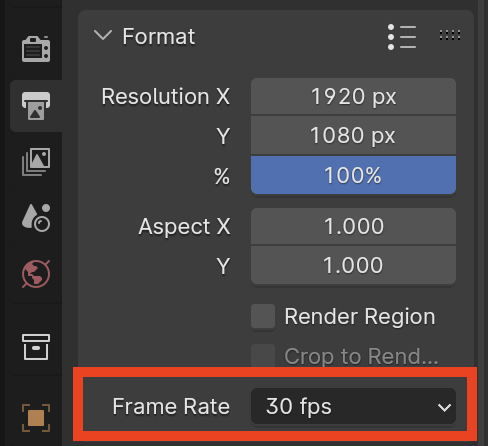
- Ensure frame rate is set to 30 fps. This is not strictly necessary if you know what you’re doing, but it’s the Godot default so if you’re not particular, use 30.
Godot setup
There are 2 important steps:
- Setting the node type in Advanced Import Settings
- Creating an Inherited Scene
Setting the node type in Advanced Import Settings
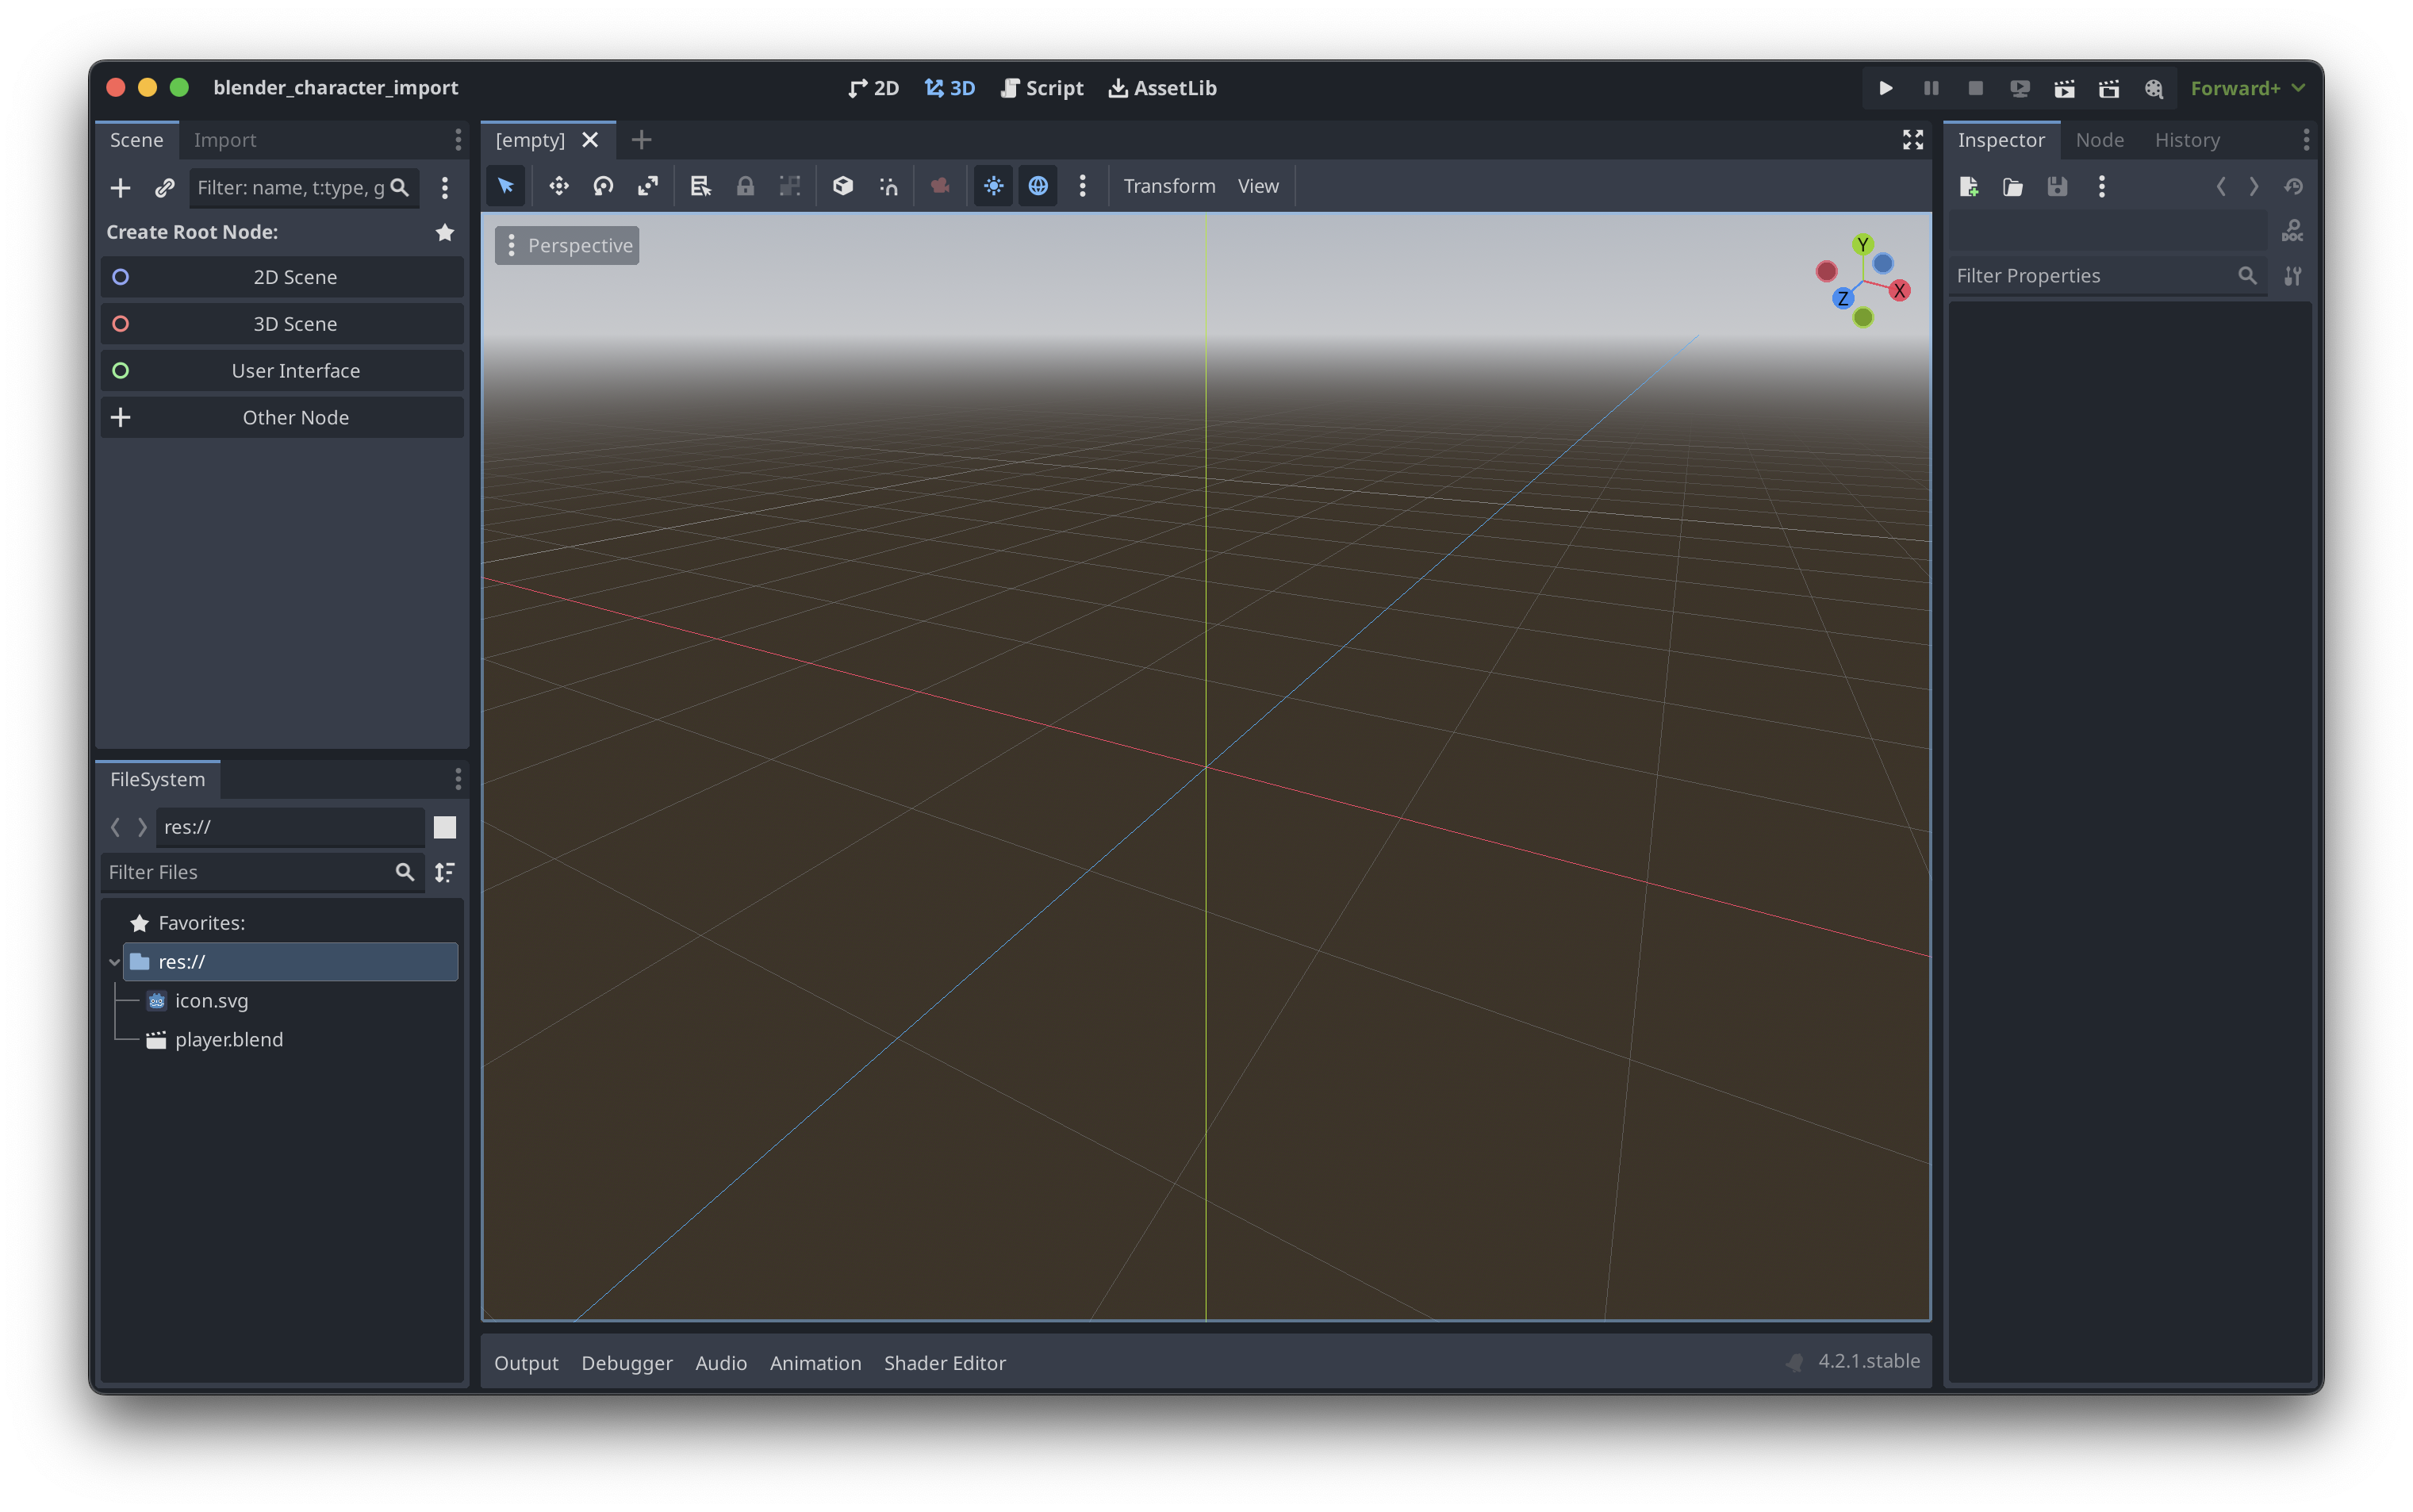
- In your Godot project, double click the
.blendfile in the FileSystem pane in the bottom left to open the Advanced Import Settings Window.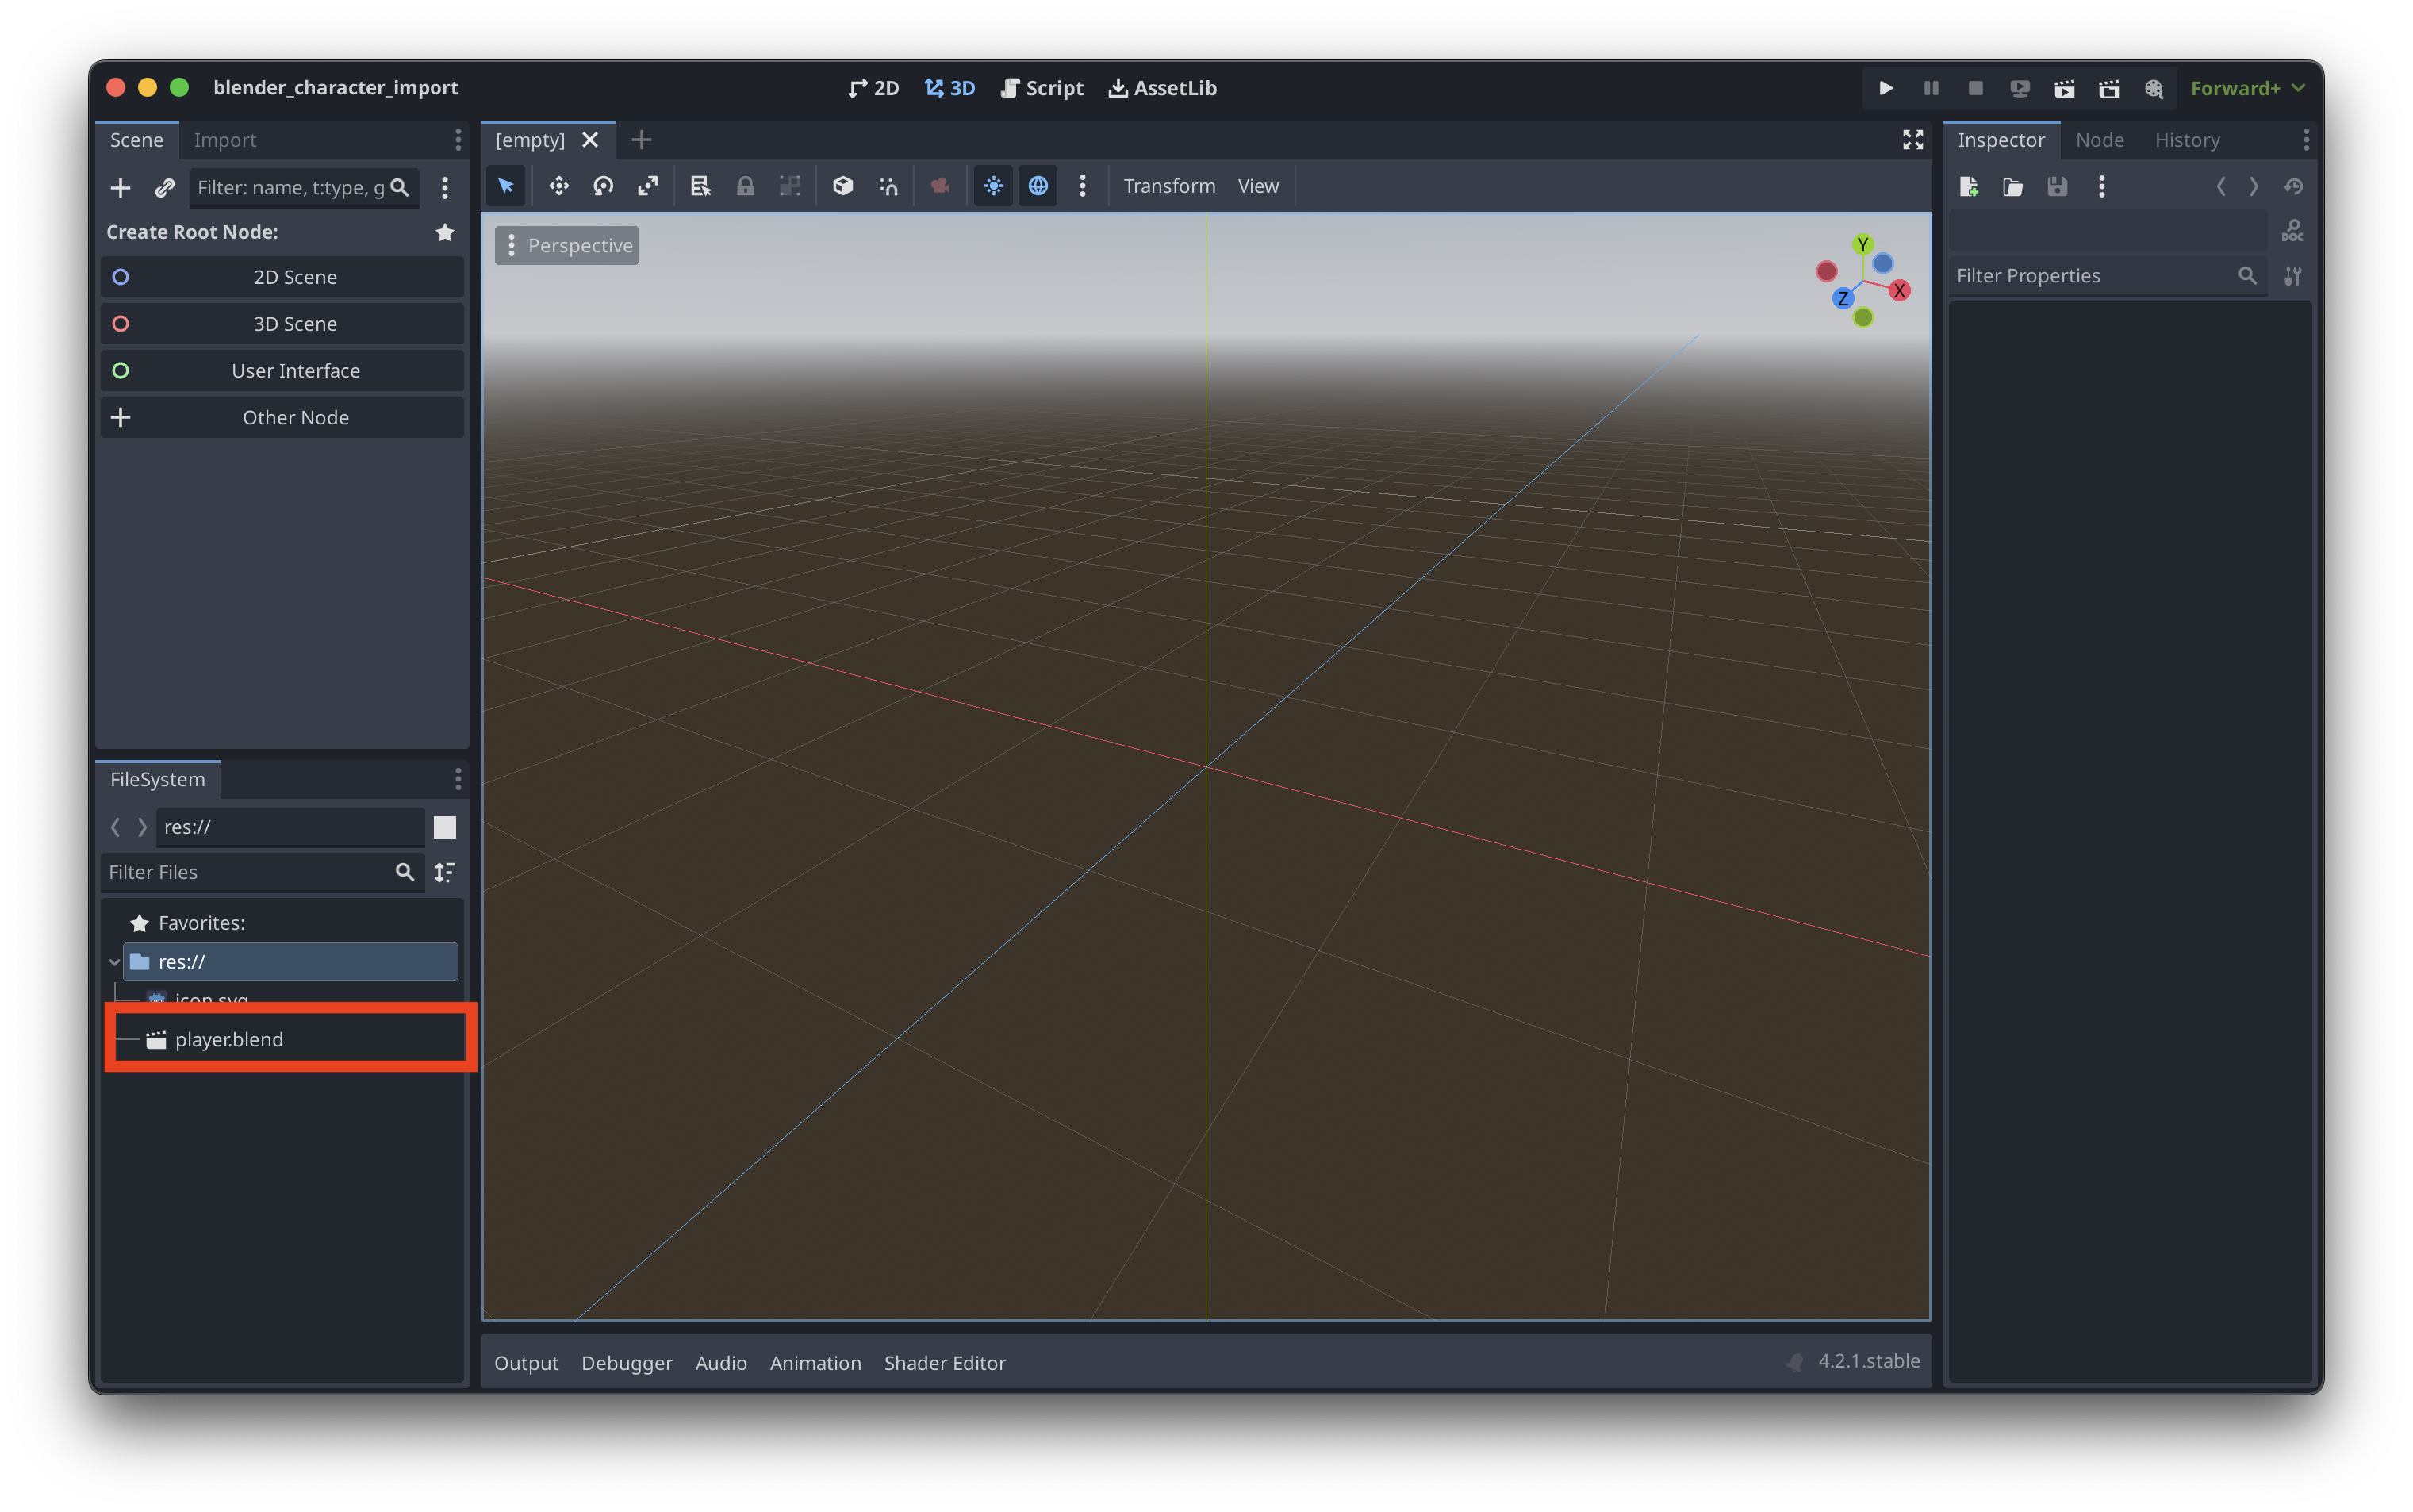
- In the right panel, change
Root Typeto CharacterBody3D. Optionally, change the Root Name to e.g. “Player”.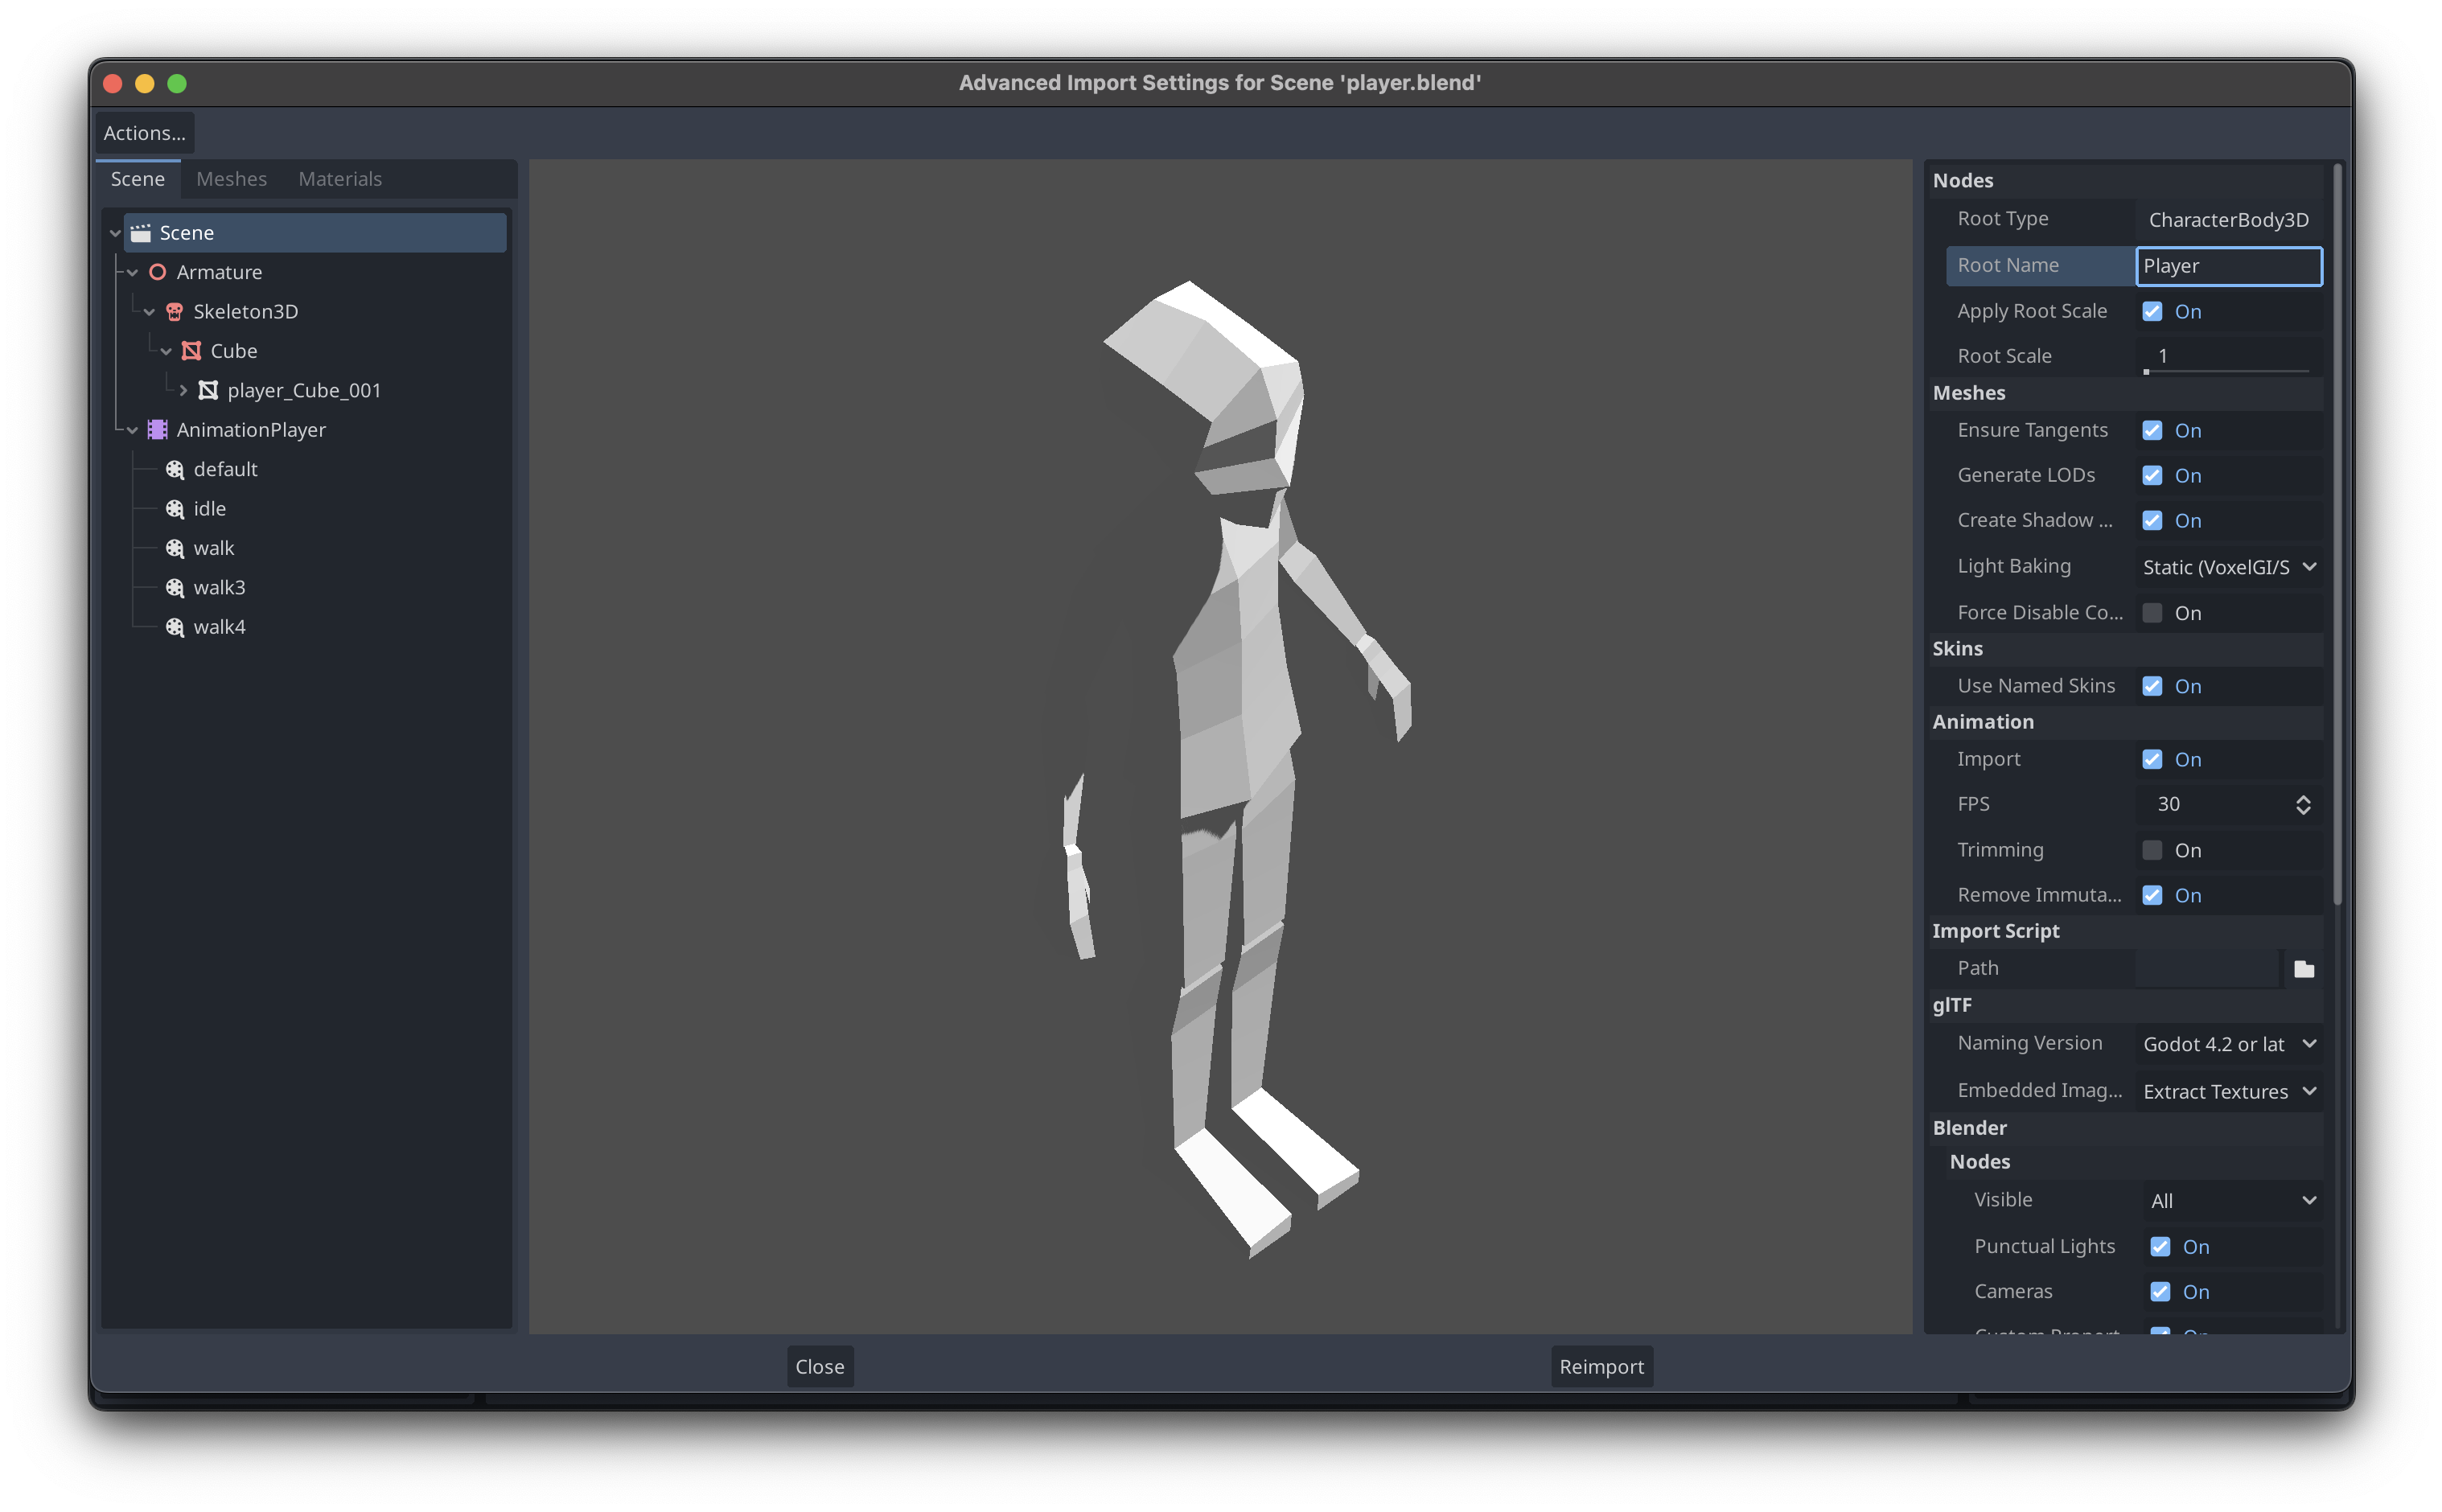
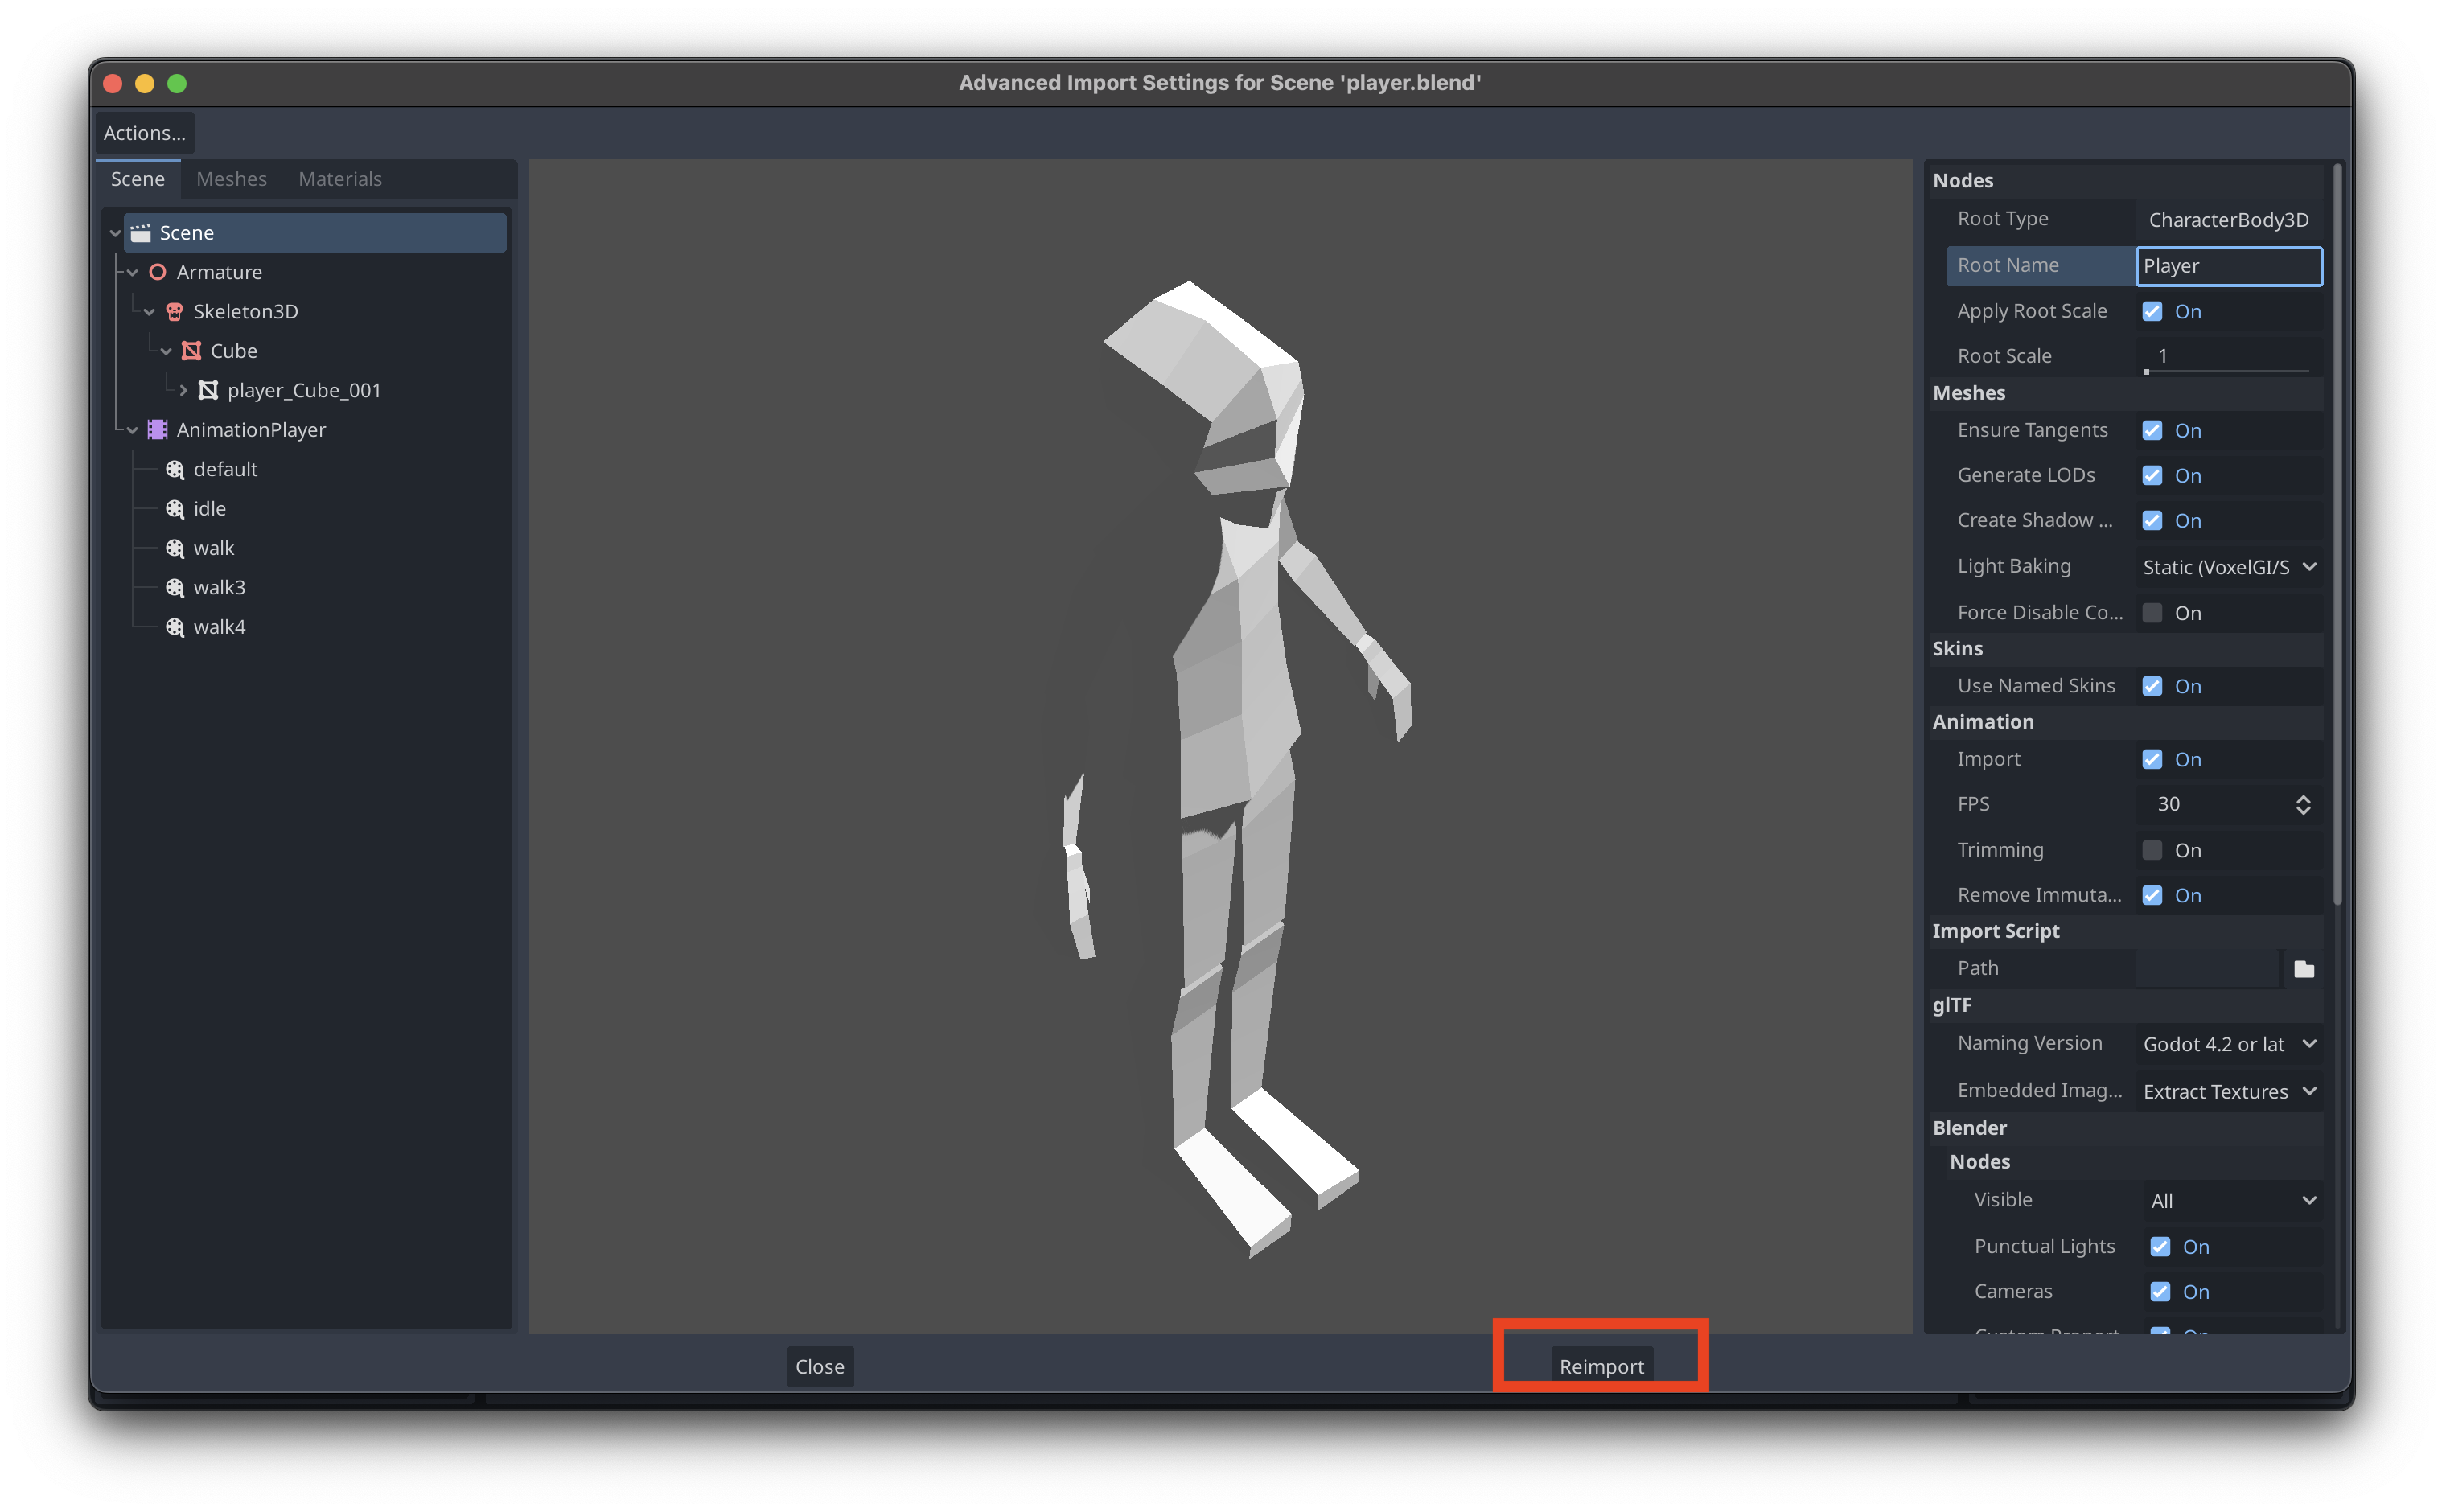
- Click the Reimport button at the bottom of the window.
Why change Root Type in Advanced Import Settings? If you use Change Type... by right clicking the root node within the Inherited Scene, Godot will break the Scene’s connection with the Blender file and changes from Blender will no longer be reflected in the Scene.
Creating an Inherited Scene
- Right click on the
.blendfile in the FileSystem pane. Click New Inherited Scene. This will create and open an[unsaved]scene.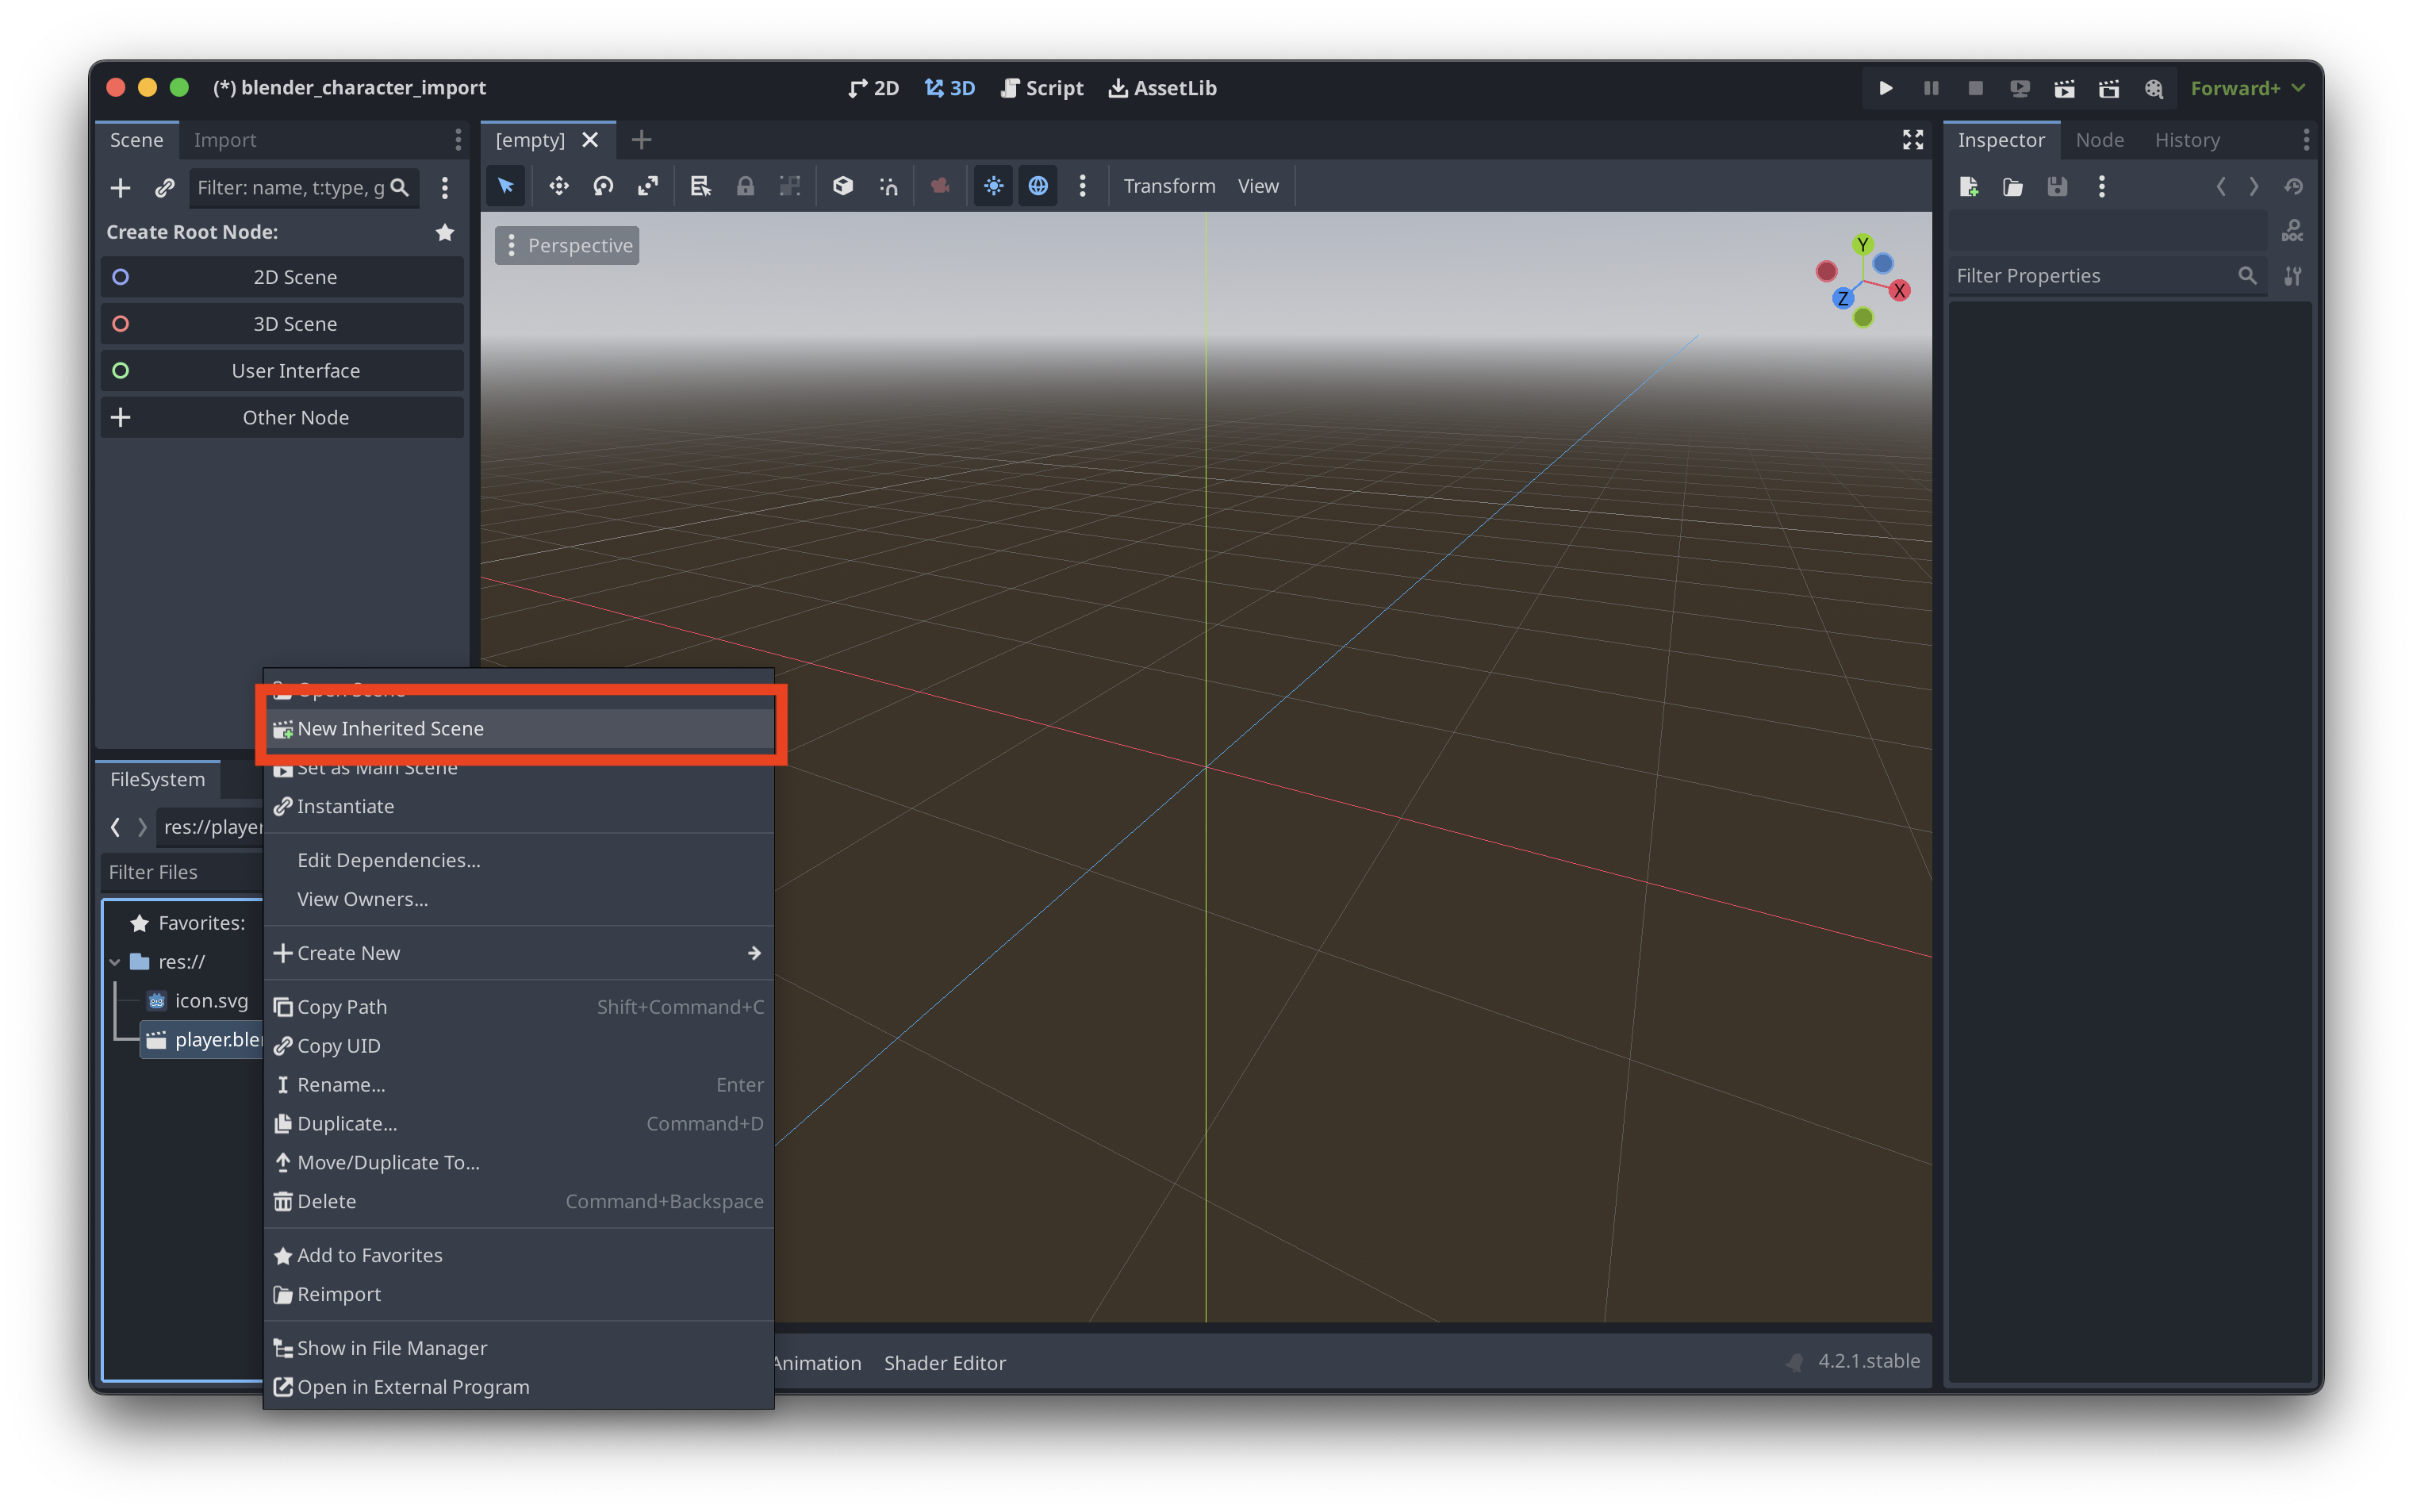
- Notice that the nodes below the root are yellow instead of white indicating that they are linked to the Blender file. If these change to white at any point, you’ve probably lost the connection between the Blender file.
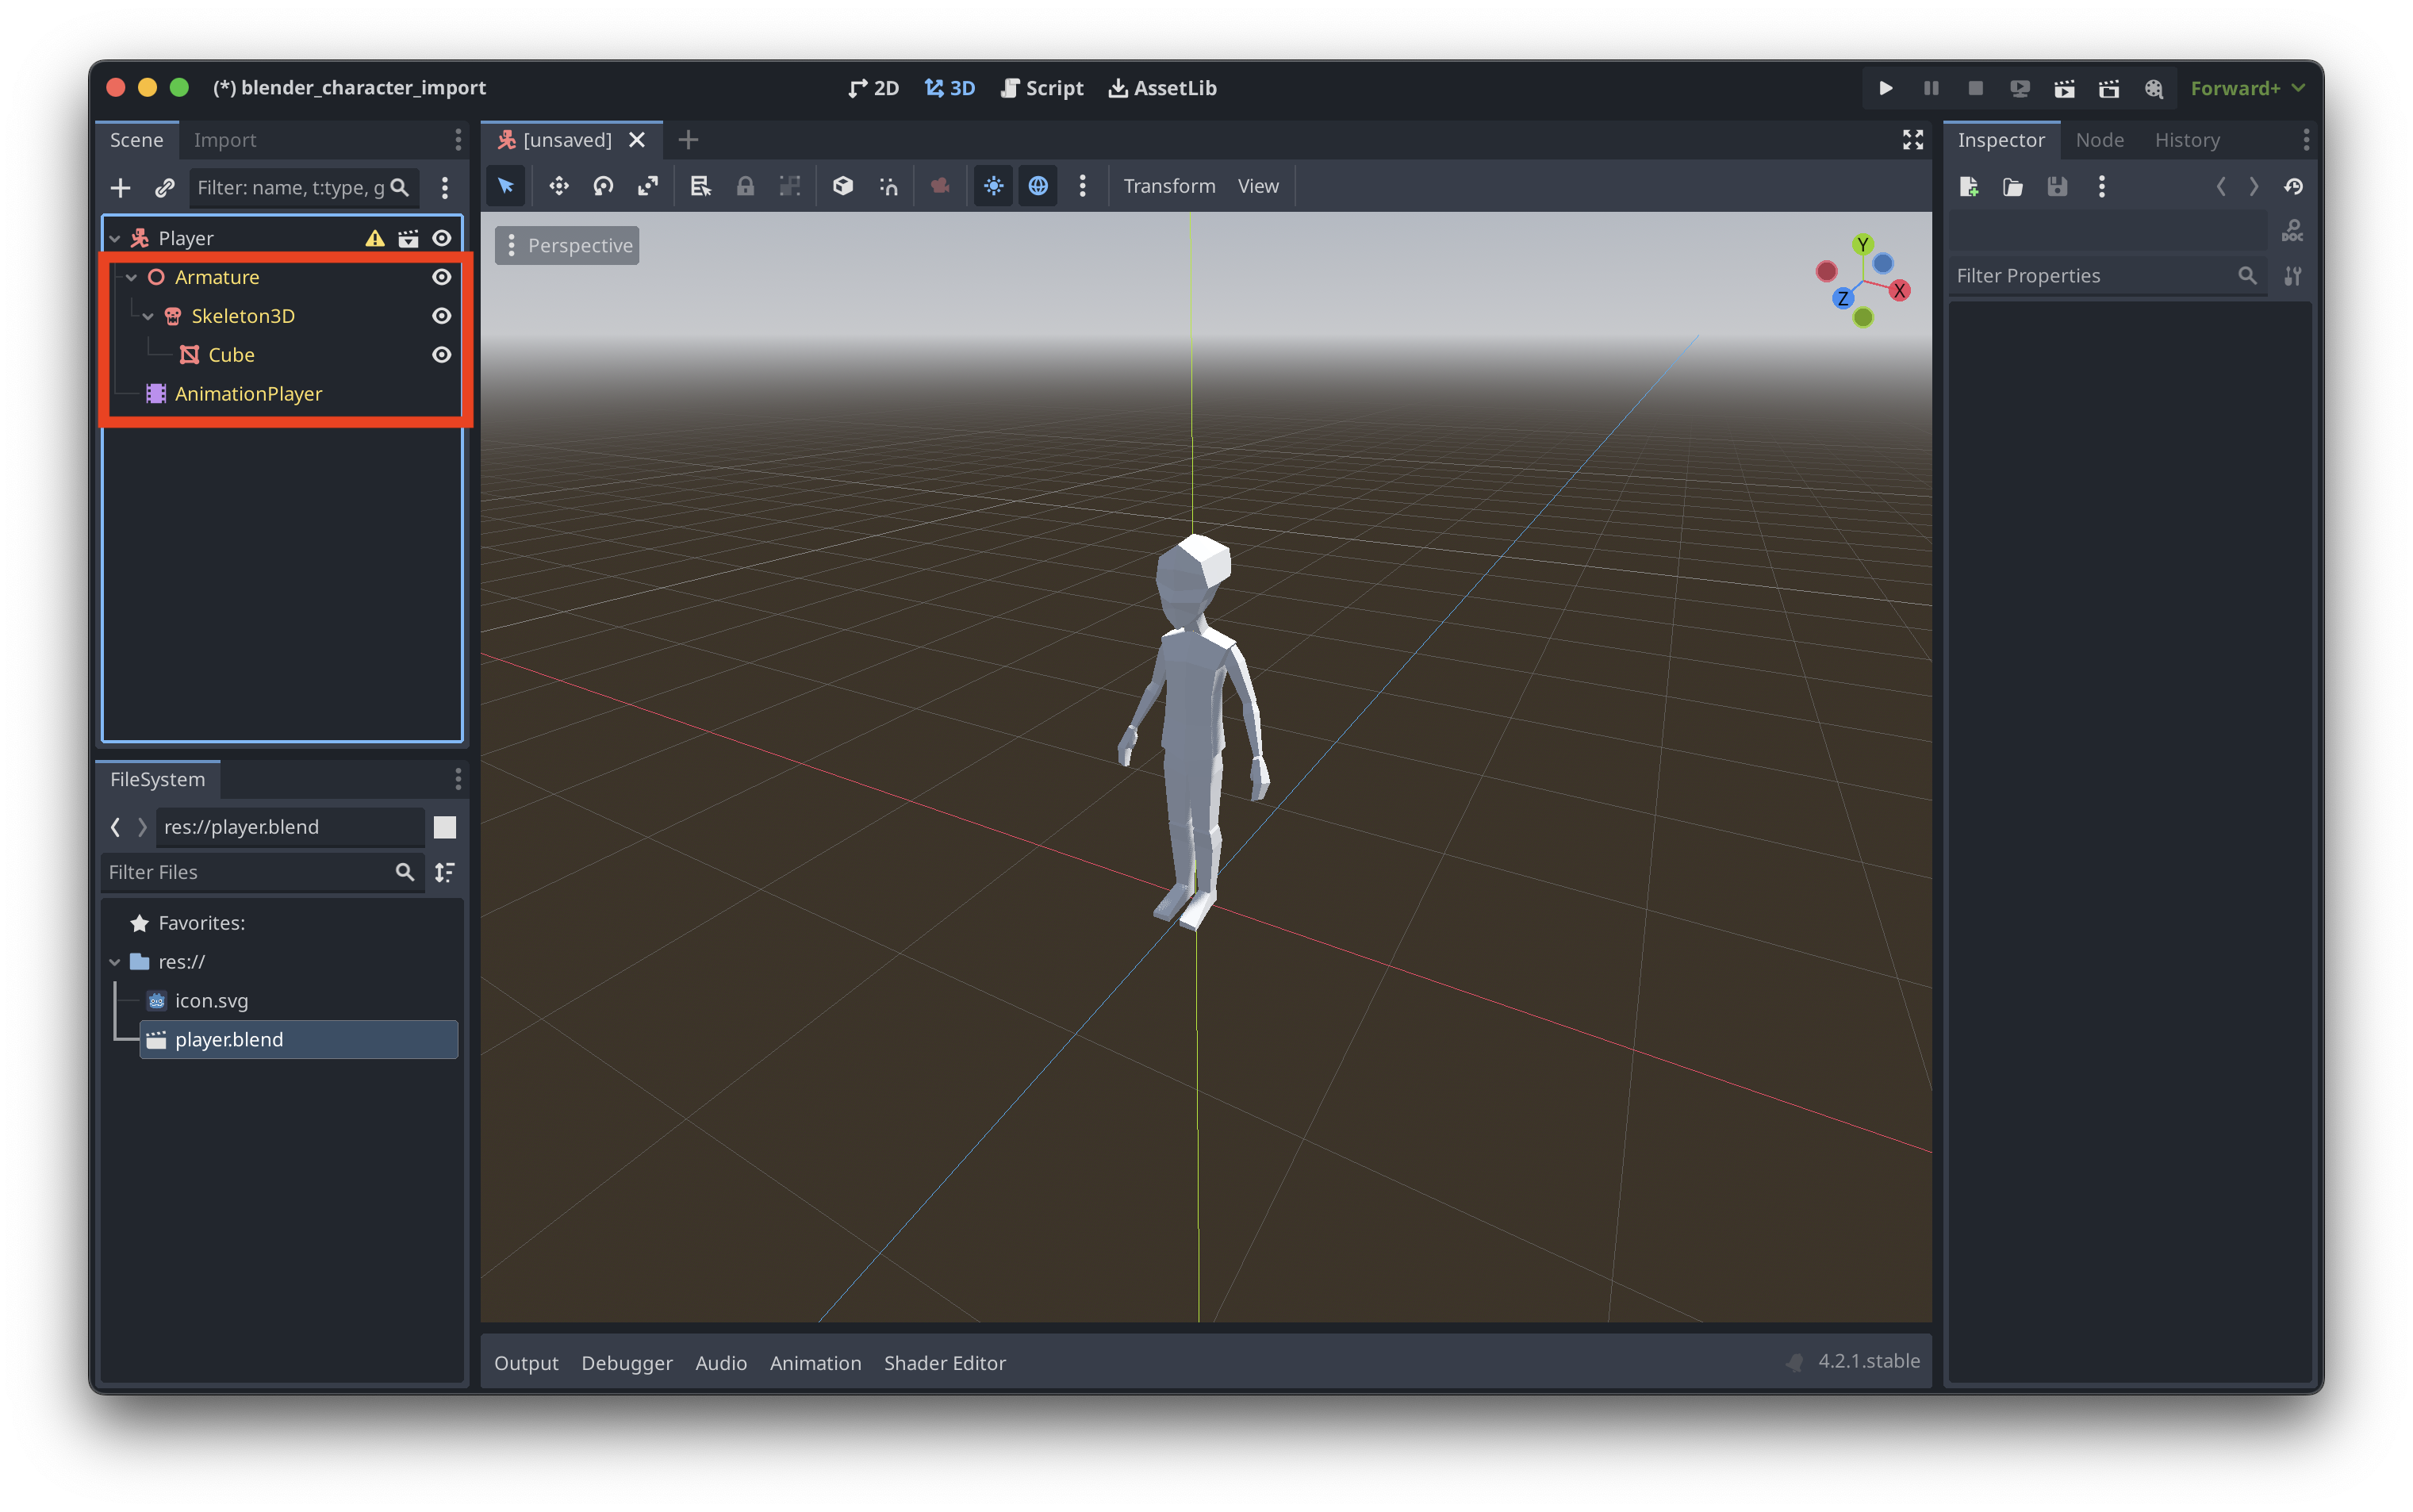
- Add any additional nodes to the root.

- Go back to the Blender file and try making a change like adding an animation Action. Save it and return to Godot.
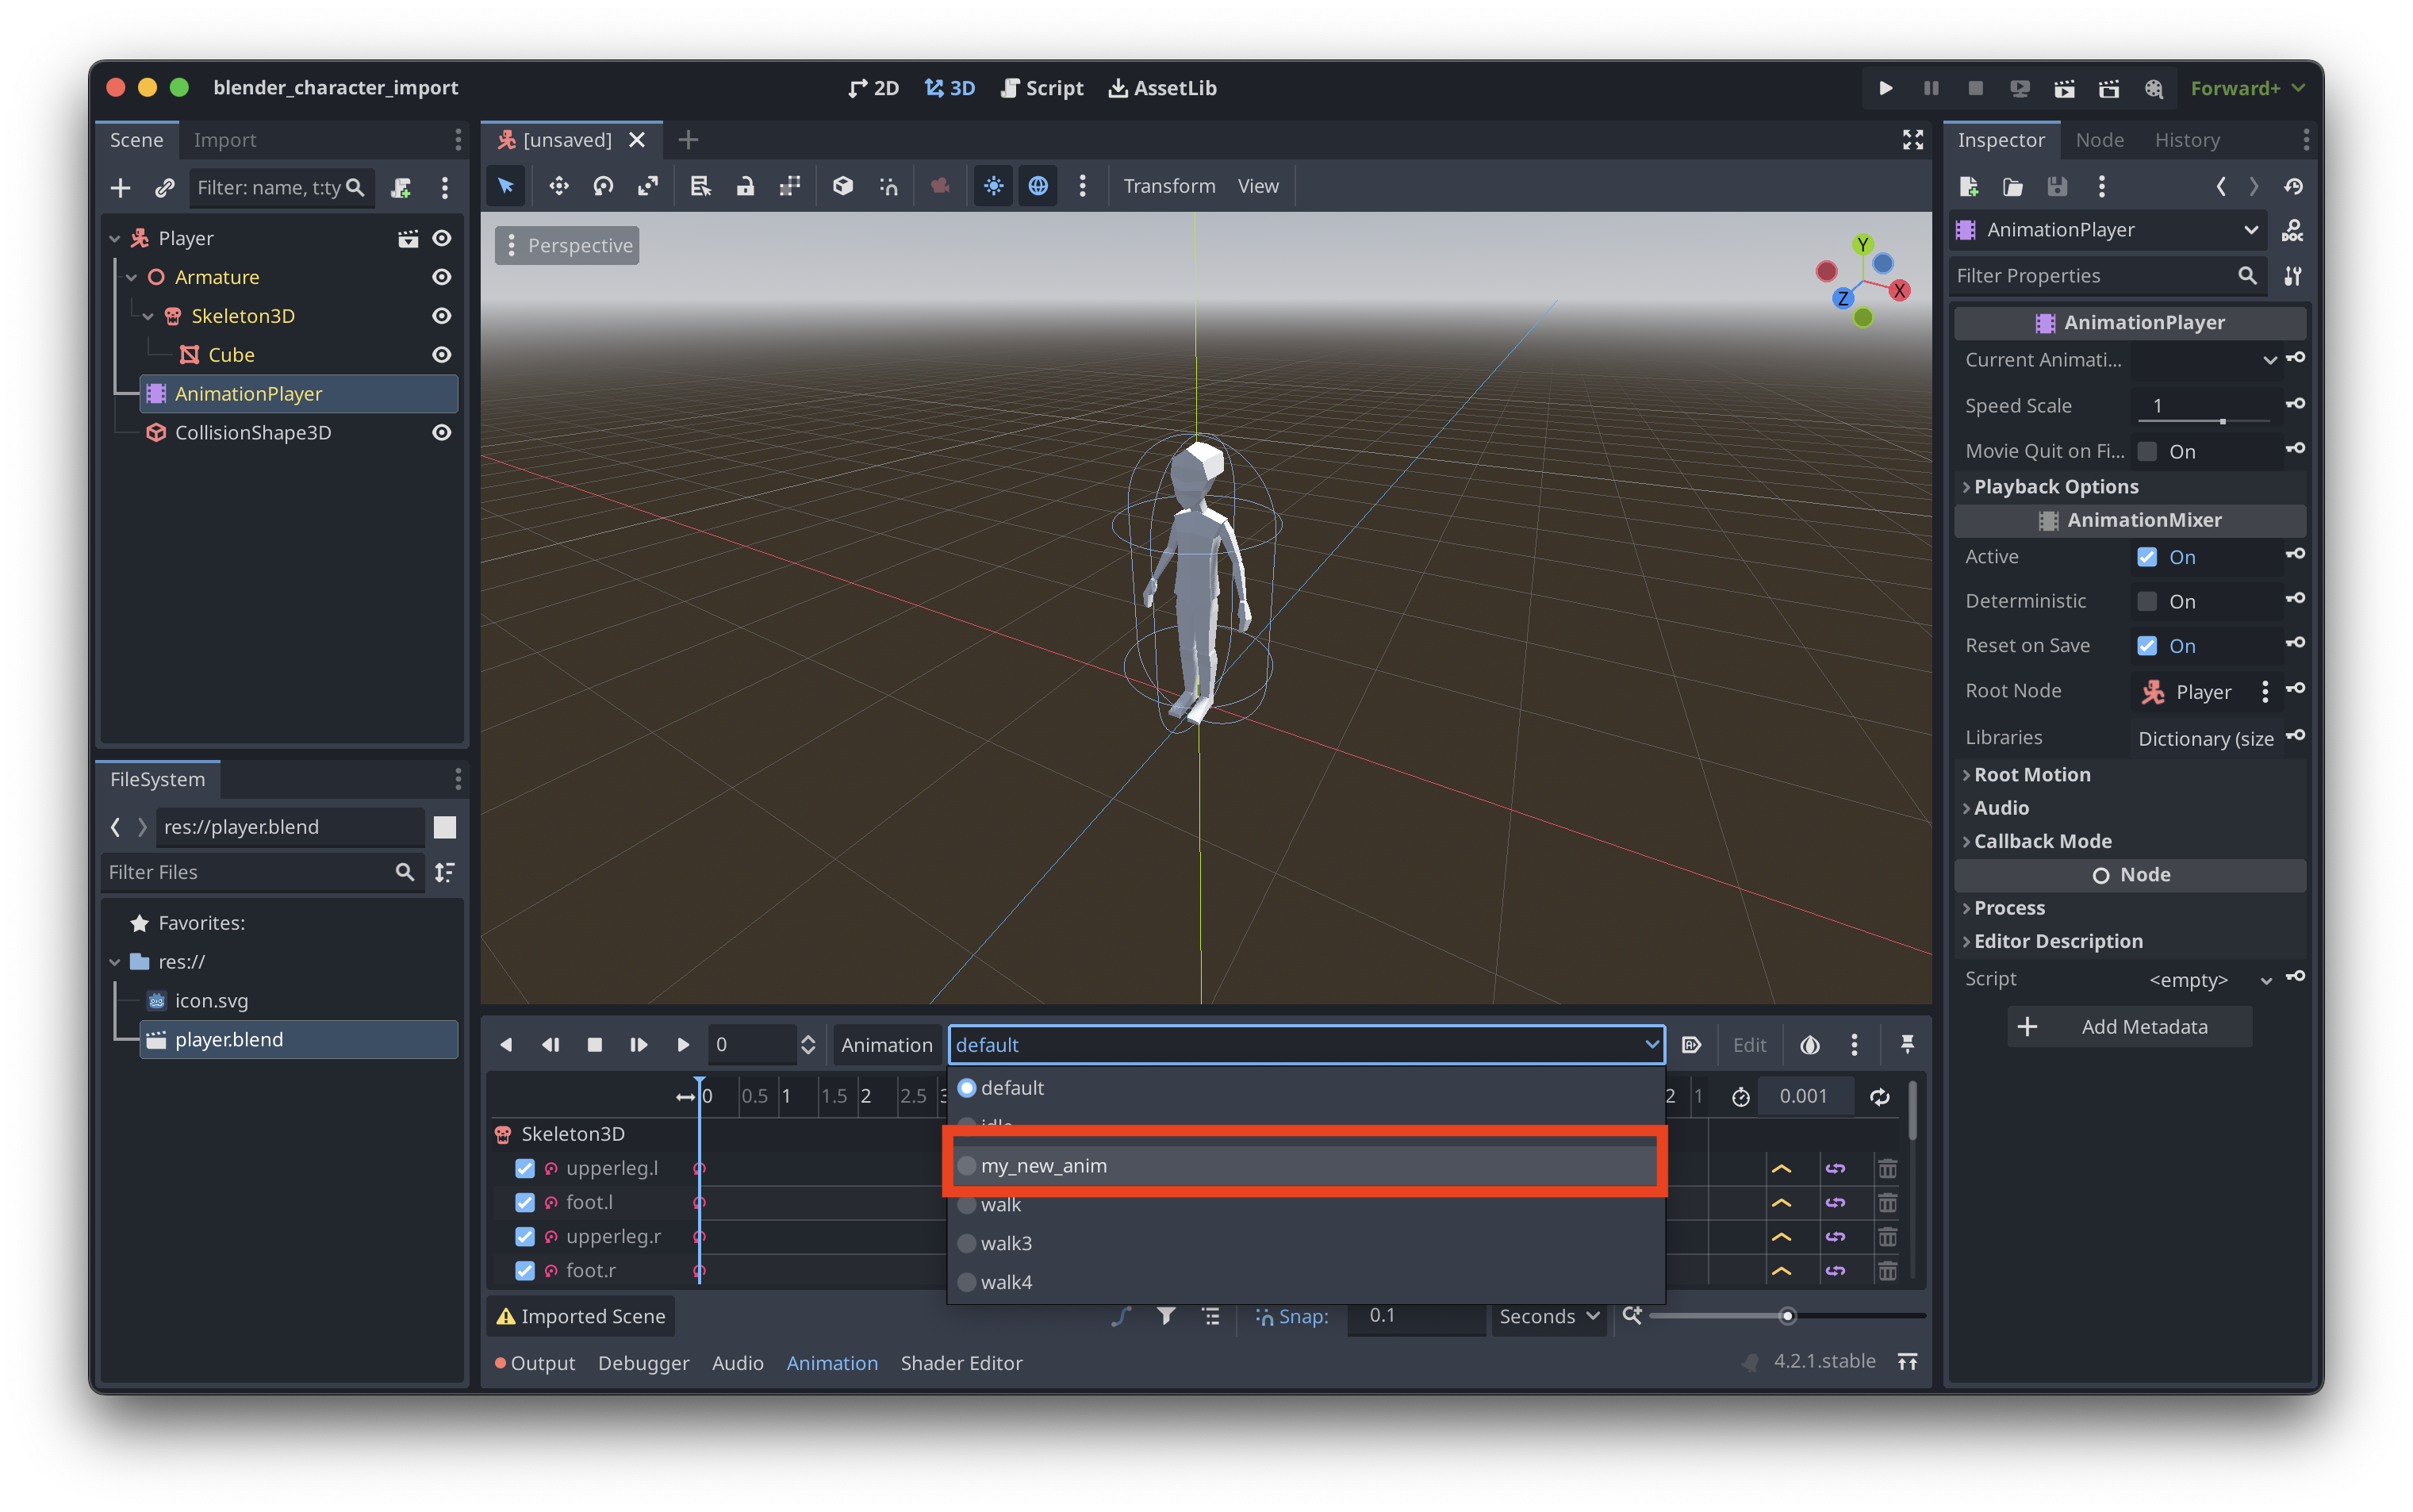
- Check the new Action is shown in the AnimationPlayer.
Other notes
- Start by simply instancing Blender files directly in the scene(s) they’ll being used. Only create an Inherited Scene (as shown in this post) when you need to add sibling or child nodes, or change the type of the root node.
- It’s still possible (although perhaps discouraged) to change attributes of the yellow-colored nodes imported from Blender in the scene’s node tree, such as
Transform. - If you need to use the same Blender file as the root of two different scenes – for example, your hero character and NPCs – and these two use cases have different root types (e.g. CharacterBody3D, StaticBody3D), then you’ll need to find a workaround since the import settings are tied to the Blender file and not the individual Inherited Scenes.
- I’m not a seasoned Blender/Godot/game developer, so if you find any inaccuracies in this post, please contact me.