Indie Game Devlog 02 - 3D Level Blockout
It was tough, but I knew I had to break away from my 2D project sooner than later if my ultimate goal was to make a 3D or 2.5D game.
I started a new Godot project and clicked into the 3D tab.
Back to prototyping
I wanted to start small again, getting the entire intro act working in an “art-light” style before trying to integrate any sort of custom 3D models, materials, or animations.
I started remaking the world by creating a default environment with a sun to light everything. The best way to prototype objects was to use Godot’s very basic support for 3D shapes. I created a MeshInstance3D for the floor and a capsule to represent the player, and collisions to prevent the player from falling through the floor.
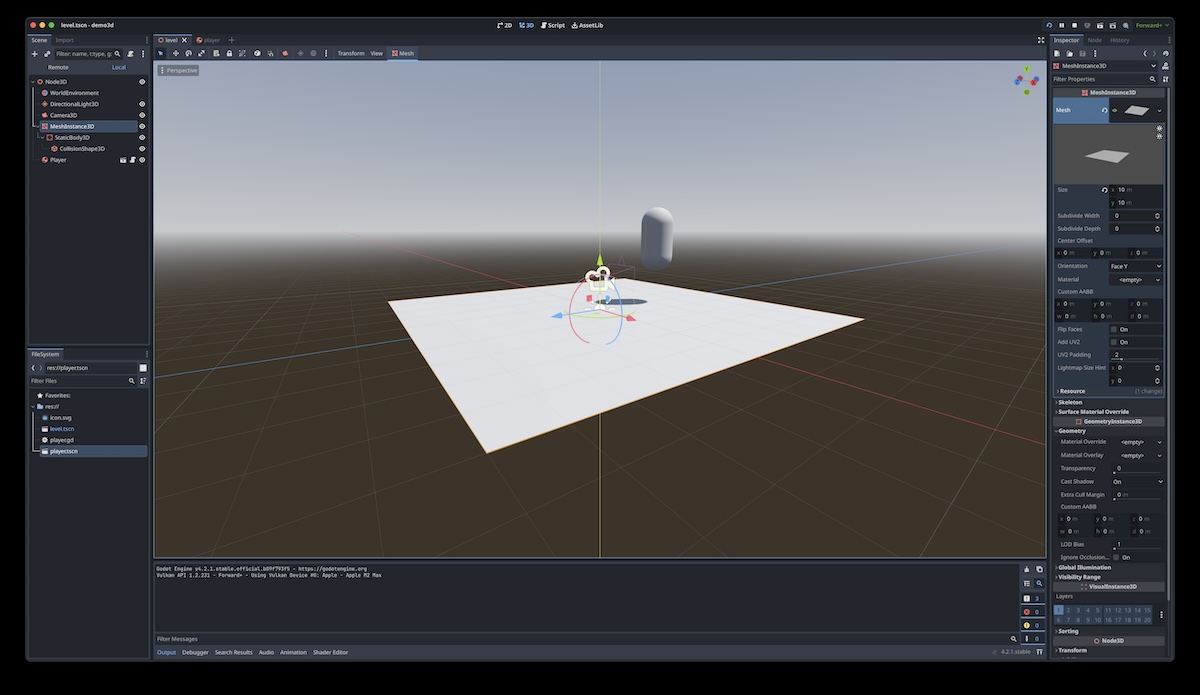
Next was the most basic player and camera controller code. Player code is provided in an optional template by Godot so I started with that.
I immediately needed to pause to make a decision of exactly what kind of camera and navigation style I wanted to support. Camera and navigation are two of the fundamental components that give a game its identity. Imagine your favorite FPS with a third person camera instead of first person. It’s arguably a completely different game. This decision has knock-on effects that can decimate or compound the future work required. For example, a first-person-only camera may not require any sort of player character model at all. However, the camera and navigation decision is not set in stone, and the goal at this point is to do just enough work to feel confident making that decision before adding more detail across all assets.
At this point, I’ve decided on a third-person camera with classic PC 3D platformer controls of WASD keys for moving and strafing, and the mouse to pan the viewport up and down within fixed bounds.
I did a little copying and pasting for the NPCs, then gave it a test run.
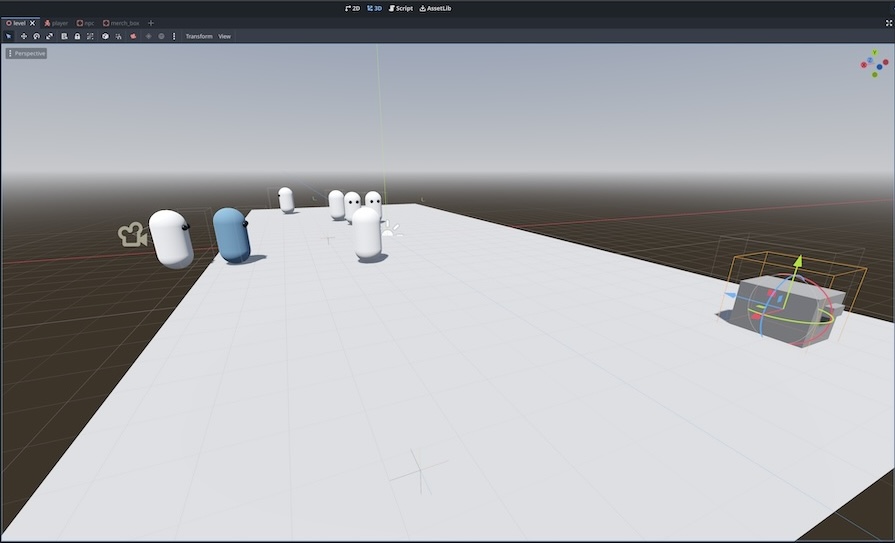
The simplicity of the main game code from the 2D version of the game allowed me to port it almost trivially to a 3D context. The primary difficulties were actually in modifying the hardcoded position and rotation animations (via tweens) for a 3D context. There’s an introductory walkthrough in Godot docs that helped me begin to understand the complexities of transforms in 3D. I wanted to spend a little time digging into it even if I’d be throwing this code out simply to prime my brain for the next time I encounter this problem.
After porting, the demo looked like this:
The demo above isn’t 1-to-1 feature complete compared to the 2D version. It doesn’t include the intro cutscene, nor the custom overhead dialogue bubbles, nor the splash scene or end game scenes. But those aren’t really important yet because I won’t be doing any playtesting for this version without 3D assets at the next level of fidelity.
Blender as a 3D tool
Although Godot is a 2D and 3D game engine with a full IDE and GUI, it intentionally leans on external tools for complex 3D modeling and animation. One of the reasons I chose Godot as the game engine is its first class support for multifunction 3D design tool Blender.
I’m already familiar with Blender, taking my first baby steps with the free, OSS application 3 or 4 years ago. Over that time, my dabbling has become more regular and started to cover more of the tools available in Blender. Separately, this includes basic 3D modeling, environment modeling, character modeling, material creation, rigging, lighting, 2D animation, and 3D animation.
This past experience making 3D assets, although at varying degrees of beginner level, is what gave me enough confidence to commit to a 3D game. I’m very much clear on that fact it’s going to be an uphill battle, but I legitimately enjoy working in 3D enough to push through most of the challenges I’ll face. Additionally, working in 3D makes up for my non-mastery (to say the least) of art fundamentals like perspective, lighting and shadows, and anatomy.
For the level of quality I’m targeting, I need to create the environments, characters, and most animations in Blender and import them into Godot. In game development, the flow of assets between different applications is called an asset pipeline.
There will always be impedance mismatches between tools; most tools’ export formats will not be 100% readable by the importing application. My next goal was to quickly and efficiently understand the current (but changing) limitations of the interface between Blender and Godot.
I started where I usually start by skimming the official Godot documentation, then watching a few tutorials. These two sources were enough to get the broad strokes:
- When imported into the Godot project’s file system, Blender files can be used as-is and even dragged into an existing Godot scene (this is huge). Under the hood, Godot is transparently monitoring changes in the file, then running Blender’s glTF exporter automatically.
- Appending a special suffix to your objects in Blender will automatically add functionality on the Godot side, such as making a sidecar collision Node3D or ignoring import on that object.
- There is very basic support in Godot for the default physically-based rendering shaders in Blender and their user-defined relationship to the mesh via the UV map.
The only way to find the exact limits was to get modeling.
3D Modeling
I started with the environment model blockout. In the case of my game, the environment model is an indoor bar and venue stage area. It’s essentially 3 linked rooms.
One of the toughest parts of modeling environments for me is getting the proportions right. In my first attempt, I tried to work in all 3 dimensions at the same time, which resulted in me getting the initial measurements incorrect to the point where it was easier just to start over.
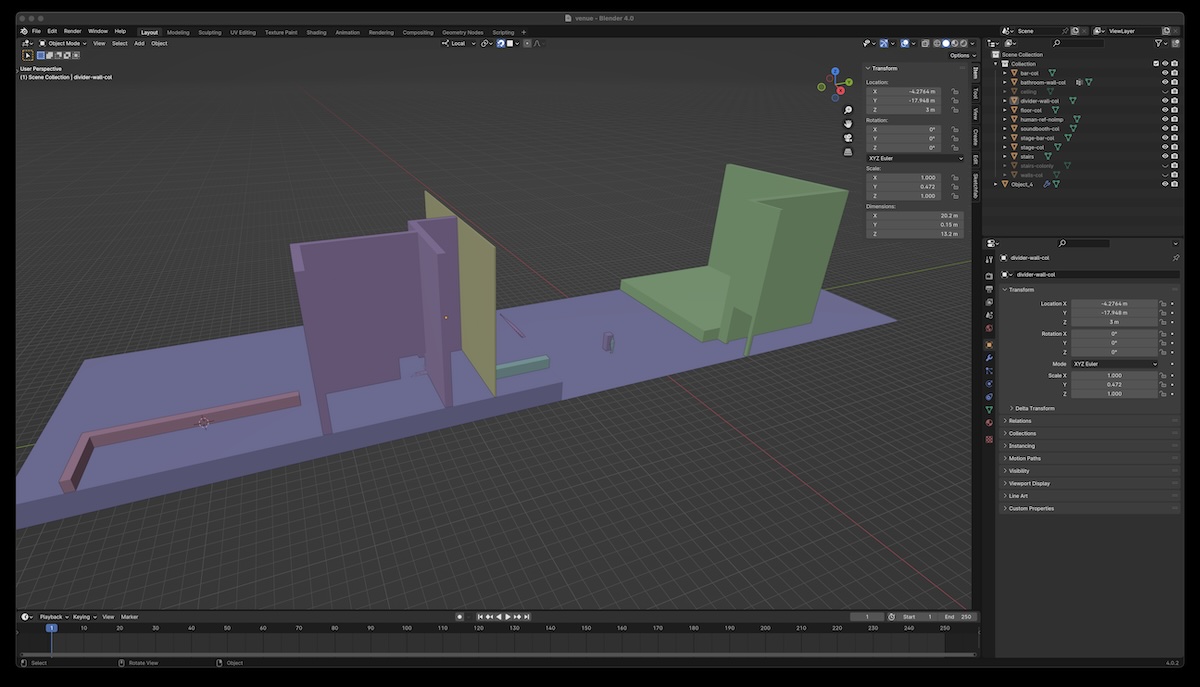
However, even with a very incorrectly proportioned room, I still found that the asset pipeline was functioning properly so far and I could even explore a room with walls in 3D for the first time.
In my second attempt, I went with a tried-and-true approach of starting with a top-down floor plan first. Additionally, I found a properly proportioned humanoid 3D model that I could duplicate liberally around the scene to keep my room proportions in check.
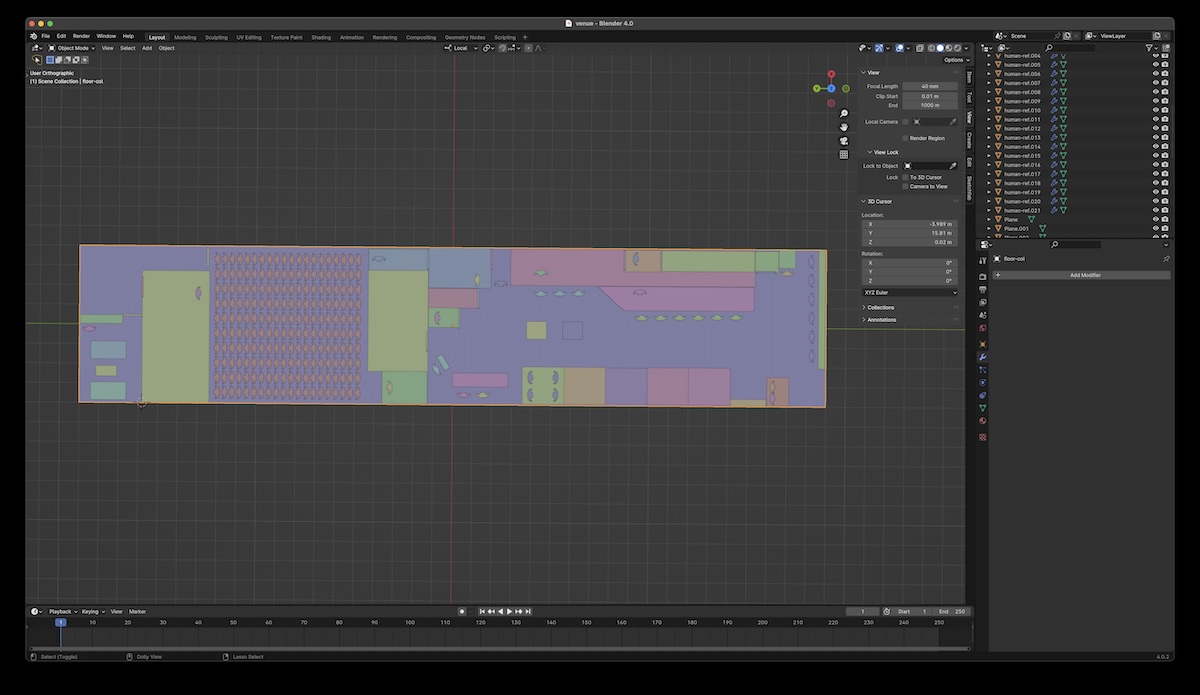
I felt okay about the 2D proportions enough to begin extruding the planes into boxes. This step was also hard!
- I wasn’t sure which meshes I should keep in one object.
- I wasn’t sure how to share walls between adjacent rooms.
- I wasn’t sure how to properly extrude walls to a proper thickness, or whether I should at all.
- I wasn’t sure whether it was right to use a template model for each door frame.
- I wasn’t sure how to handle the face normal direction on planar walls.
I spent a lot of time Googling Chicago bar floor plan templates, dimensions of toilets, bar and chair heights, etc. The aesthetic I’m going for certainly isn’t going to by hyper-realistic, but I don’t trust myself as an artist enough yet to wing it. Leaning on reality harder at first is probably the best way to keep myself in the ballpark.
I did the best I could and finished a 3D blockout, keeping furniture shapes very simple and spending no time on detail.
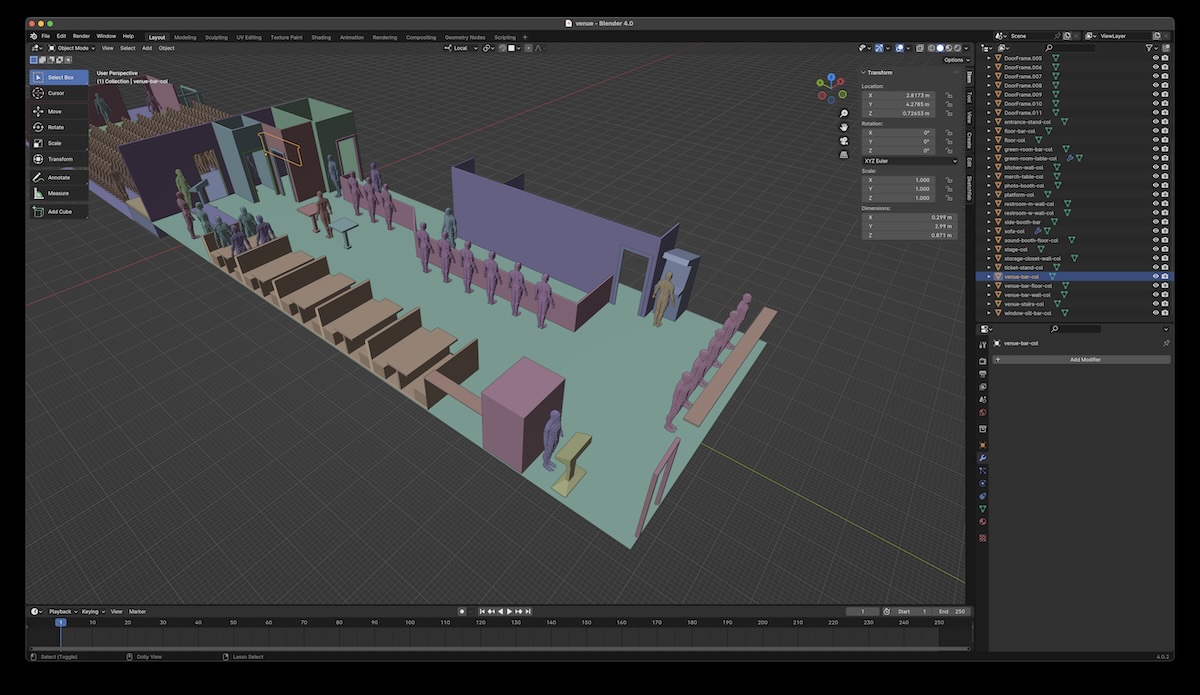
I mostly used separate objects for logically different meshes, if only to better match the Blender/Godot import conventions. I did add some stairs and inclines because I felt their relationship with the player movement code was important to de-risk early.
I did a couple quick rounds of iteration importing the room into Godot, positioning the NPCs, and fixing layout issues.
Lighting
The next task was lighting. In theory, it’d be nice to be able to import as much from Blender as possible, including all lighting, materials, and shader definitions.
Although Godot has limited support for importing light objects from Blender, the Godot docs recommend creating and placing lights in Godot instead. The light object types don’t match one-to-one in Blender/Godot, nor do their parameters.
I gave it a shot though, adding some light types into Blender and seeing how they were handled in Godot. The result wasn’t great nor useful. Adding lights in Godot directly definitely seemed like the right direction.
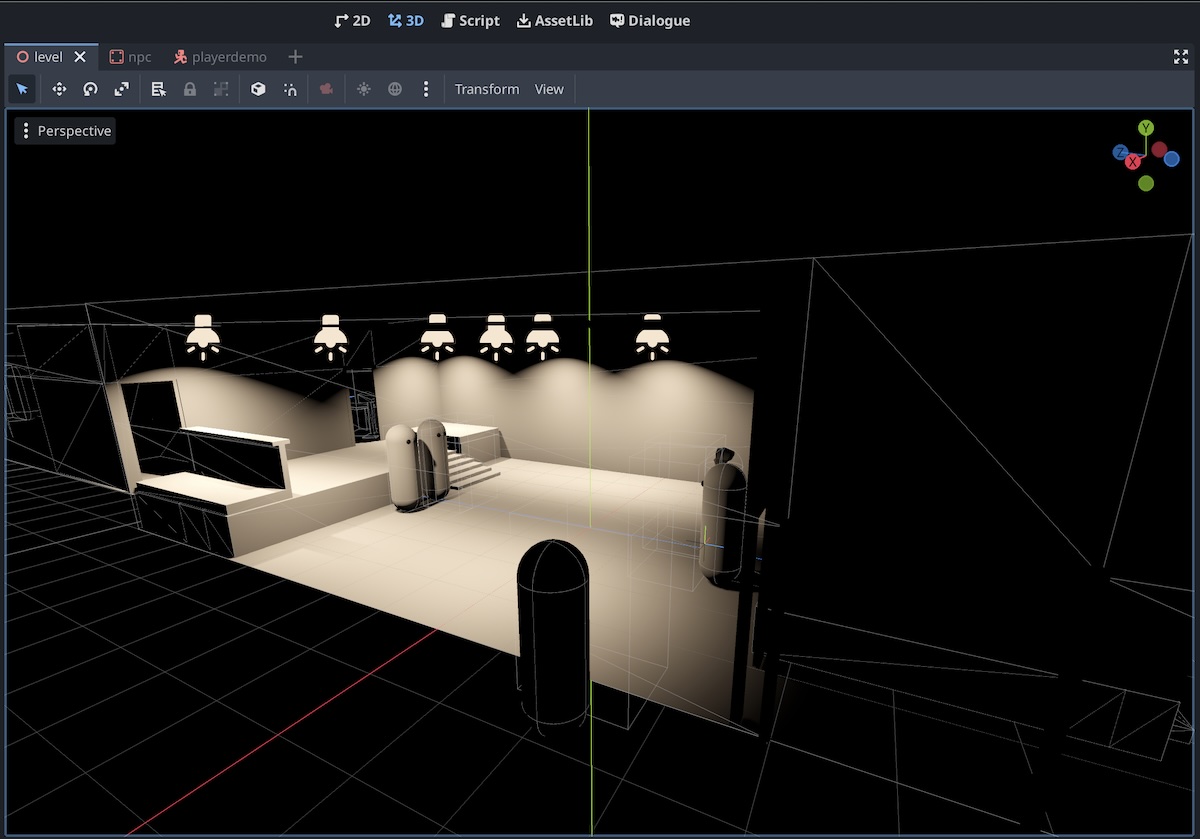
I pulled each of the different native light types into the Godot level scene and jockeyed the parameters. Godot’s live preview pane is super helpful in expediting the feedback cycle.
The Godot WorldEnvironment node has lots of inscrutably-named rendering settings like SSR, SSAO, SSIL, and SDFGI. Some are new and experimental. I watched a few YouTube tutorials again to get the lay of the land, but otherwise I tried to keep my changes from the baseline to a minimum in this experimental stage.
I decided to settle on subdued and moody lighting that produces plenty of shadows. I only lit half the venue area though.
Materials and shaders
With lighting, I could now properly see the effect of materials. Up to now, I was using the base white-ish shader.
From what I’d read, shaders, like lighting, are another part of the Blender/Godot interface that is intentionally underbaked. Each app has its own rendering engine and shaders are necessarily tailored to it. Regardless, it’s still nice to be able to understand the limitations.
I know eventually I’ll have to write/design my own shaders in Godot, either as the base layer or on top of the base materials configured in Blender. Godot shaders has a bunch of recipes I’ll be looking at once I’m at the stage where I’m digging deep into polishing the aesthetic.
If my skills as an artist were stronger, I’d probably start with polished concept art then do the hard work of finding out how to execute that concept art by writing shaders and tweaking lighting. However, my approach is to experiment with the tools at my disposal in a sandbox until I find an aesthetic both I’m satisfied with and know I can execute (by nature of already having executed it).
Back to the practical:
My first experiment in probing the Blender/Godot interface was adding a material in Blender with a single Principled BSDF node with a flat color. Applying this to a one face of a wall worked as expected. So far so good.
Next was doing some kind of interesting variation of the base color with a color ramp or voronoi texture generator. The color input was completely ignored in Godot. Strike out there.
Next was applying an image texture node to base color. I downloaded a few realistic textures from PolyHaven including roughness and normal maps.
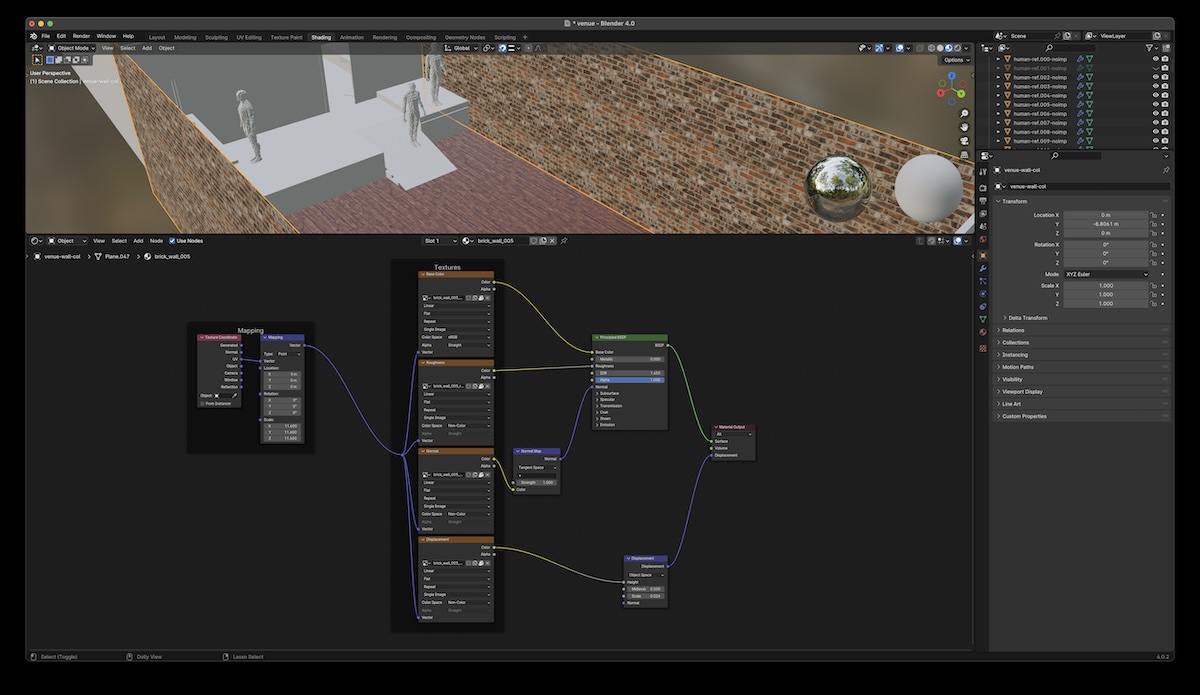
I wired these up and they worked! However, it’s hard to tell whether any of the normal or displacement is appearing correctly.
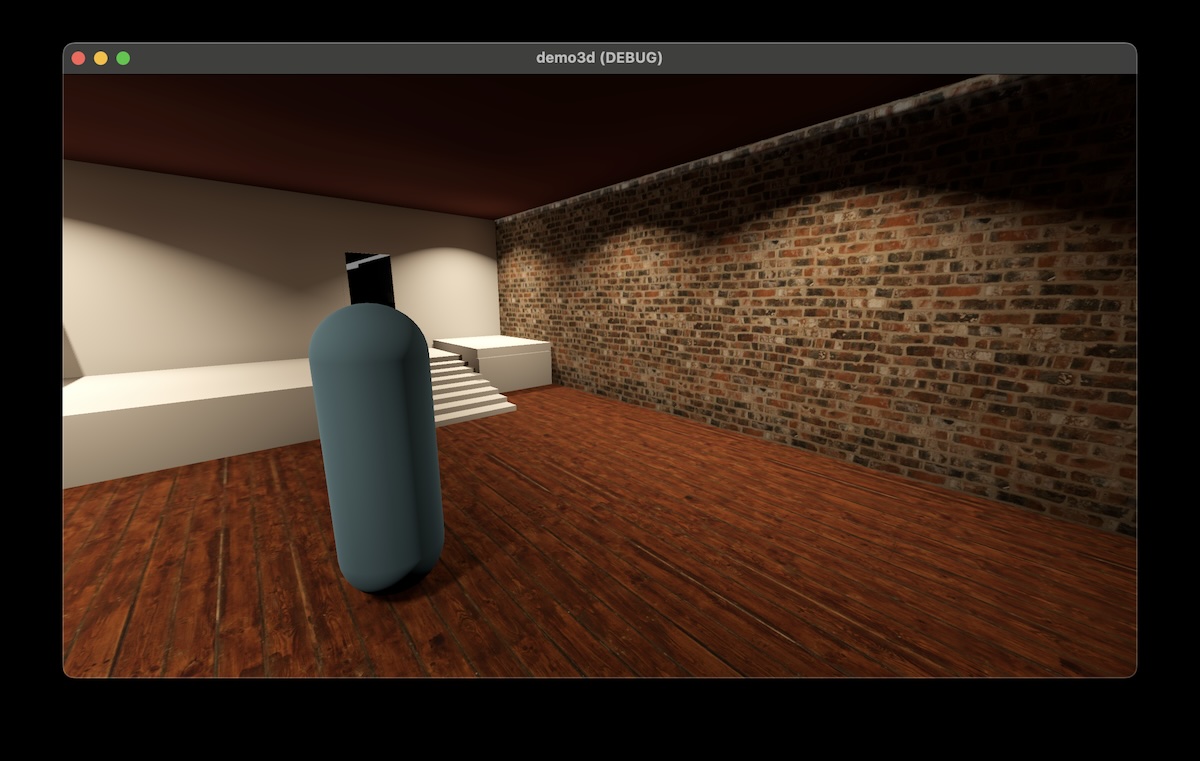
This is certainly not the aesthetic I’m going for, but it’s good to know that a image texture plus PBR node system in Blender is possible.
There’s still plenty to explore regarding materials in Godot. While I ponder my target aesthetic more, my next move is to continue onto base character modeling, rigging, and animation.
Until next time.