Giving Claude Code Eyes to See Your SwiftUI Views
Claude Code works best as a multi-shot agent, iterating on a task by making changes and checking whether its attempts match the target.
Let’s explore one way of giving Claude Code (henceforth “CC”) a way to use its multimodal capabilities to view the results of the SwiftUI code: Swift Snapshot Testing. We’ll look into ways to enhance its image analysis capabilities with tool calling. And finally we’ll see how well it does with the challenge of recreating a SwiftUI View from a reference image.
The strategy in this post is optimized for “unit testing” SwiftUI Views in isolation (i.e. without the status bar, with flexible dimensions, etc.). We’ll briefly review other visualization strategies at the end of this post.
Setting up Swift Snapshot Testing
This is not a full tutorial, so here are some other walkthroughs to get you started:
- How to setup Swift Testing in a Swift or SwiftUI project in Xcode
- pointfreeco/swift-snapshot-testing: Installation
I created a separate target ViewSnapshotTests to isolate these kinds of tests and disabled it from running with Cmd+U alongside my main iOS target.
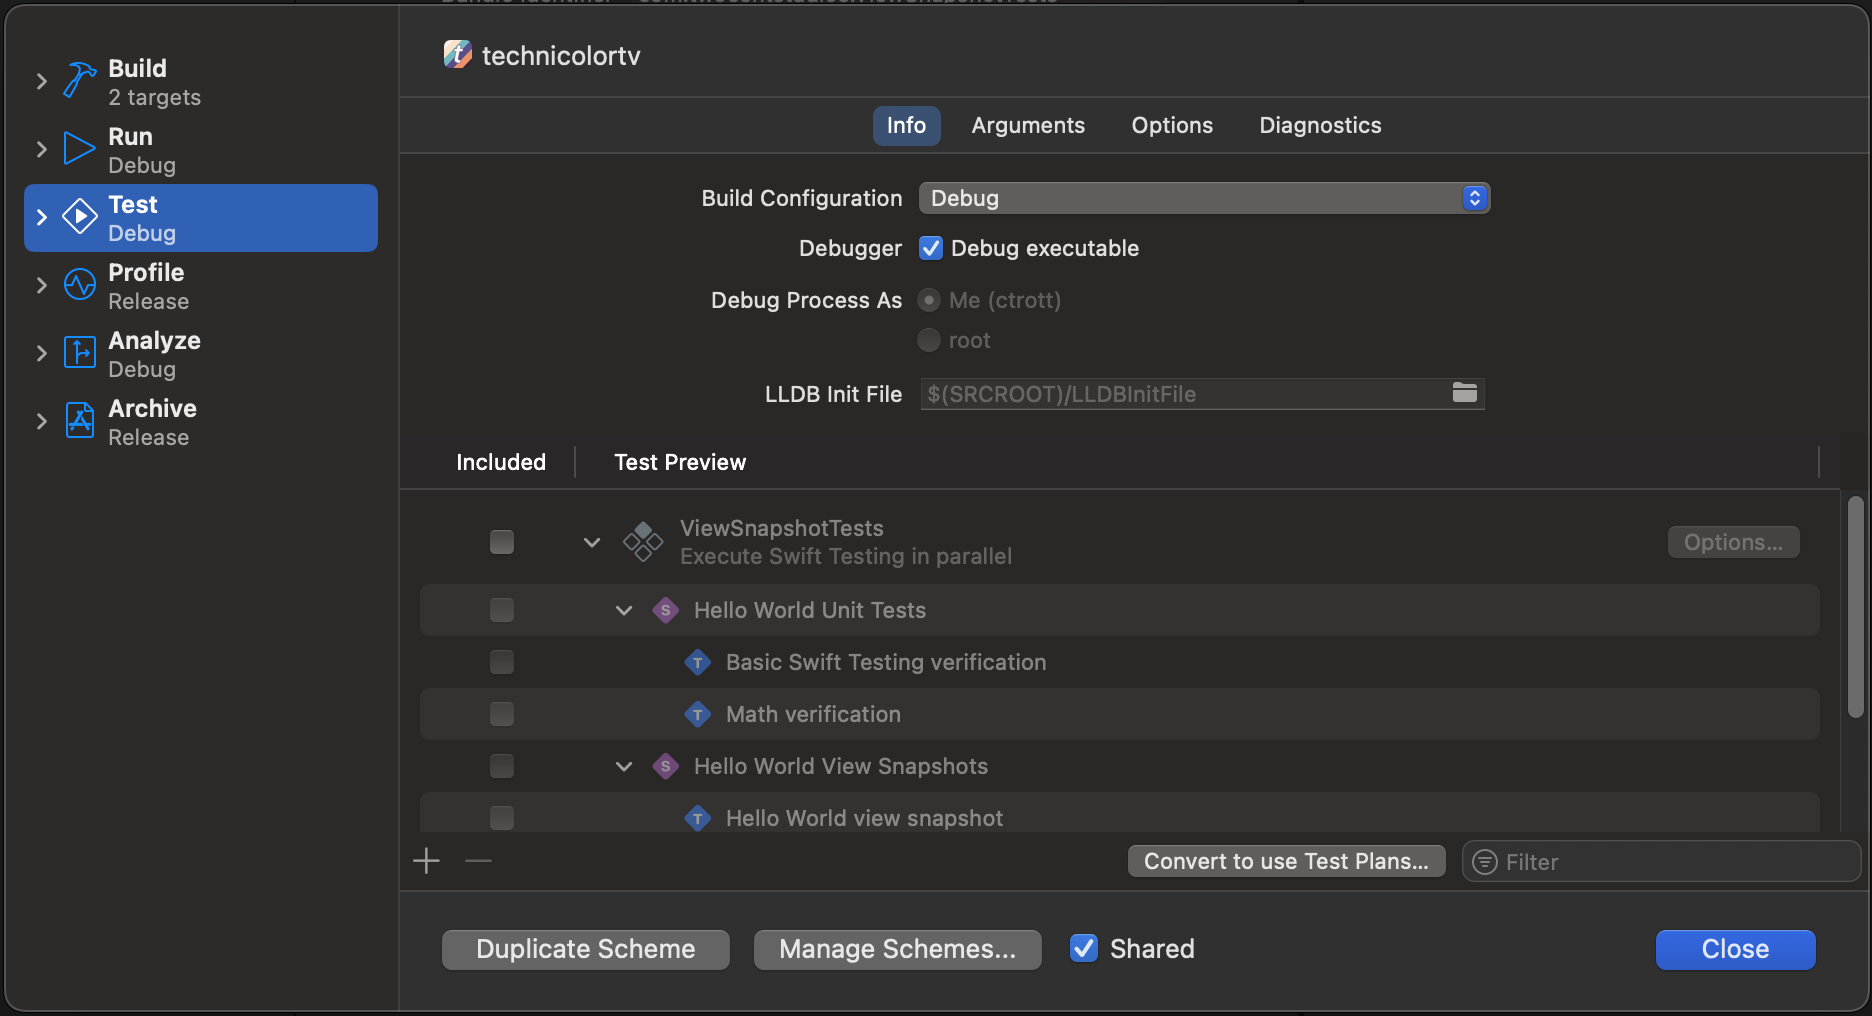
Our goal with this setup is to give CC a way to visually reference its work, not create long-lived snapshot tests that will be maintained.
Let’s add a file we’ll have CC use a template. We’ll instruct it to modify this test, run it, then reset it once the verification is complete.
/// ViewVerificationTests.swift
import SnapshotTesting
import SwiftUI
@testable import mytarget
import Testing

@Suite("ViewVerificationTests")
@MainActor
struct ViewVerificationTests {
    @Test("ViewVerificationTest")
    func viewVerification() {
    	// Replace with the view under test
        let view = EmptyView()

        assertSnapshot(
            of: view,
            as: .image(layout: .fixed(width: 0, height: 0)),
            record: true
        )
    }
}
Then we can try exercising this template:
/// HelloWorldView.swift
struct HelloWorldView: View {
    var message: String = "Hello, World!"

    var body: some View {
        VStack(spacing: 20) {
            Text(message)
                .font(.title)

            Rectangle()
                .fill(Color.blue)
                .frame(width: 100, height: 50)
                .cornerRadius(8)
        }
        .padding()
        .background(.background.secondary)
    }
}
// Modify the template test
func viewVerification() {
    let view = HelloWorldView()

    assertSnapshot(
        of: view,
        as: .image(layout: .fixed(width: 200, height: 150)),
        record: true
    )
}
If you run the suite manually, the test will (as expected) fail, and a new folder and image will be created in the test directory:

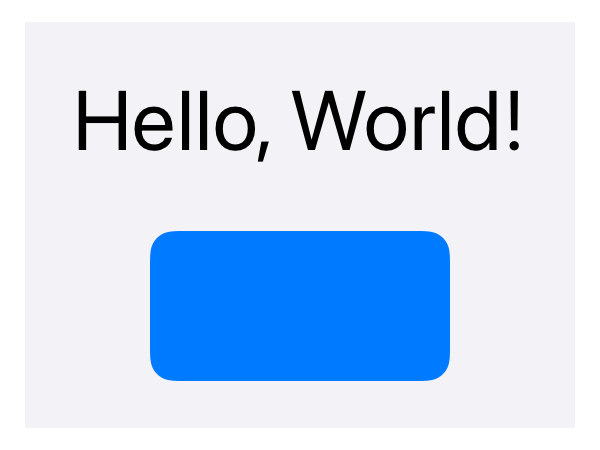
Instructions for Claude Code’s iteration loop
Exactly when you, the developer, decide to use Claude’s visualization depends highly on your design -> code workflow.
For the sake of argument, let’s start by adding this instruction to CLAUDE.md:
Any time you create or modify a SwiftUI View, use the workflow defined in the SwiftUI View Verification Workflow section below to check your work. Iterate at least 2 times and up to 5 times before considering your SwiftUI code complete.
The instruction is heavy handed, but will give us a baseline requirements to relax. Now let’s describe the ideal workflow to CC in detail:
## SwiftUI View Verification Workflow

### View Creation Workflow

1. Create a SwiftUI View based on the developer-provided written specifications or reference image.
2. Run xcodegen to add the `.swift` file to the `.xcodeproj`.
3. Modify the `viewVerification` test in `ViewVerificationTests.swift` to use the new View and set the expected layout.
4. Run `xcodebuild test -only-testing:"ViewSnapshotTests/ViewVerificationTests" -quiet` and ignore the expected test failure.
5. Read the output image `ViewSnapshotTests/__Snapshots__/ViewVerificationTests/viewVerification.1.png` and compare it to the written specifications or reference image. Use any image analysis tools or techniques listed in the "Image Analysis Strategies" section.
6. Plan a list of changes to the SwiftUI View code that will bring `viewVerification.1.png` closer to the written spec or reference image.
7. Implement the changes in the plan.
8. Run the command in (4) to replace the snapshot image.
9. Repeat steps (5) to (9) as many times as specified in previous instructions.
10. Once I have approved, please reset the test files and image to their original state.
You’ll need to heavily modify that prompt to fit with your ideal workflow and use the proper command line commands for your project. For example, if you’re going off a written spec with no particular design in mind, you could to add “make the View more beautiful” after each iteration.
It’s important to note that xcodebuild test can only target suites via -only-testing, not individual tests like swift test can.
The View Modification Workflow would be subset of the View Creation Workflow. In that prompt, we tell CC to reference another section for image analysis. Below are some ImageMagick commands that could be useful.
# Extract exact RGB values from specific coordinates
magick image.png -crop 1x1+200+300 txt:
# Output: (240,240,240,255) #F0F0F0FF grey94

# Check image dimensions and properties
magick identify image.png
# Output: image.png PNG 1206x2622 1206x2622+0+0 8-bit sRGB

# Get Root Mean Square Error between images
magick compare -verbose -metric RMSE reference.png snapshot.png null:
# Provides per-channel distortion percentages

# Generate visual difference overlay
magick compare reference.png snapshot.png diff_output.png
# Red areas show differences, black areas show matches
Weak points of snapshot testing
- As far as I can tell, it’s not possible to get the full system UI wrapper with snapshot testing (e.g. the status bar).
- There are built in device sizes, but they aren’t frequently updated to include new devices.
Challenge: create a SwiftUI View from a reference image
I gave CC a challenge as a way to develop the above setup and strategies. I gave it the simple users list screen from my recently re-released app Vinylogue, captured directly from the simulator.
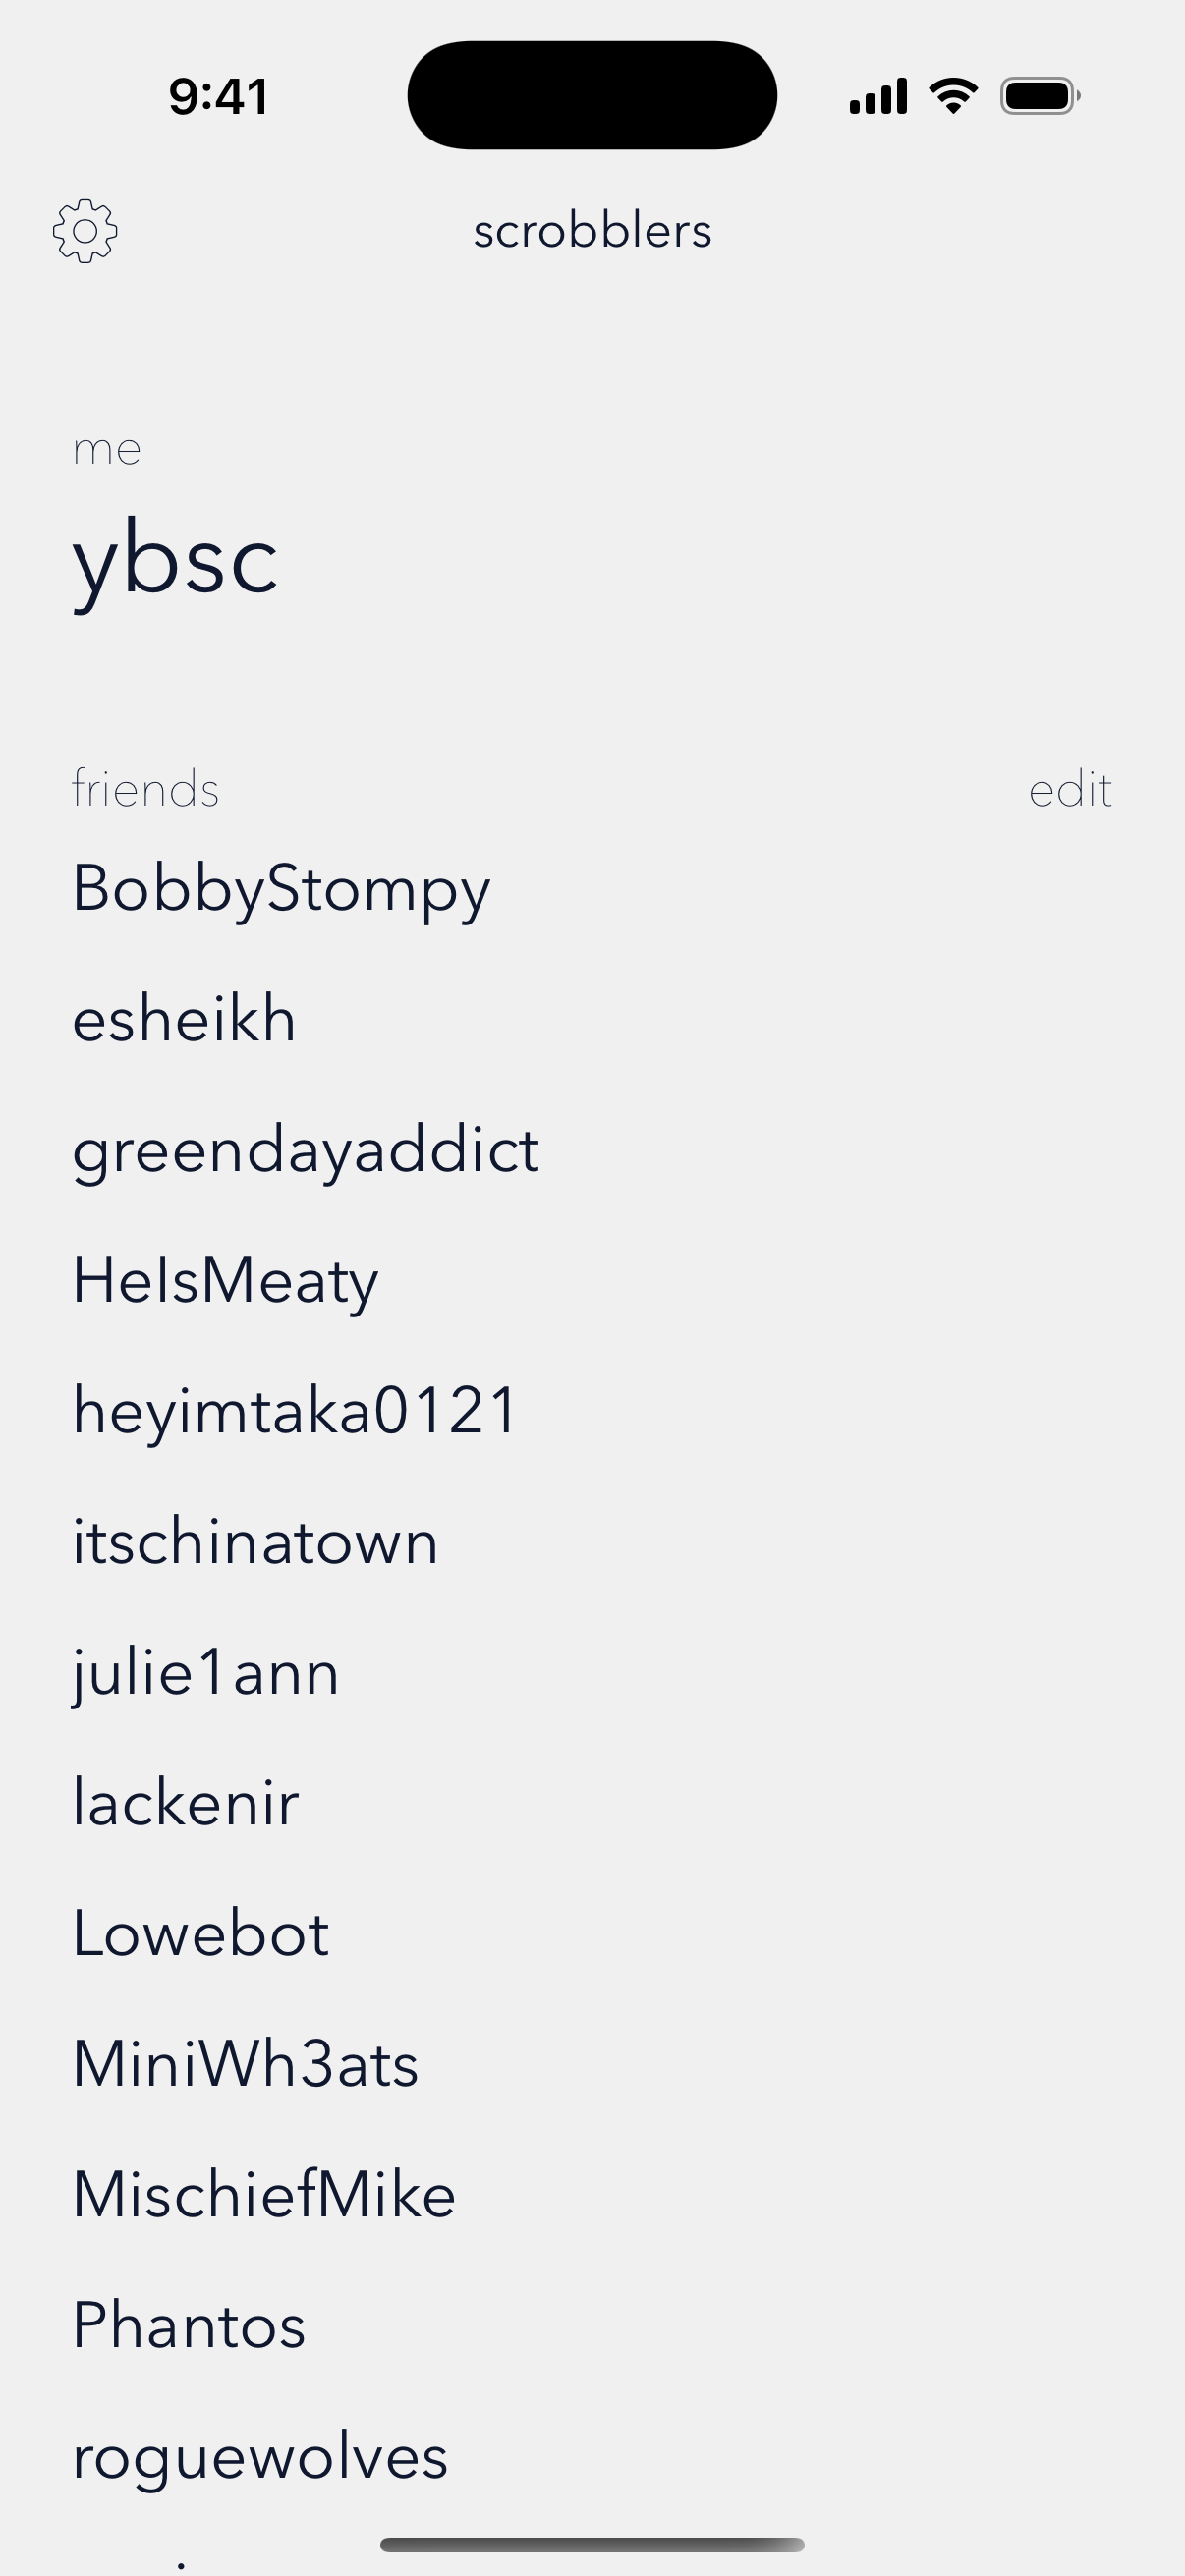
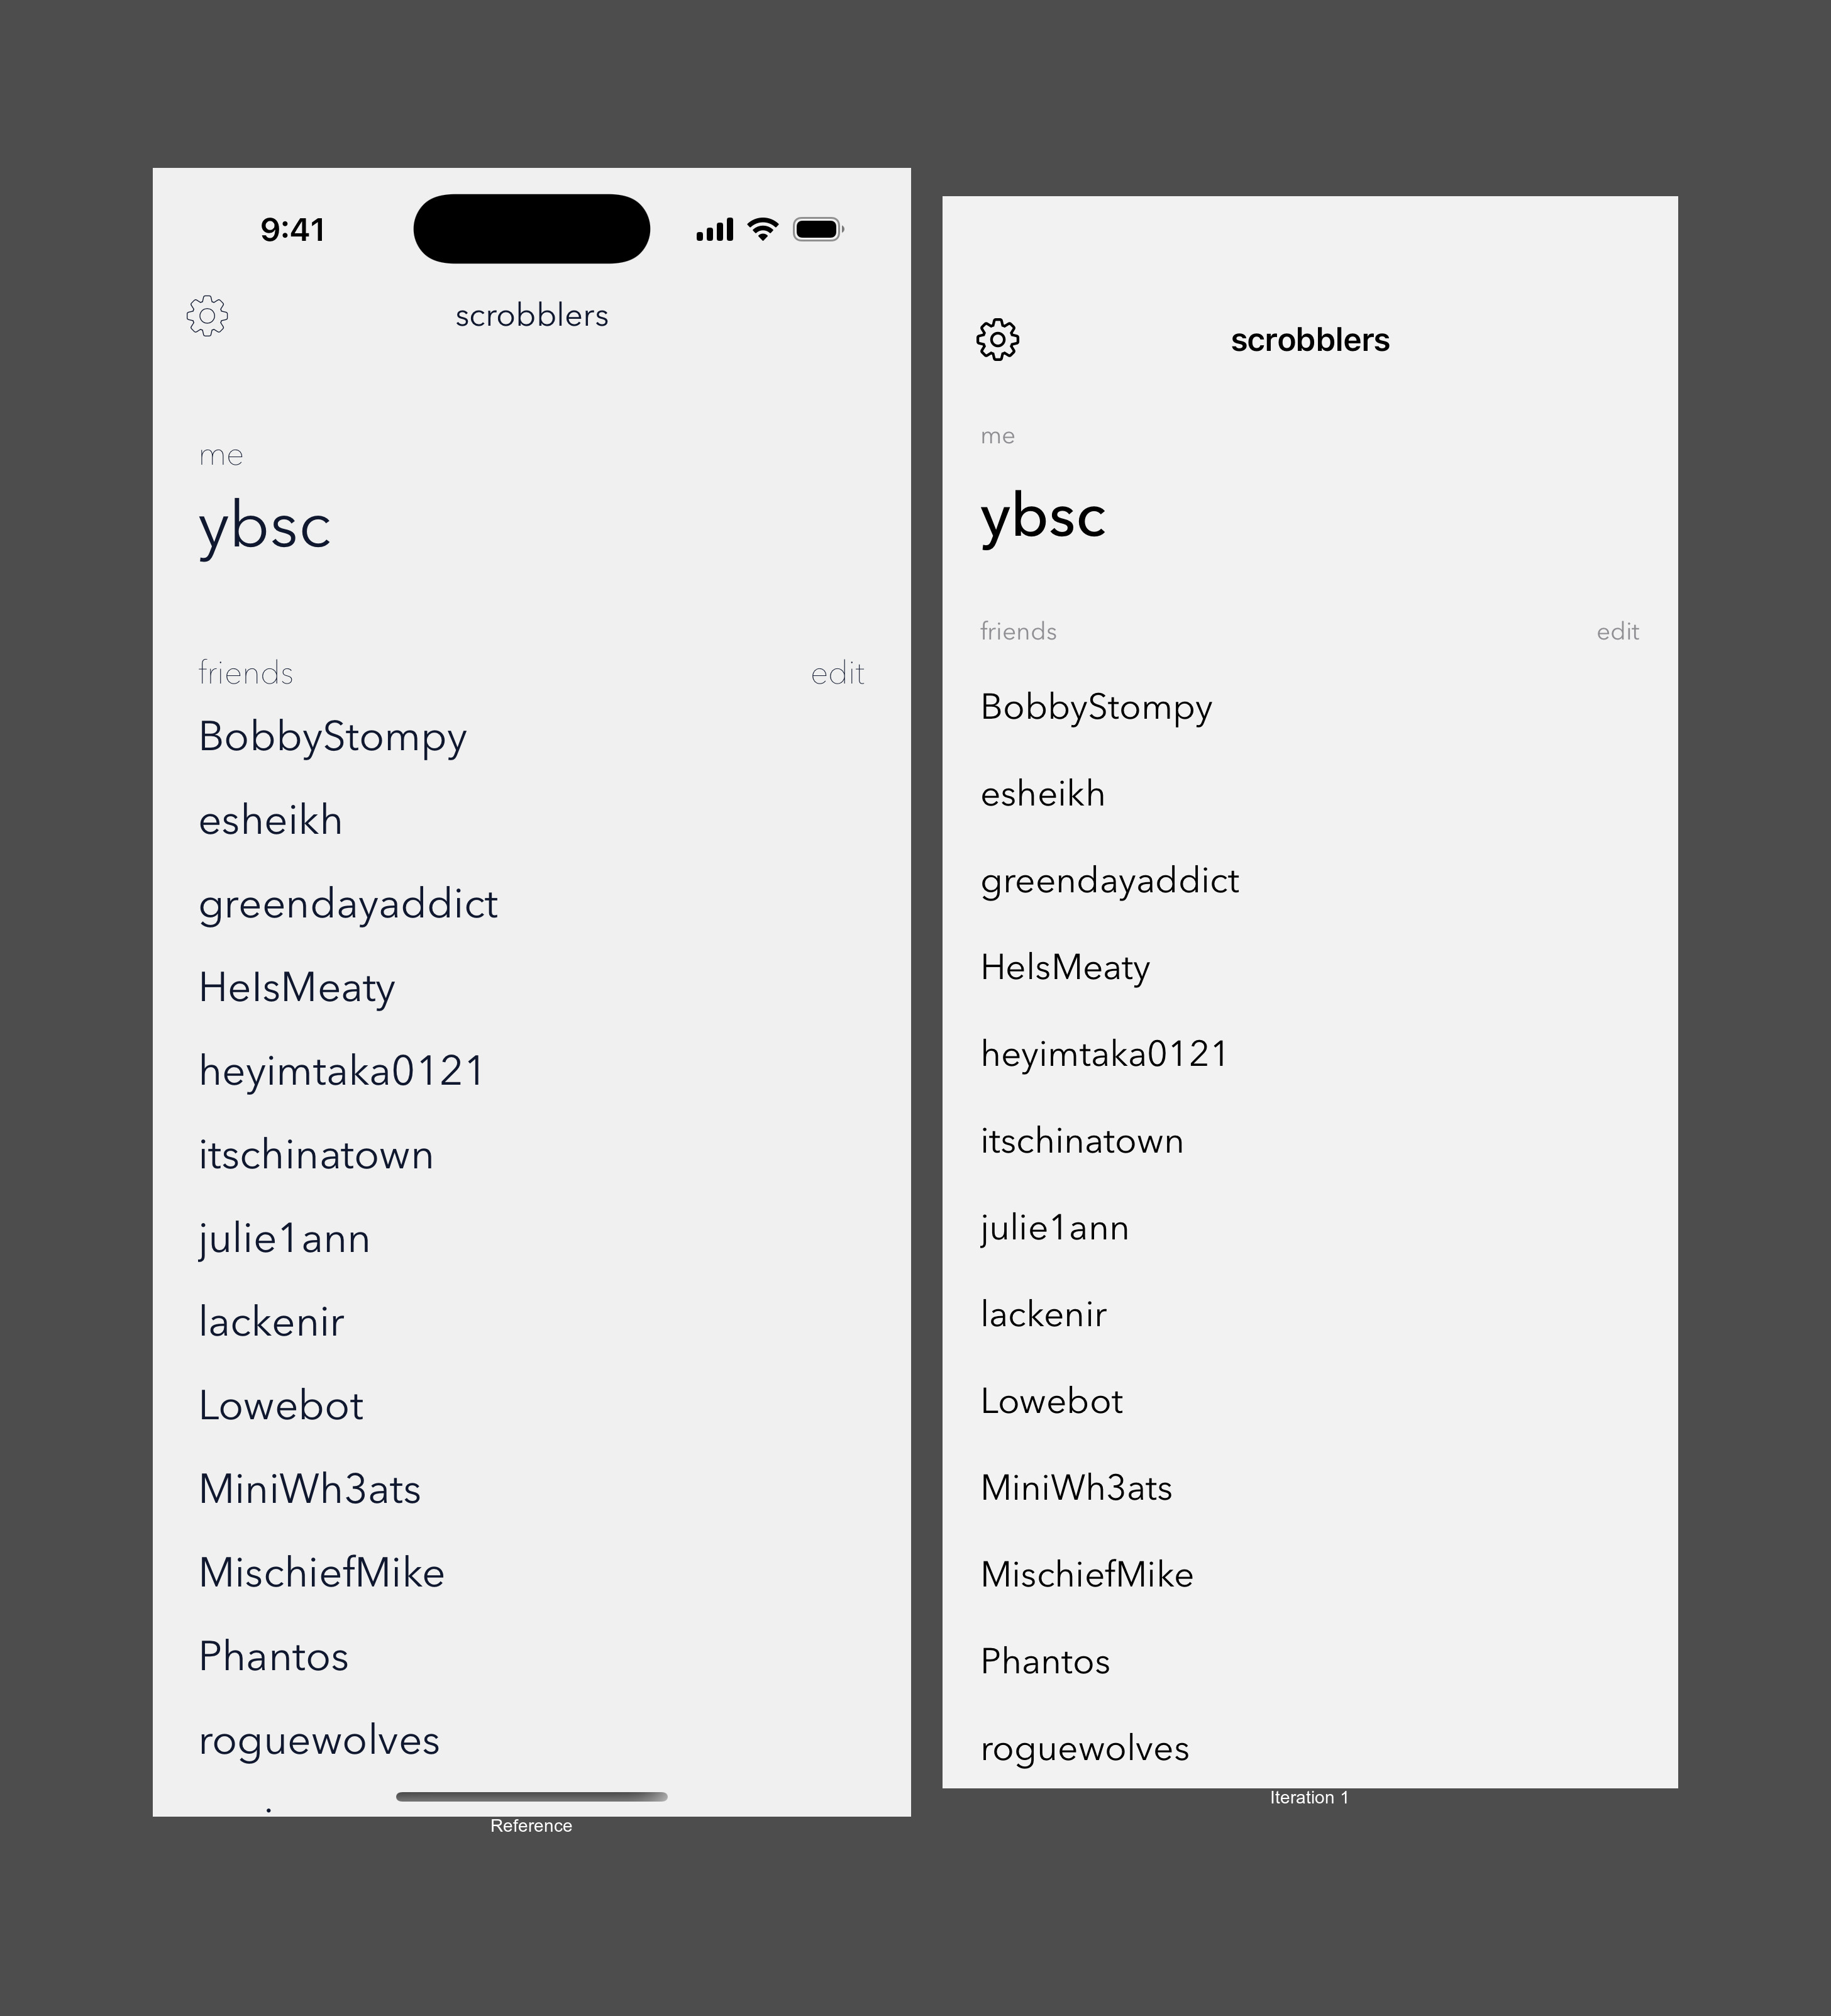
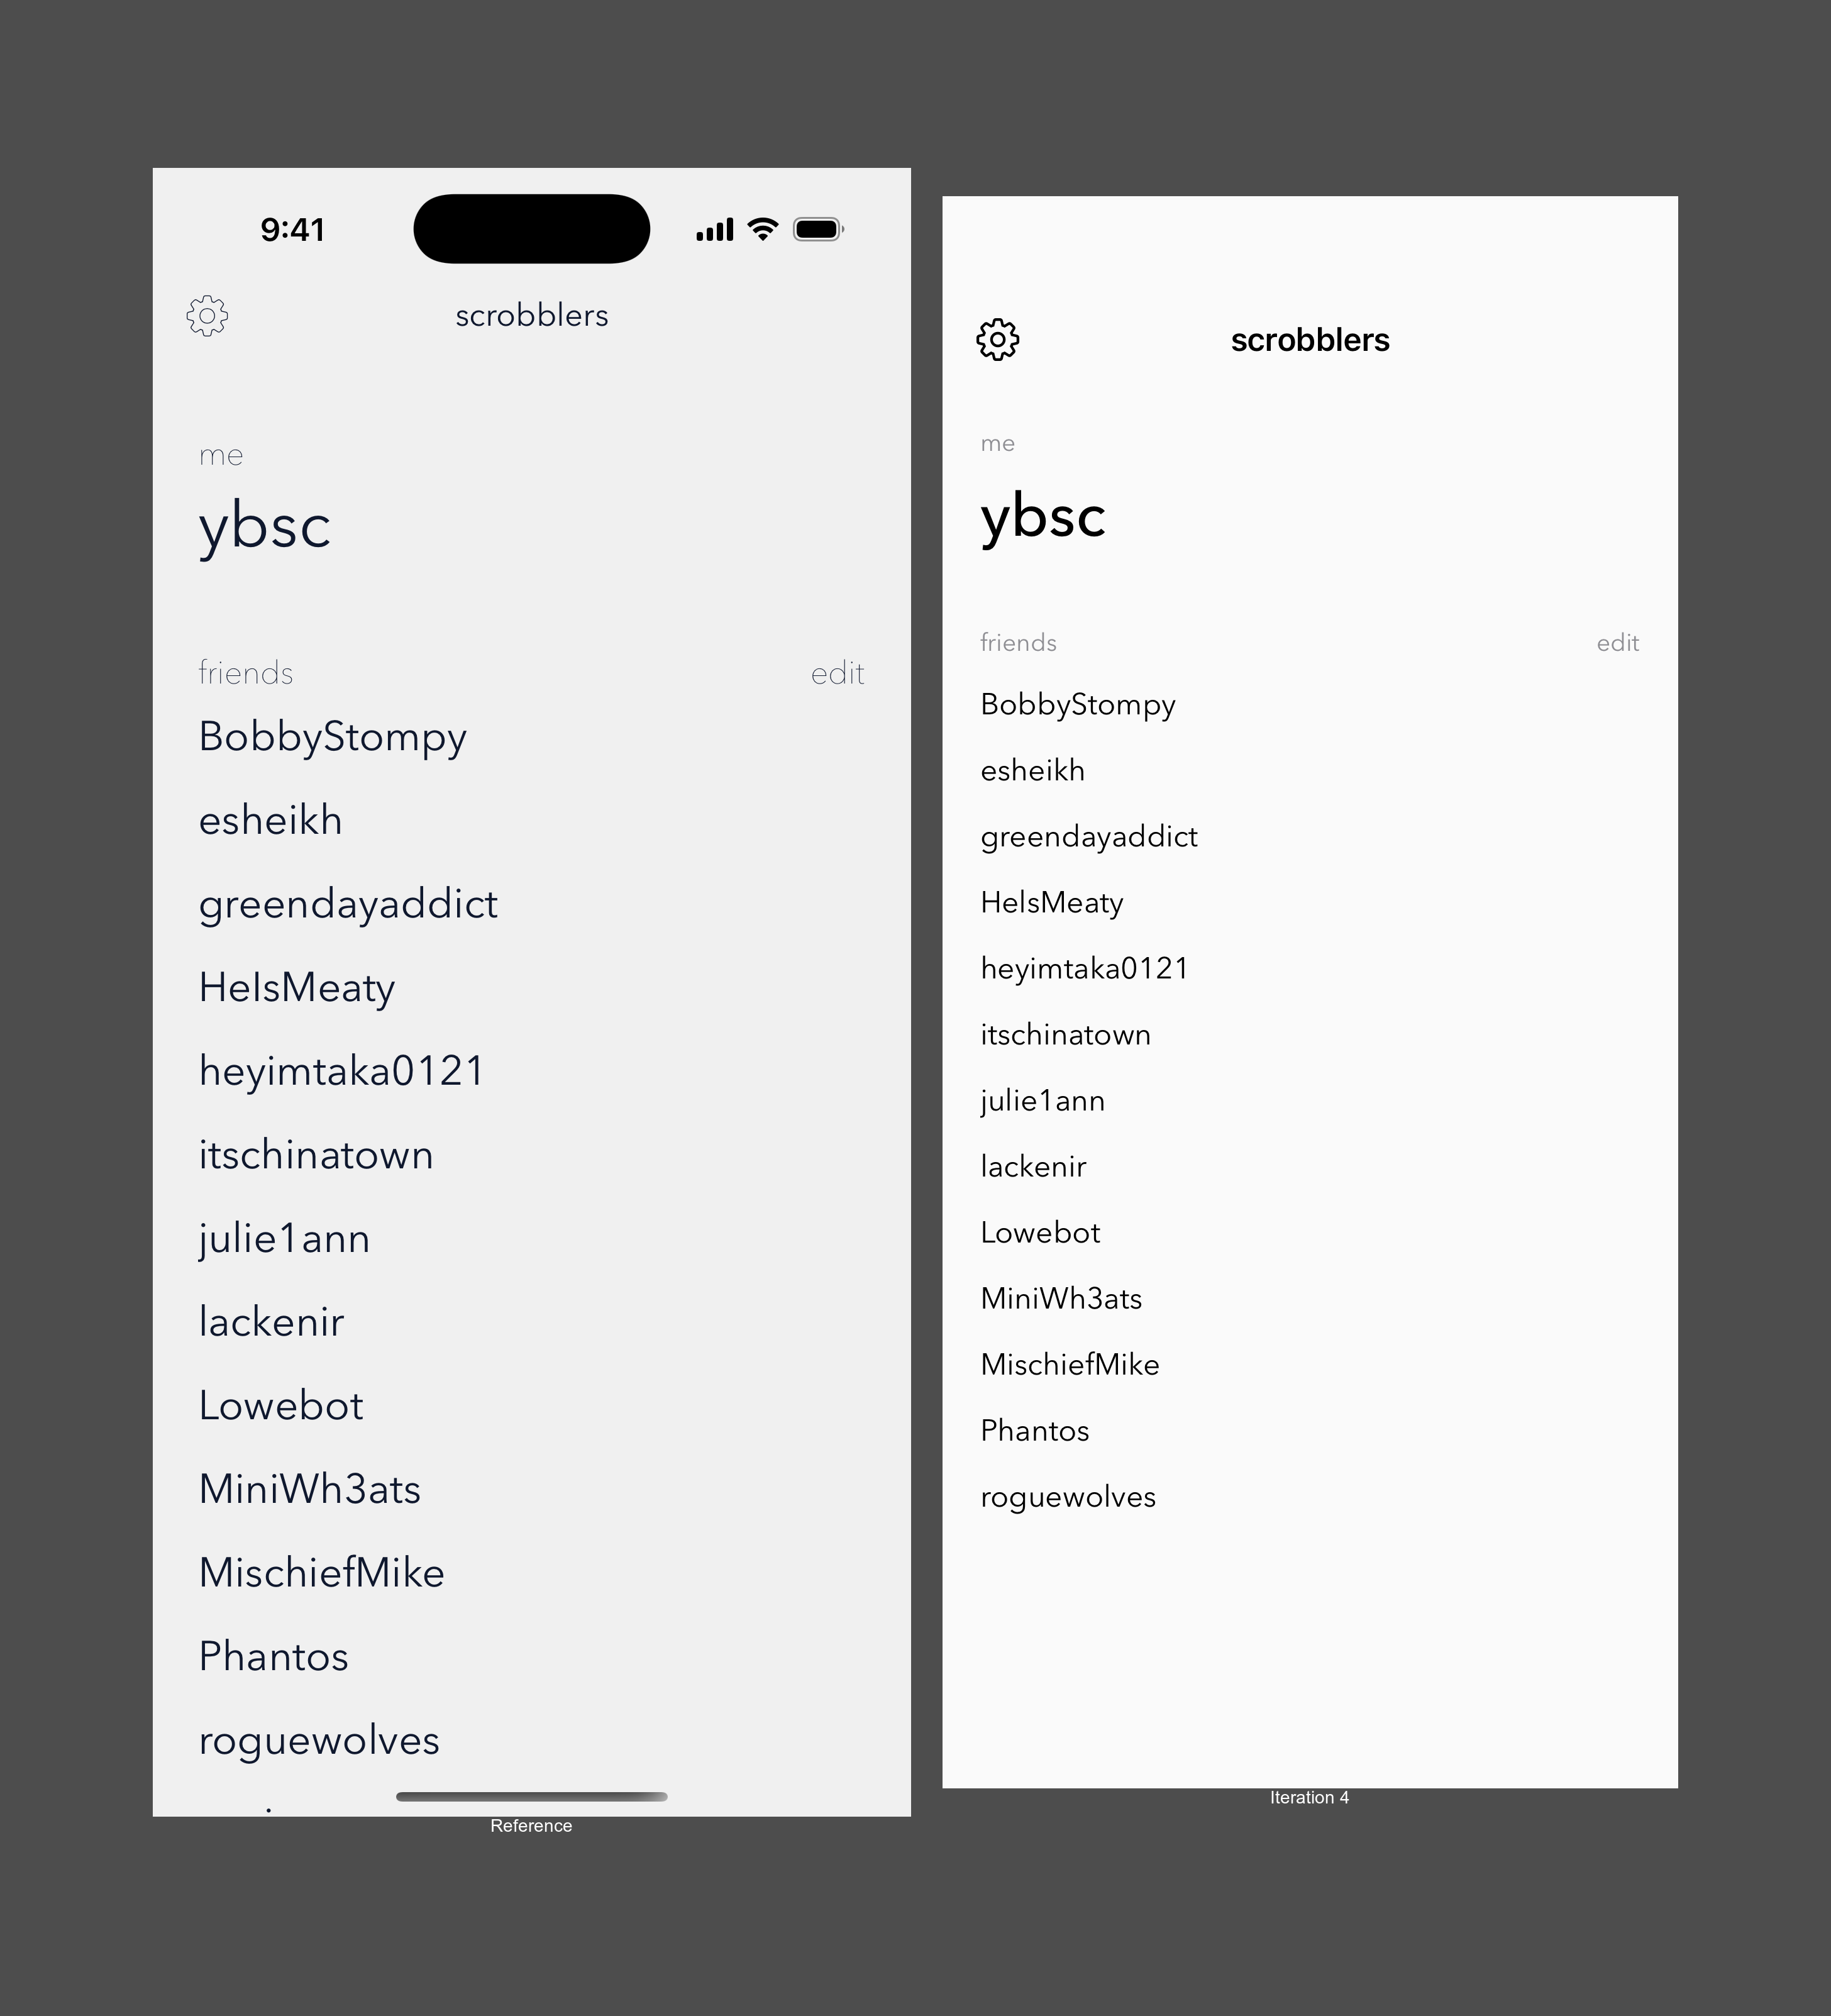
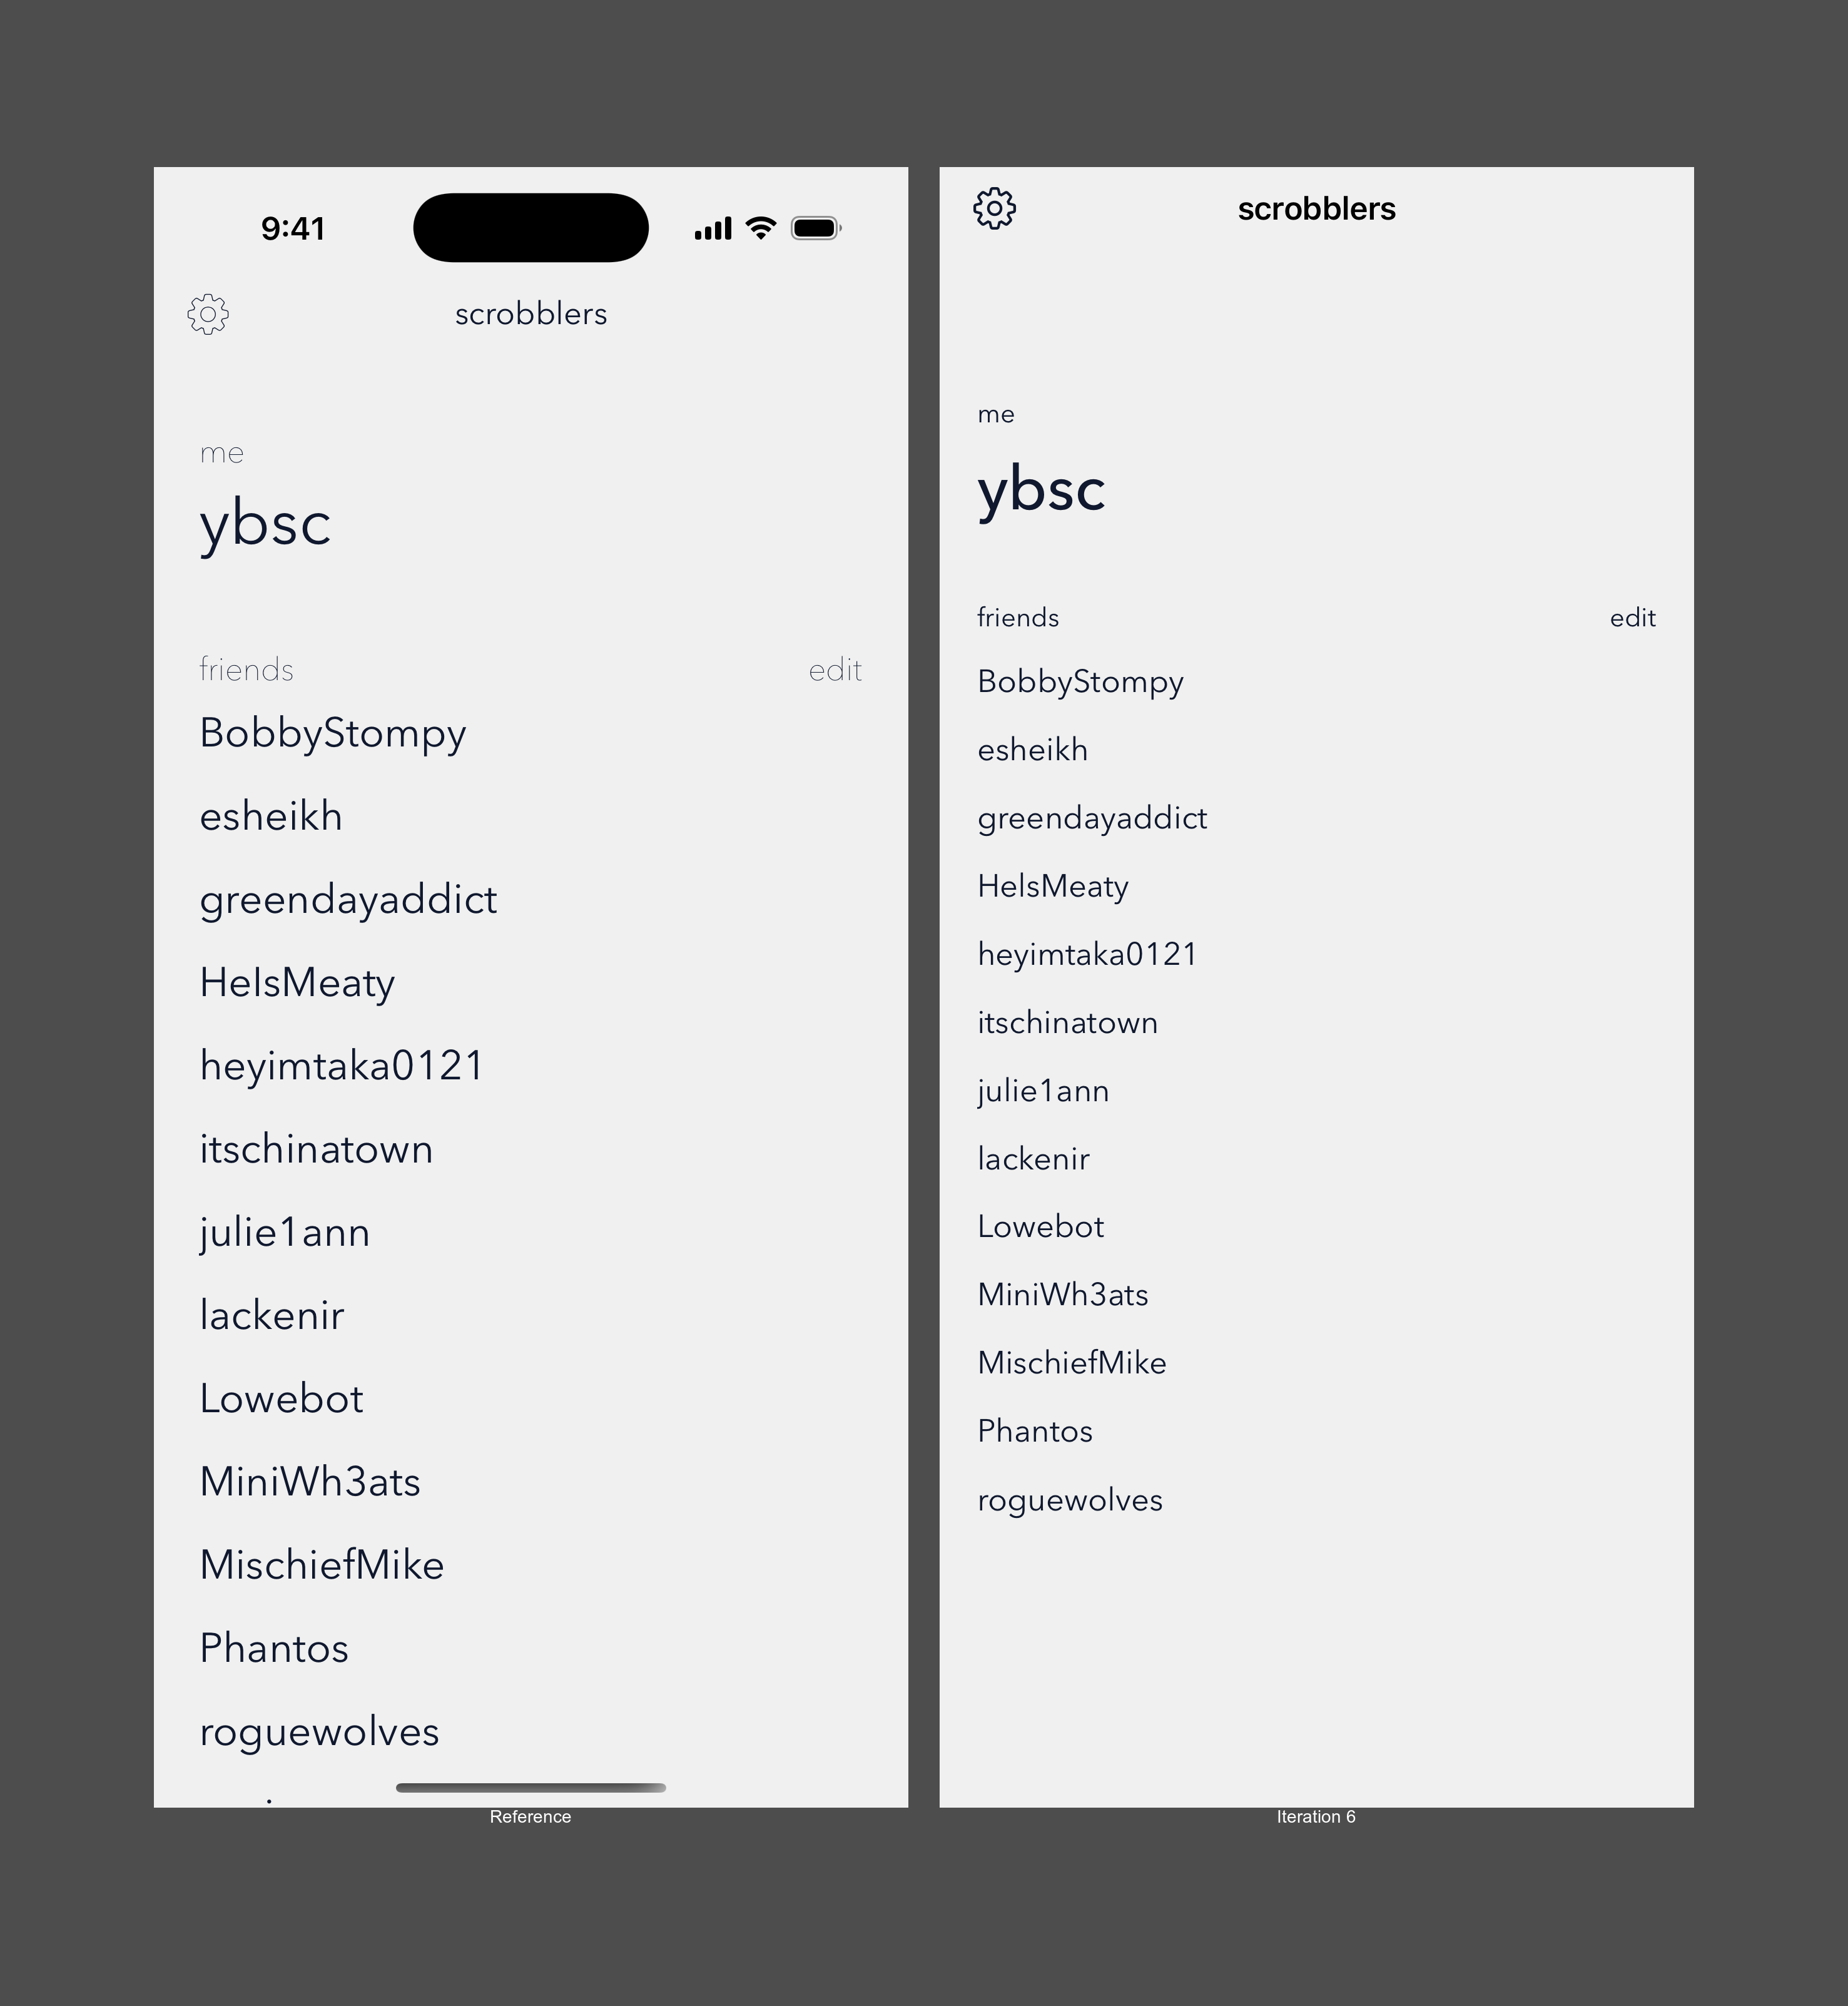
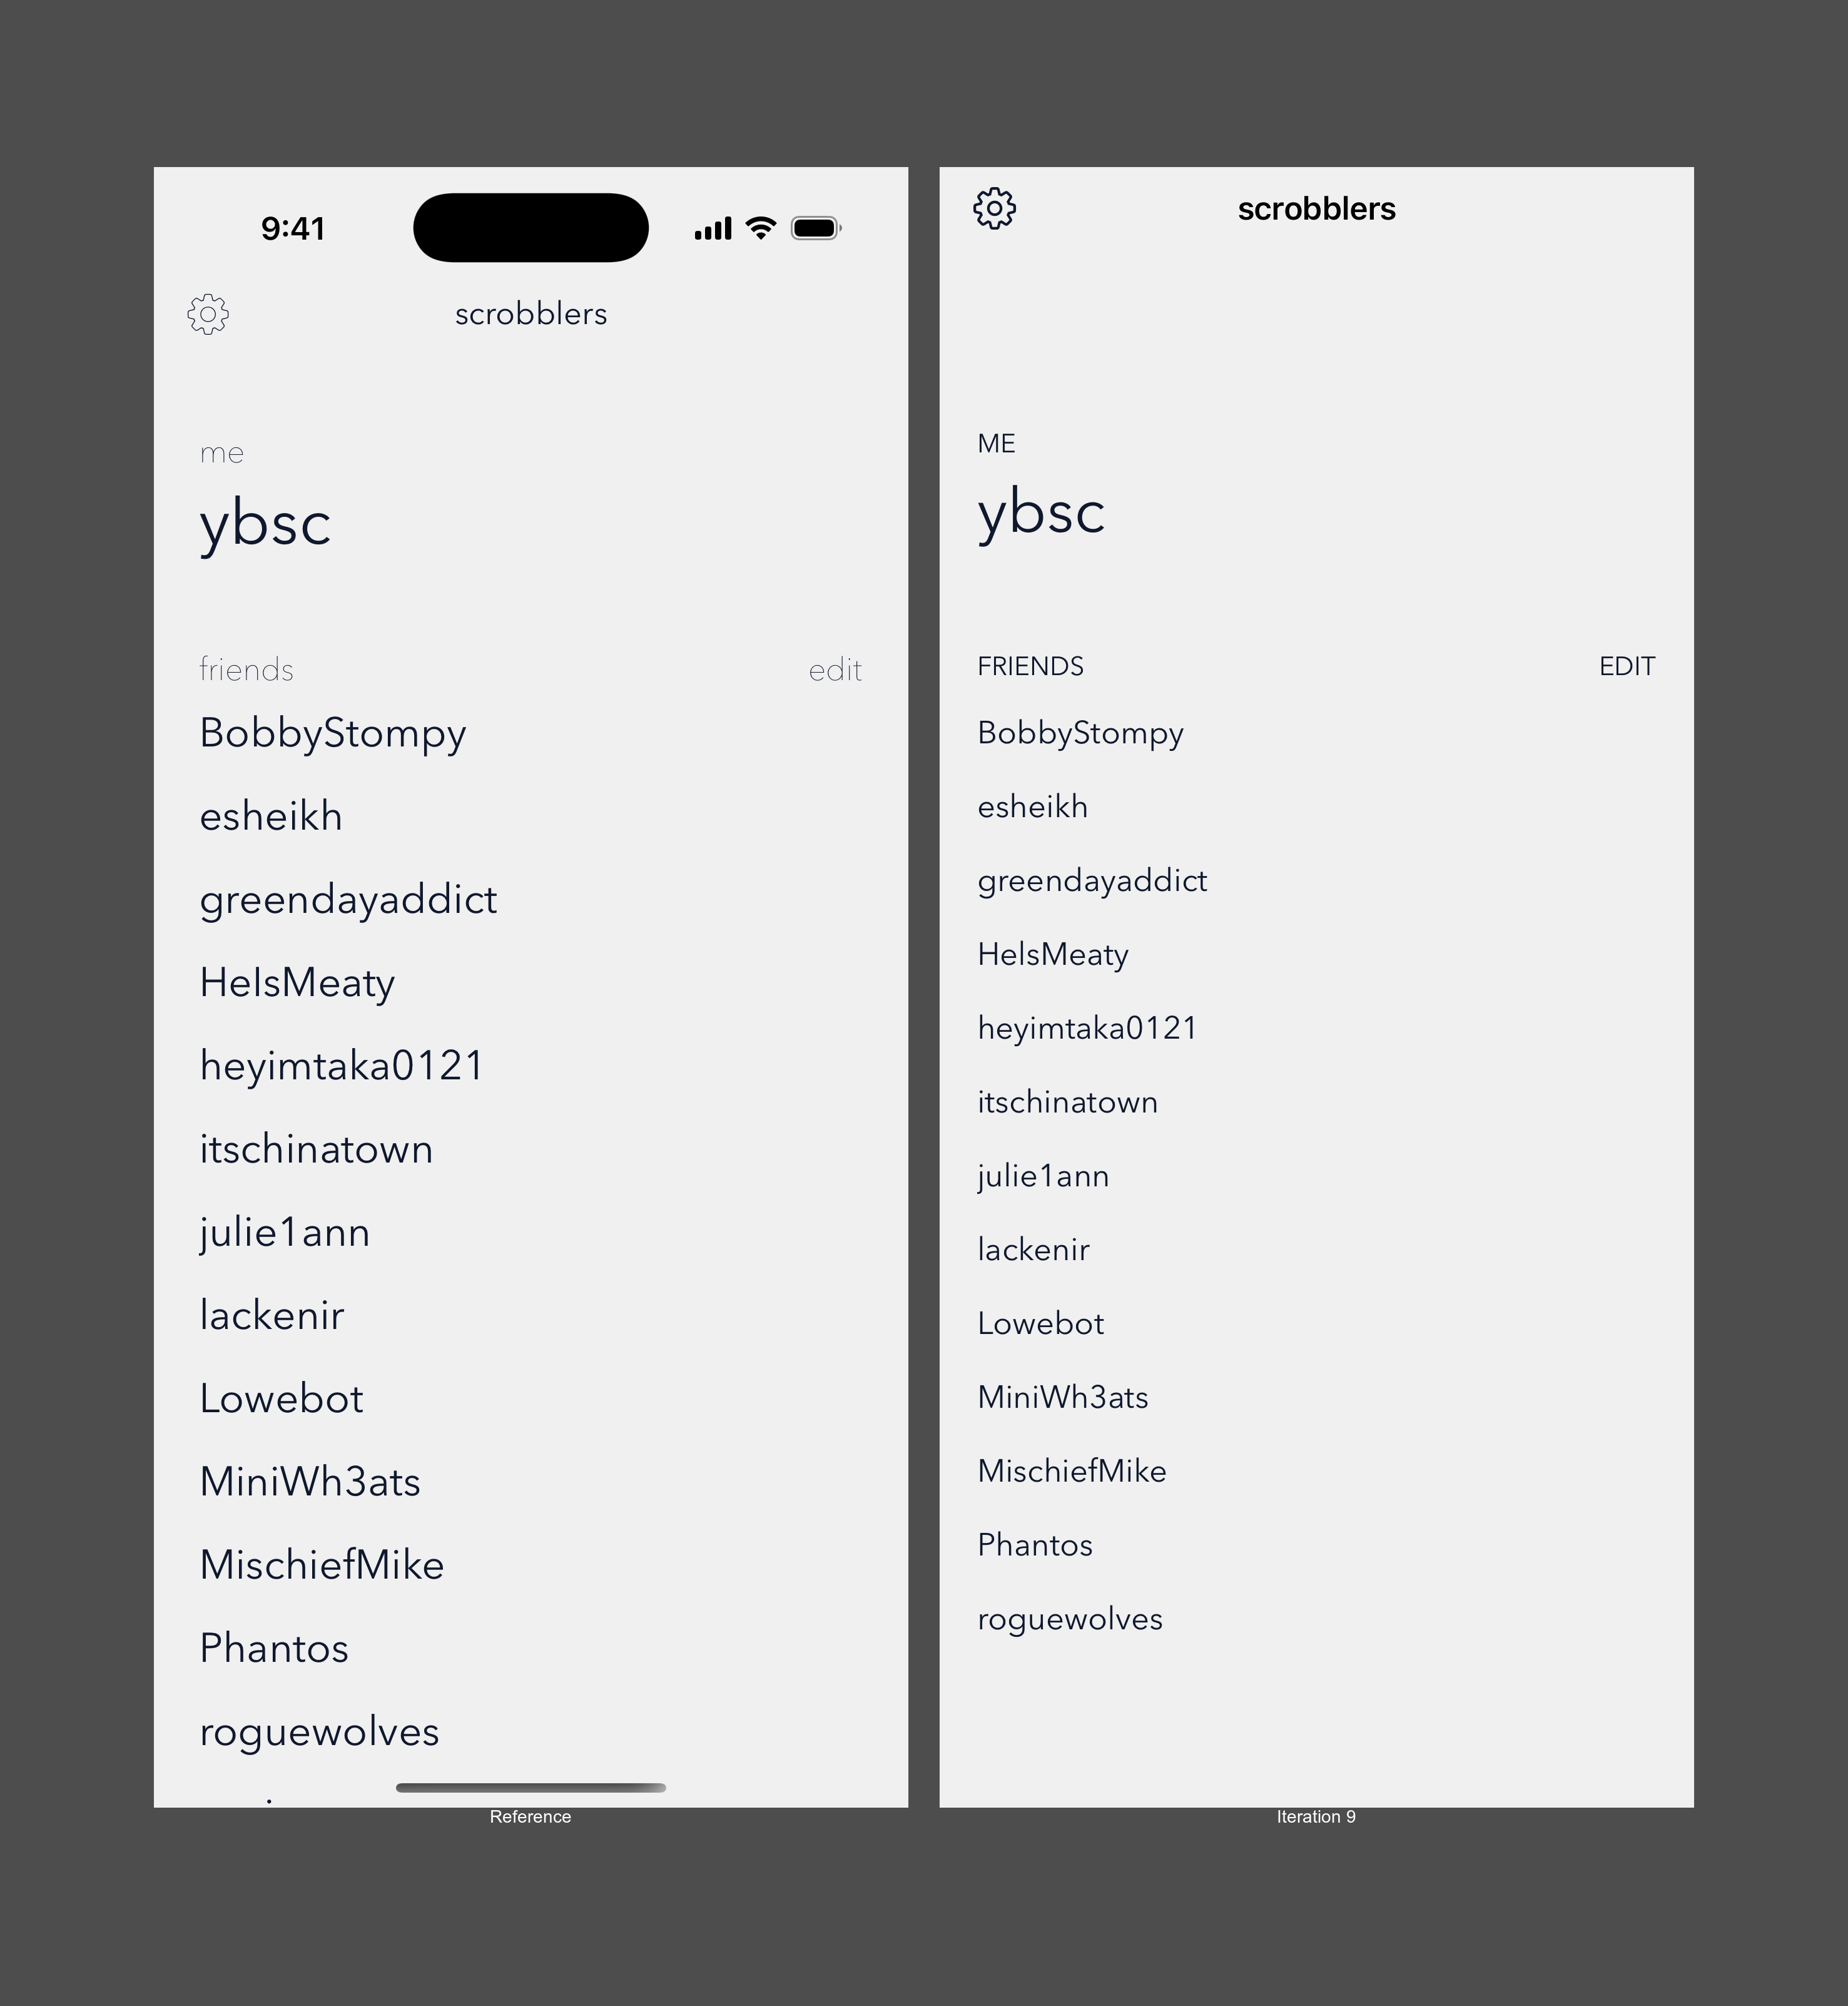
Alongside the reference image, I gave a variant of the above instructions flow. I gave it some upfront hints: the font is AvenirNext; please ignore the dynamic island. Then had it run unguided for 5 iterations before stepping in and giving it more hints and tools to see how close it could get to pixel perfect.

Challenge Results Analysis
Without direct prompting, even with a reference image, CC will default to system fonts and colors (to be fair, this is usually the best route if you have no specific design spec). I had to give it pretty specific instructions to “notice” things about the image like the colors not being black and white, or the font weights being incorrect. Even using the ImageMagick techniques, CC got confused more often than not. I felt like CC had limited ability to see either absolute or relative differences in padding or sizing. After almost every step, CC thought the output was close enough and it praised itself and wanted to stop.
With CC’s current image analysis capabilities, using snapshot testing isn’t a useful strategy for getting to a pixel perfect result. If your development flow involves reproducing mocks from Figma, it’d be better to provide the mock and generated web code and colors and fonts directly to CC. If your development flow involves giving CC general vibe reference shots, snapshot testing may give it a few more shots at getting it right.
This technique is in research phase for me. Without putting it through its full paces, I’m guessing it doesn’t make sense at the moment to give it more than 3 iterations before putting a human in the loop.
Other ways to give Claude Code eyes
Below are a few other techniques, although I have not tried any of them enough to say how well they work for any particular workflow.
Full XCTest UIAutomation
It’s possible to get the full simulator output with XCTest, but more complicated to get access to the raw image. You can also simulate taps and perform navigation. But the tradeoff is that you have to set up the whole app environment even if you just want to see one view in isolation.
Simulator via XcodeBuildMCP
XcodeBuildMCP advertises simulator automation features:
- UI Automation: Interact with simulator UI elements
- Screenshot: Capture screenshots from a simulator
macOS system viewing with PeekabooMCP
PeekabooMCP is a macOS system-wide tool for accessing screen contents. This is more useful for developing macOS apps.
Conclusion
For anyone looking to take the next steps in CC automation in the realm of the view layer, I hope this was somewhat helpful in understanding the current landscape an capabilities.
The expected shelf-life of this post is short. This post references Claude Code v1.0.51, Xcode 16.4, Swift Snapshot Testing 1.18.4.